這個功能的主題其實有很多人都寫過了,不過為了之後的文章,所以還是要先寫出這一篇。
大家也都知道 ASP.NET Web Api 2 都已經有內建了 Help Page 的功能,這是一個可以產生對應 API 服務的線上文件產生器,所謂的產生並不是可以幫我們做出一份 Word 或是 PDF 檔,而是指將我們所開發的 API 服務相關的輸入、輸出、Resource 等資料經由 Help Page 的功能處理並建立好網頁,在網頁上去提供了這些 API 服務的相關資訊,以方便介接 API 服務的開發人員查看。
這一篇就來簡單地介紹如何在 ASP.NET Web Api 應用服務裡啟用這一個功能。
首先準備好一個 ASP.NET Web Api 的服務,這邊範例使用的資料庫是 Northwind(是的,又是北風,別再問為什麼都是用北風,因為我懶,要為範例建立一個合乎使用情境的資料庫是很傷腦筋的),這篇所使用的開發工具與應用程式與套件的版本如下:
Visual Studio 2013
.NET Framework 4.5
ASP.NET Web Api 2.2.3 ( 5.2.3 )
ASP.NET Web Api Help Page 5.2.3
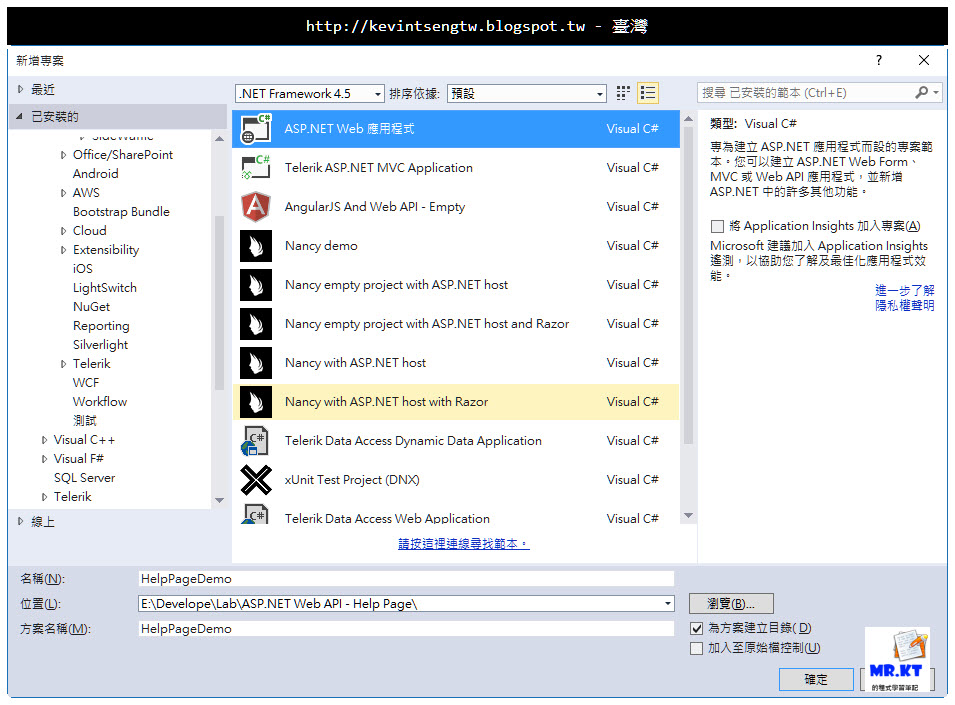
新增 ASP.NET Web 應用程式
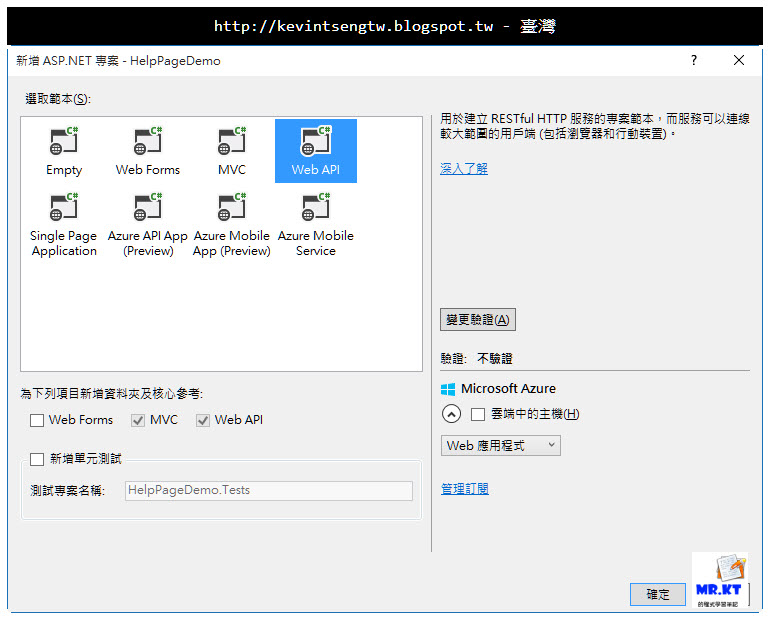
選擇使用 Web API 範本(不需要使用驗證)
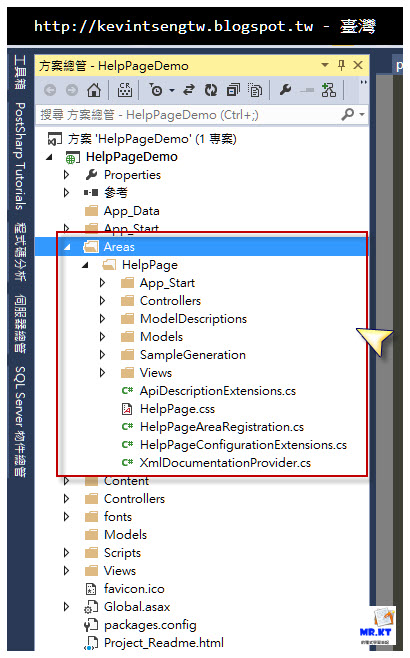
確認預設使用 Web API 範本所建立的網站服務有 Help Page
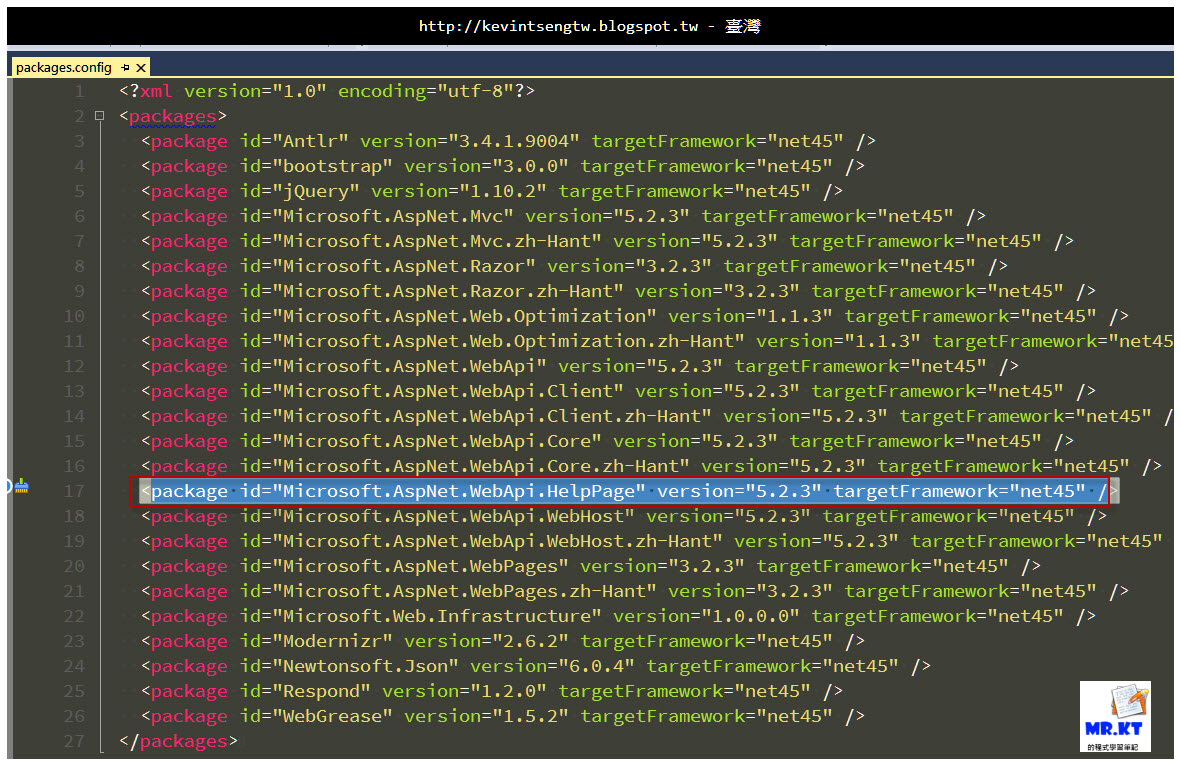
另外開啟 packages.config,在裡面有 ASP.NET WebApi Help Page
新增 LocalDB 以及建立 Northwind 資料庫
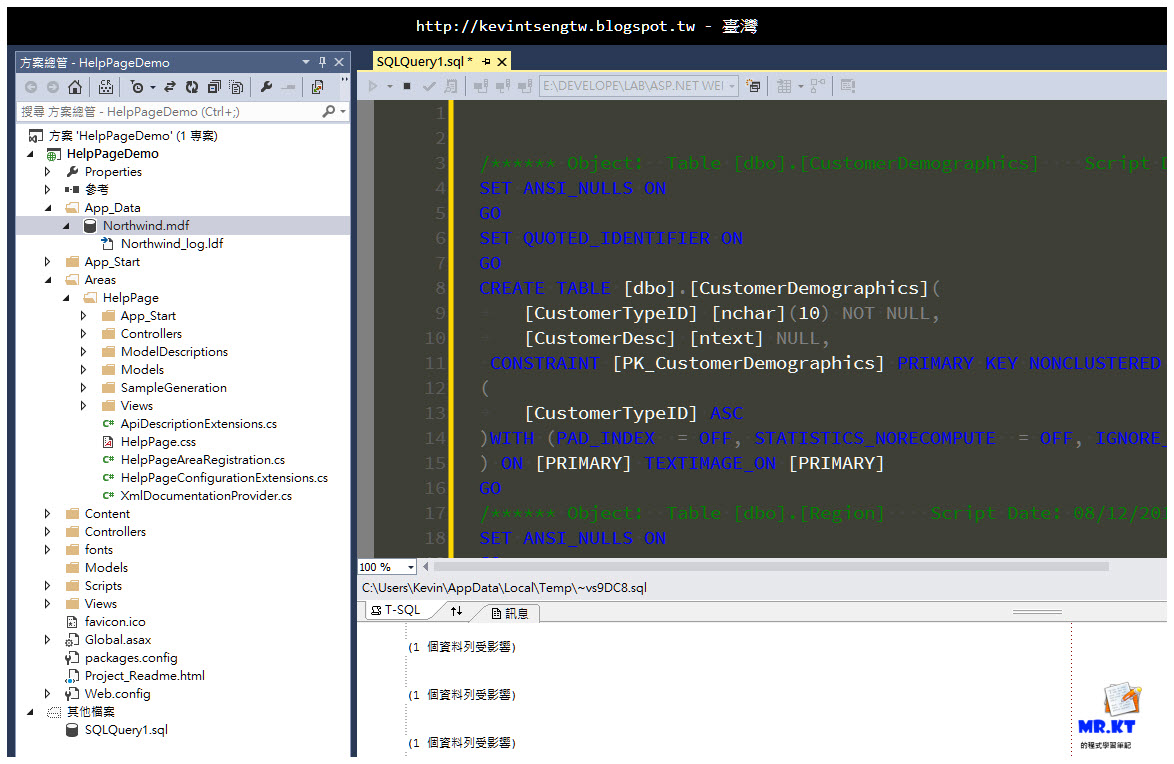
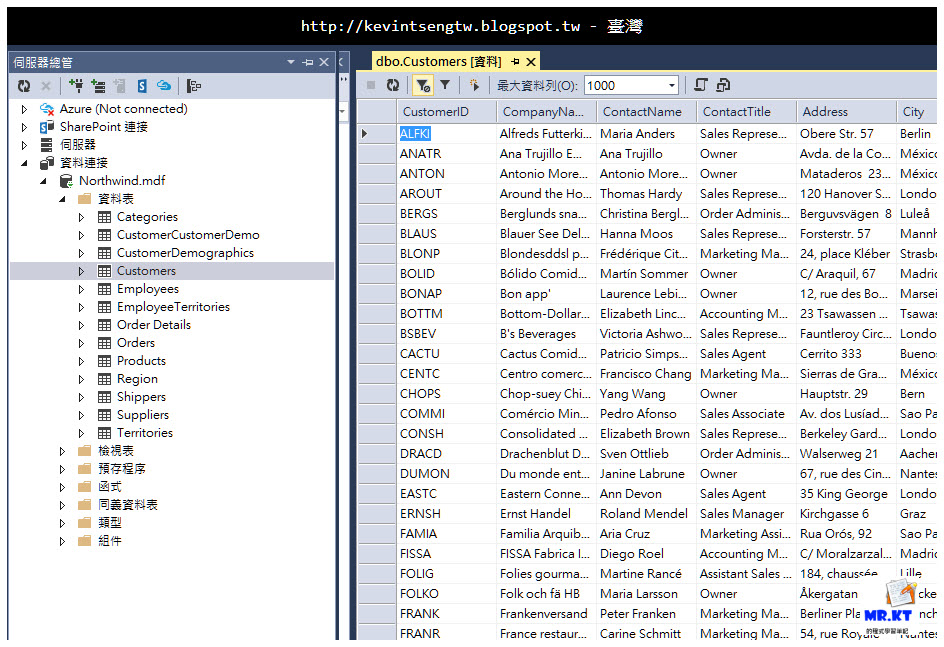
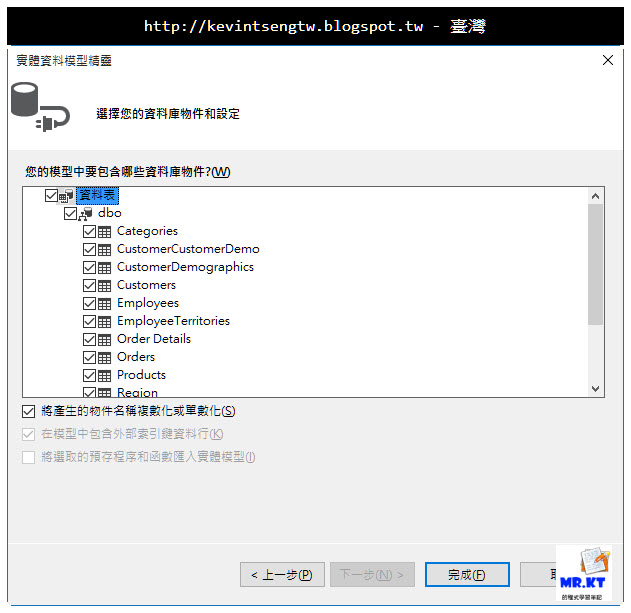
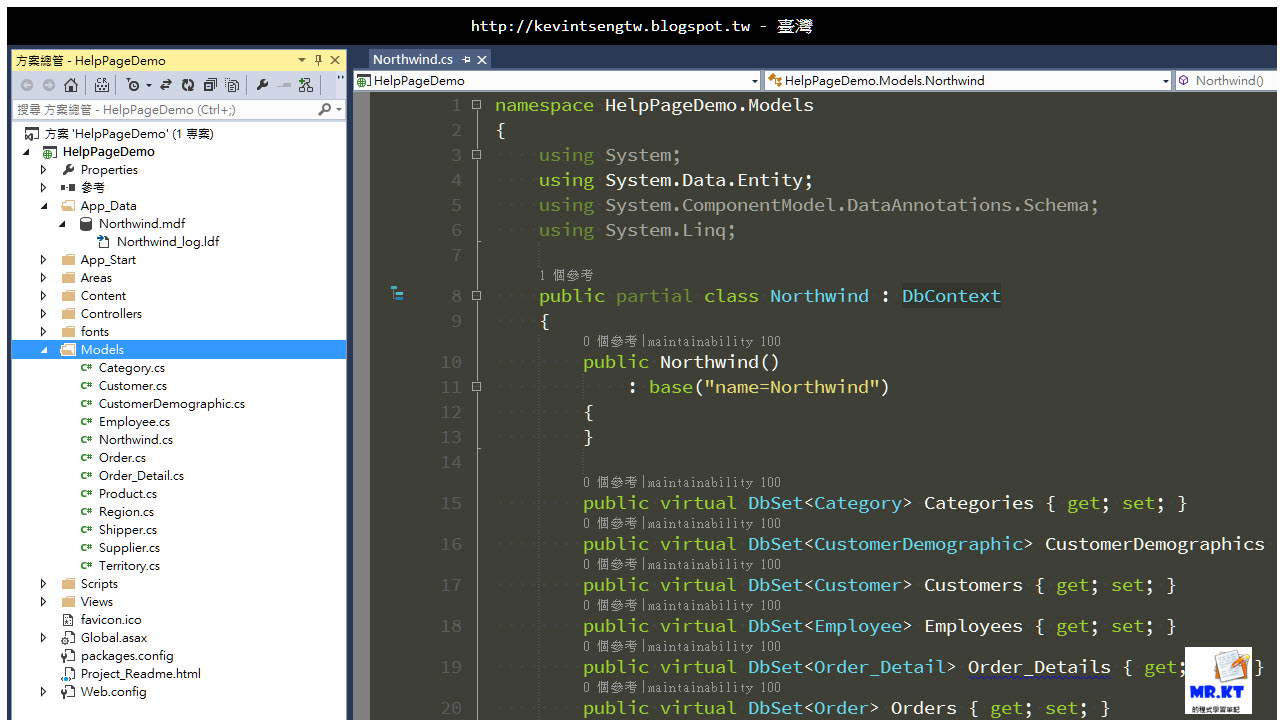
建立 Model(使用來自資料庫的 Code Fisrt,或是使用 Database First)
接著就是建立 Web API 服務的 Controller,這邊只會建立兩個,一個是 CustomersController 另一個為 ProductsController,都是使用 Scaffold 建立,
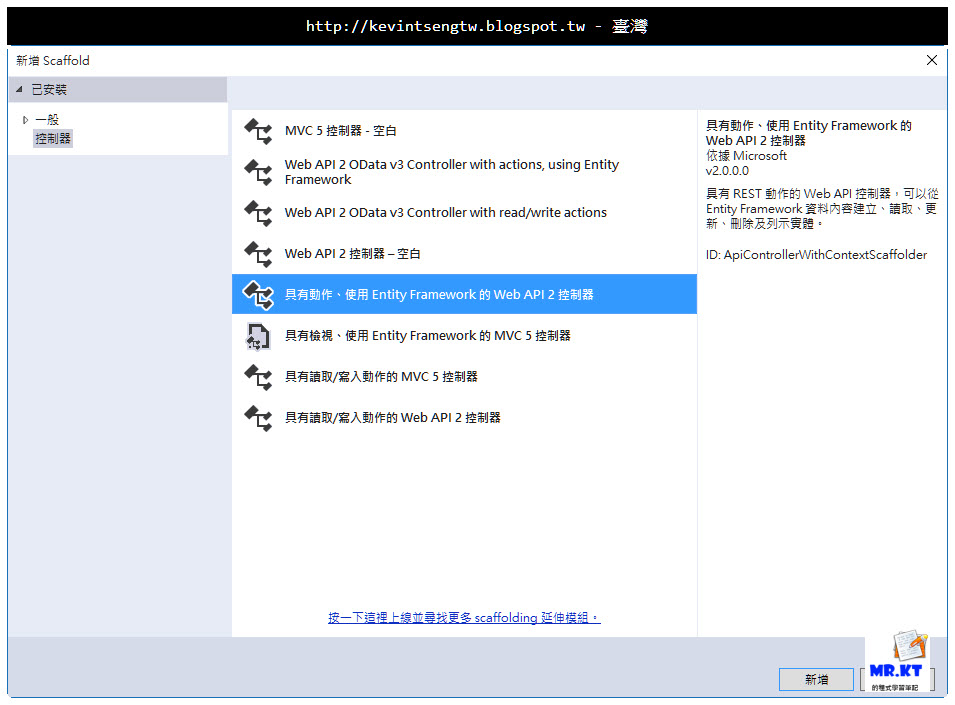
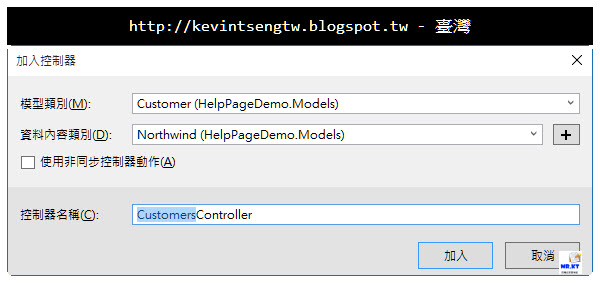
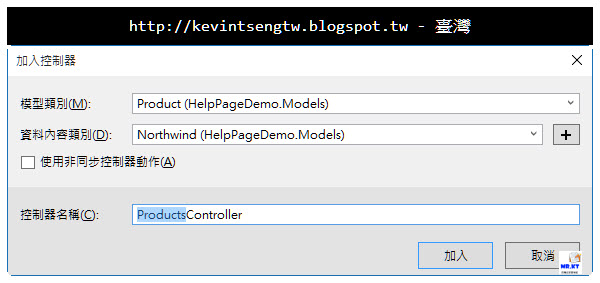
重新整理新建立的 CustomersController 與 ProductsController,記得要在 Controller 類別與各個公開的 Action 方法加上 Summary (XML 註解),
CustomersController.cs
using System.Data.Entity;
using System.Data.Entity.Infrastructure;
using System.Linq;
using System.Net;
using System.Web.Http;
using System.Web.Http.Description;
using HelpPageDemo.Models;
namespace HelpPageDemo.Controllers
{
/// <summary>
/// Customer API 項目.
/// </summary>
public class CustomersController : ApiController
{
private Northwind db = new Northwind();
/// <summary>
/// 取得所有 Customer 資料.
/// </summary>
/// <returns>IQueryable<Customer>.</returns>
public IQueryable<Customer> GetCustomers()
{
return db.Customers;
}
/// <summary>
/// 指定 ID 以取得 Customer 資料.
/// </summary>
/// <param name="id">The identifier.</param>
/// <returns>IHttpActionResult.</returns>
[ResponseType(typeof(Customer))]
public IHttpActionResult GetCustomer(string id)
{
Customer customer = db.Customers.Find(id);
if (customer == null)
{
return NotFound();
}
return Ok(customer);
}
/// <summary>
/// 更新 Customer.
/// </summary>
/// <param name="id">The identifier.</param>
/// <param name="customer">The customer.</param>
/// <returns>IHttpActionResult.</returns>
[ResponseType(typeof(void))]
public IHttpActionResult PutCustomer(string id, Customer customer)
{
if (!ModelState.IsValid)
{
return BadRequest(ModelState);
}
if (id != customer.CustomerID)
{
return BadRequest();
}
db.Entry(customer).State = EntityState.Modified;
try
{
db.SaveChanges();
}
catch (DbUpdateConcurrencyException)
{
if (!CustomerExists(id))
{
return NotFound();
}
else
{
throw;
}
}
return StatusCode(HttpStatusCode.NoContent);
}
/// <summary>
/// 新增 Customer.
/// </summary>
/// <param name="customer">The customer.</param>
/// <returns>IHttpActionResult.</returns>
[ResponseType(typeof(Customer))]
public IHttpActionResult PostCustomer(Customer customer)
{
if (!ModelState.IsValid)
{
return BadRequest(ModelState);
}
db.Customers.Add(customer);
try
{
db.SaveChanges();
}
catch (DbUpdateException)
{
if (CustomerExists(customer.CustomerID))
{
return Conflict();
}
else
{
throw;
}
}
return CreatedAtRoute("DefaultApi", new { id = customer.CustomerID }, customer);
}
/// <summary>
/// 刪除 Customer.
/// </summary>
/// <param name="id">The identifier.</param>
/// <returns>IHttpActionResult.</returns>
[ResponseType(typeof(Customer))]
public IHttpActionResult DeleteCustomer(string id)
{
Customer customer = db.Customers.Find(id);
if (customer == null)
{
return NotFound();
}
db.Customers.Remove(customer);
db.SaveChanges();
return Ok(customer);
}
protected override void Dispose(bool disposing)
{
if (disposing)
{
db.Dispose();
}
base.Dispose(disposing);
}
private bool CustomerExists(string id)
{
return db.Customers.Count(e => e.CustomerID == id) > 0;
}
}
}
ProductsControllers.cs
using HelpPageDemo.Models;
using System.Data.Entity;
using System.Data.Entity.Infrastructure;
using System.Linq;
using System.Net;
using System.Web.Http;
using System.Web.Http.Description;
namespace HelpPageDemo.Controllers
{
/// <summary>
/// Product API 項目.
/// </summary>
public class ProductsController : ApiController
{
private Northwind db = new Northwind();
/// <summary>
/// 取得全部 Product 資料.
/// </summary>
/// <returns>HttpResponseMessage.</returns>
public IQueryable<Product> GetProducts()
{
return db.Products;
}
/// <summary>
/// 指定 id 以取得 Product 資料.
/// </summary>
/// <param name="id">The identifier.</param>
/// <returns>HttpResponseMessage.</returns>
[ResponseType(typeof(Product))]
public IHttpActionResult GetProduct(int id)
{
Product product = db.Products.Find(id);
if (product == null)
{
return NotFound();
}
return Ok(product);
}
/// <summary>
/// 更新 Product.
/// </summary>
/// <param name="id">The identifier.</param>
/// <param name="product">The product.</param>
/// <returns>IHttpActionResult.</returns>
[ResponseType(typeof(void))]
public IHttpActionResult PutProduct(int id, Product product)
{
if (!ModelState.IsValid)
{
return BadRequest(ModelState);
}
if (id != product.ProductID)
{
return BadRequest();
}
db.Entry(product).State = EntityState.Modified;
try
{
db.SaveChanges();
}
catch (DbUpdateConcurrencyException)
{
if (!ProductExists(id))
{
return NotFound();
}
else
{
throw;
}
}
return StatusCode(HttpStatusCode.NoContent);
}
/// <summary>
/// 新增 Product.
/// </summary>
/// <param name="product">The product.</param>
/// <returns>IHttpActionResult.</returns>
[ResponseType(typeof(Product))]
public IHttpActionResult PostProduct(Product product)
{
if (!ModelState.IsValid)
{
return BadRequest(ModelState);
}
db.Products.Add(product);
db.SaveChanges();
return CreatedAtRoute("DefaultApi", new { id = product.ProductID }, product);
}
/// <summary>
/// 刪除 Product.
/// </summary>
/// <param name="id">The identifier.</param>
/// <returns>IHttpActionResult.</returns>
[ResponseType(typeof(Product))]
public IHttpActionResult DeleteProduct(int id)
{
Product product = db.Products.Find(id);
if (product == null)
{
return NotFound();
}
db.Products.Remove(product);
db.SaveChanges();
return Ok(product);
}
protected override void Dispose(bool disposing)
{
if (disposing)
{
db.Dispose();
}
base.Dispose(disposing);
}
private bool ProductExists(int id)
{
return db.Products.Count(e => e.ProductID == id) > 0;
}
}
}
XML 文件檔案
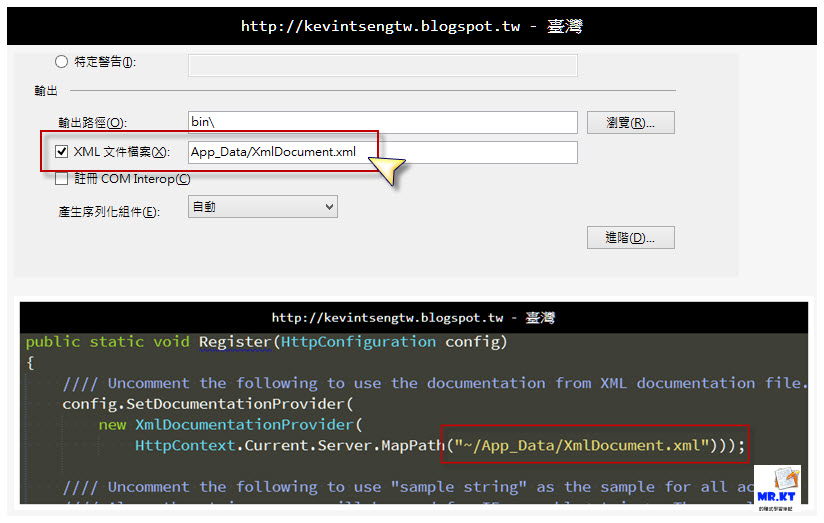
不過這樣還沒好喔,接下來的步驟就相當重要,剛才的步驟是加上 XML 註解,但是必須要產生一份 XML 文件檔案,這要在專案的屬性裡去選擇產生 XML 檔案,
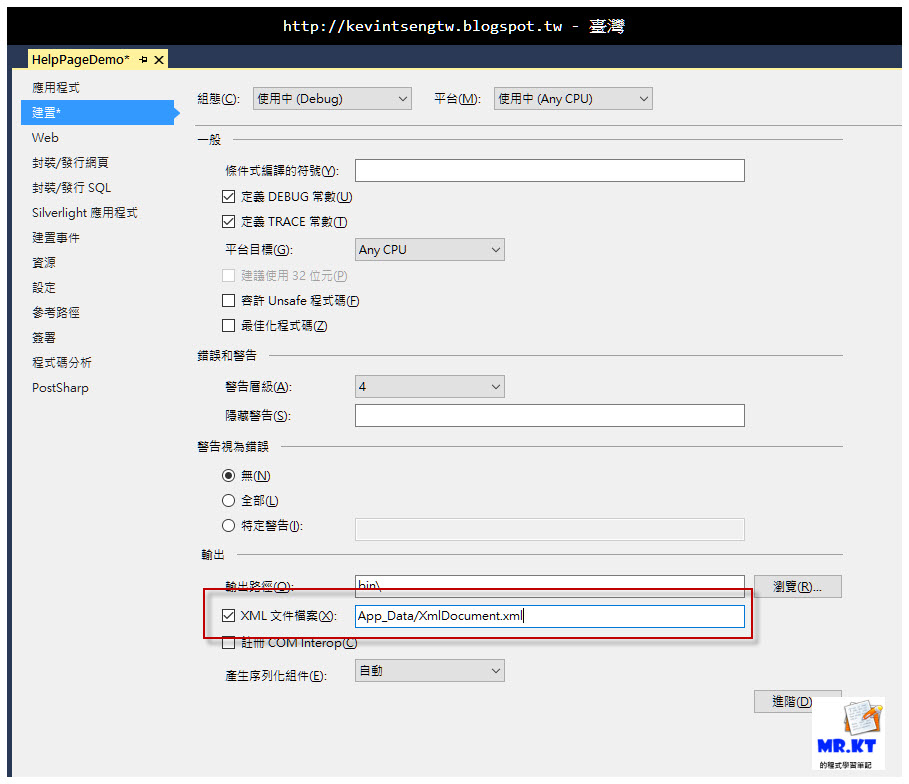
記得將「XML 文件檔案」勾選起來,然後可以修改輸出文件的輸出位置,這邊我修改為「App_Data/XmlDocument.xml」
調整 ~/Areas/HelpPage/App_Start/HelpPageConfig.cs
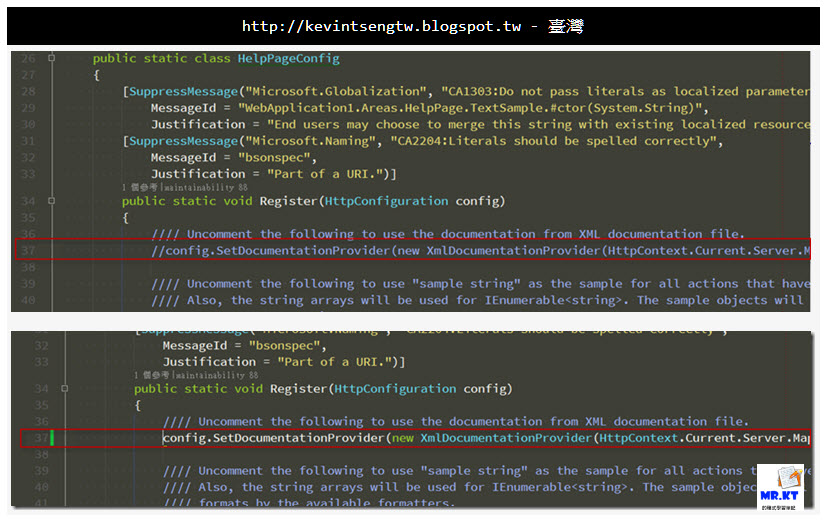
為了要讓 Help Page 可以讀取到輸出的 XML 文件檔案,就要將 ~/Areas/HelpPage/App_Start/HelpPageConfig.cs 裡的一行程式做點修改,
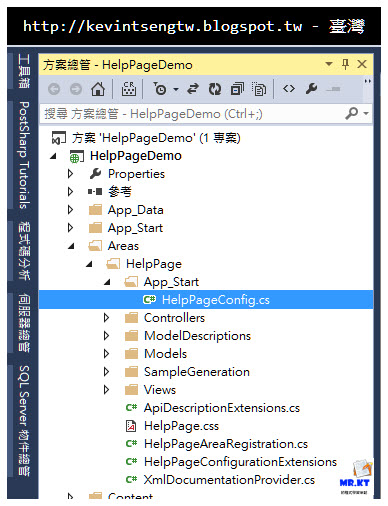
將 HelpPageConfig.cs 的第 37 行程式給解除註解
最主要是 XML 文件檔案的路徑與名稱要與專案屬性裡所設定的內容一致
瀏覽 Help Page
專案重新建置並執行後,在 Web Api 服務的網站路徑帶入 Help 就可以開啟 Help Page 的頁面,
例如:http://localhost:60900/Help
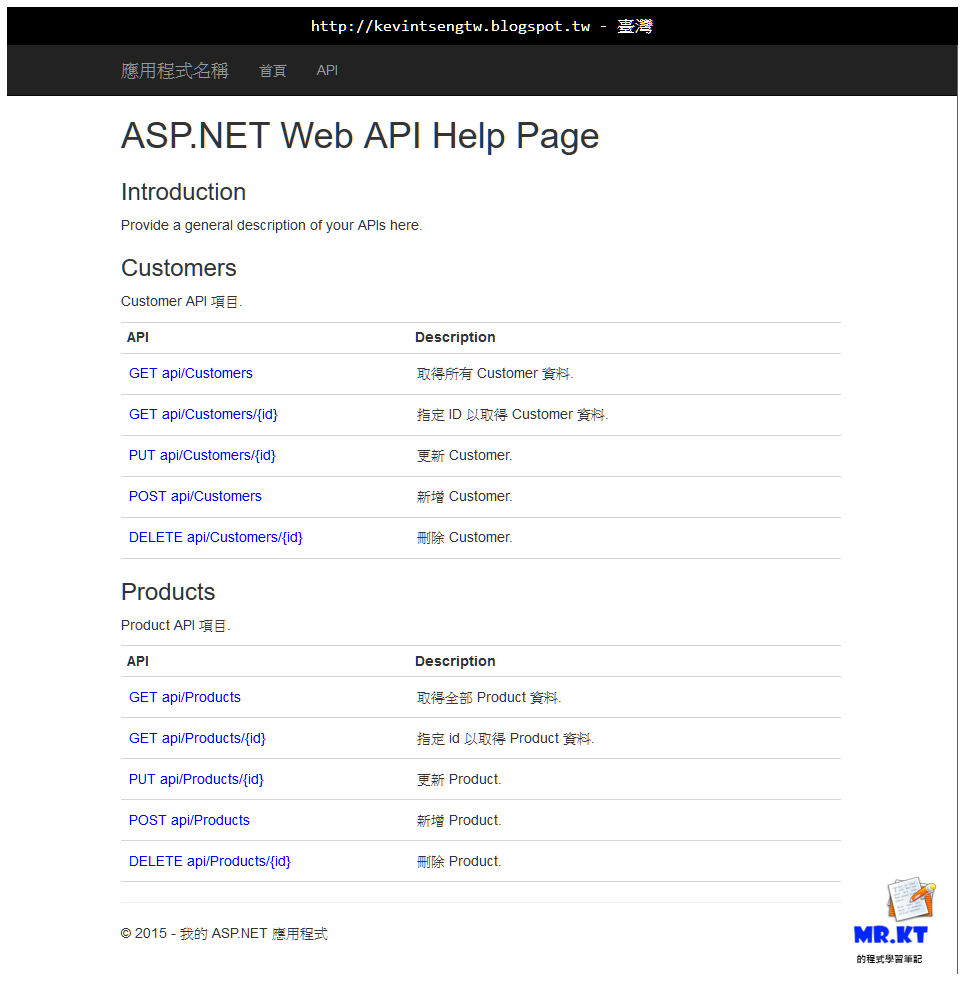
點選其中一個 API 服務就可以看到對應的輸入、輸出的內容
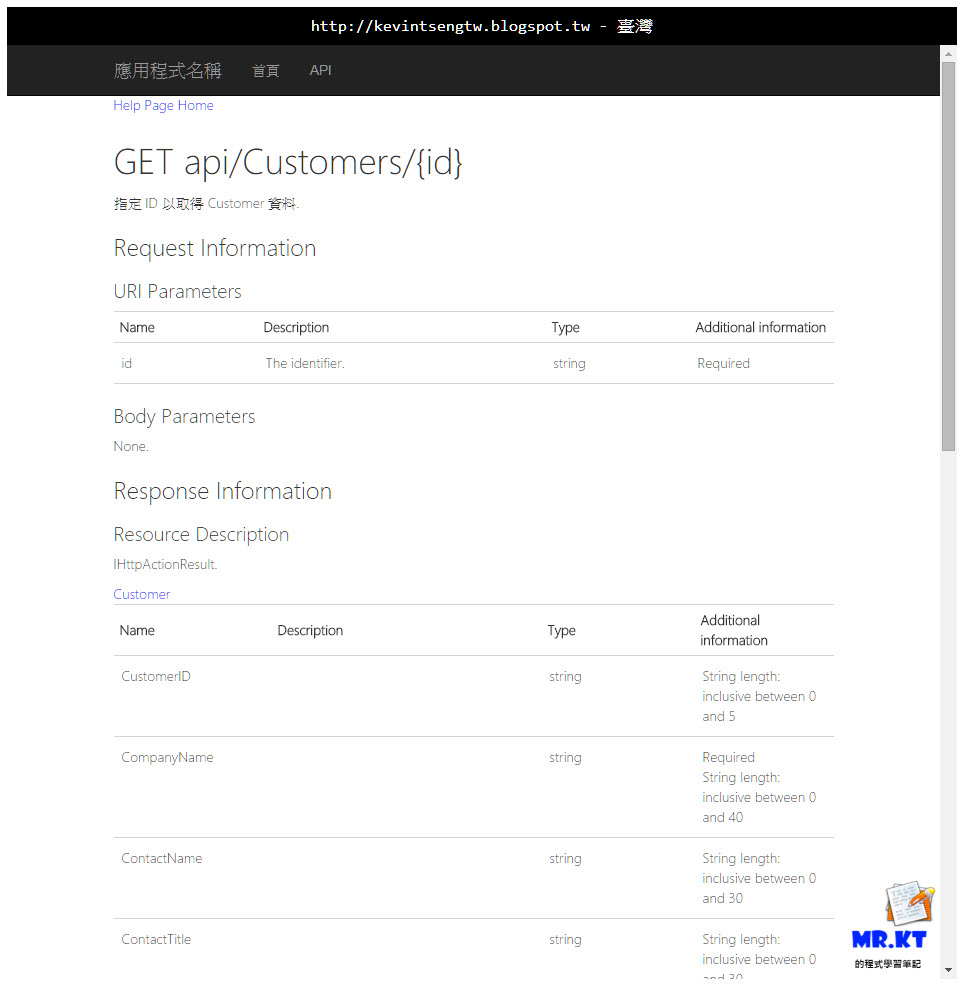
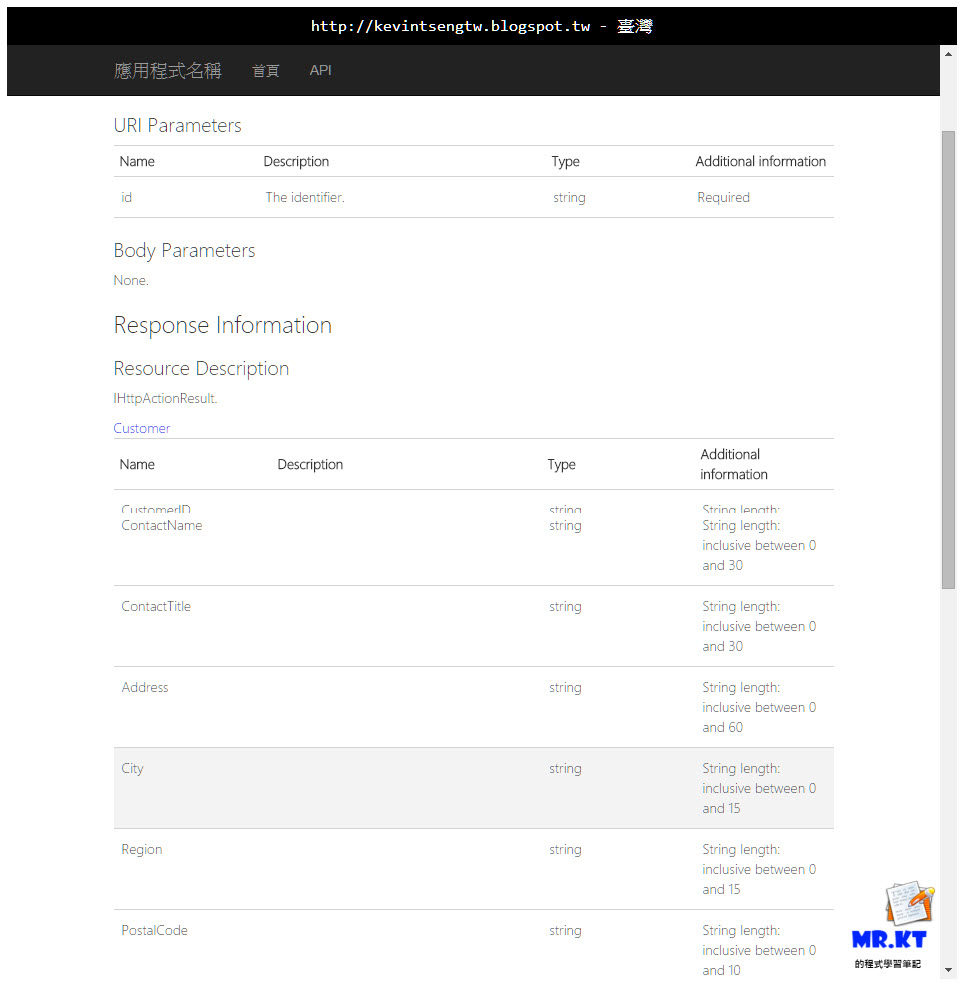
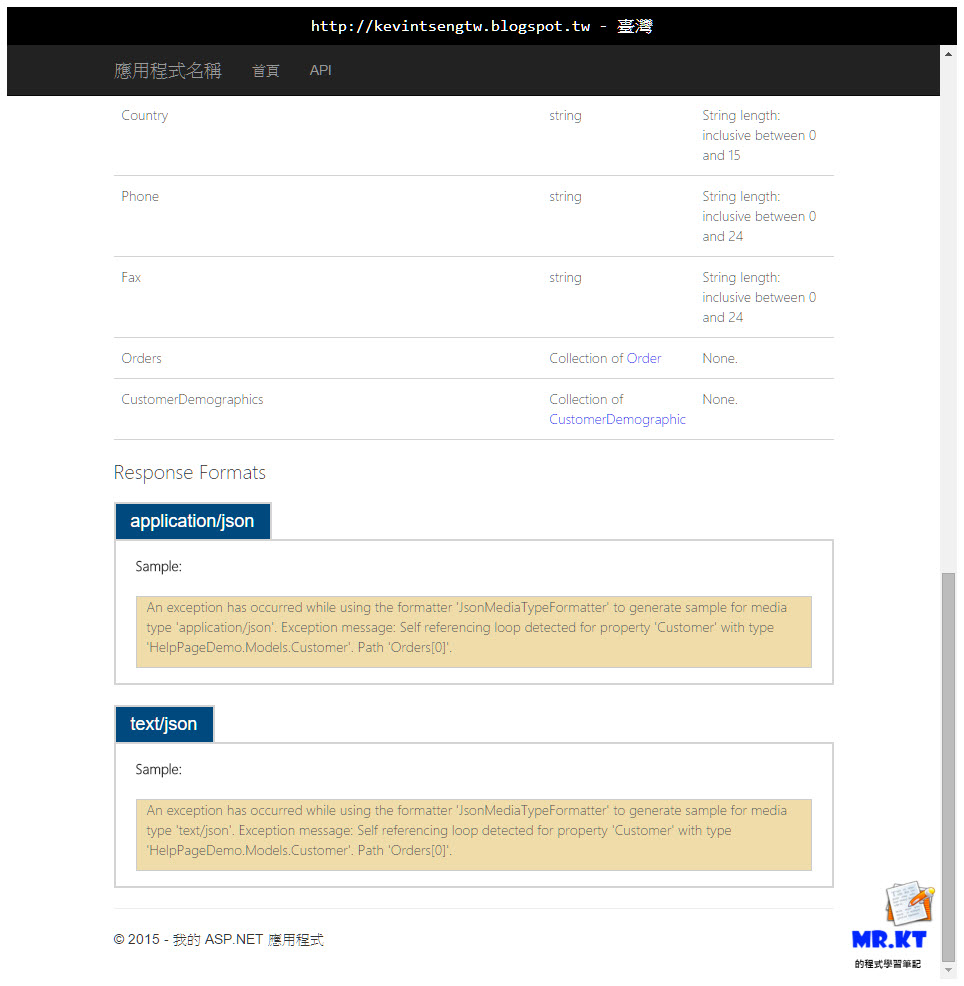
在我開發 ASP.NET Web API 服務的時候,一開始與 APP 開發團隊的文件溝通就不是用 Word 檔案也不是使用 Google Drive 的 Doc 文件(切記,絕對不要這麼做,因為用 Word 文件是最差勁的方式,對於開發人員來說是最不友善也最不容易管理的做法),我們是透過 JIRA Confluence 來做線上文件管理,API 的輸出與輸入規格都是在線上作編輯與制訂,這麼做的好處除了方便修改與共筆編輯外,最重要的是輸入的資料格式與輸出的內容是不會受到文字編輯器的影響而被修改(相信使用 Word 檔案來做文件管理的人,遇到 JSON 的雙引號就一定會有所感)。
但是使用了線上文件管理並不能根本解決文件與開發產出不一致的問題,因為 Web Api 開發人員所做出來的 Web Api 有時候還是會跟文件上是不一致的,這個時候總不能把程式拿出來一個一個去做比對,或是將程式一個個執行後再來做比對,無論是那一種方式都蠻耗費時間的,所以當 Web Api 執行結果或是輸入參數與當初所制訂好的文件規格出現不一致的時候,就可以拿 Help Page 的頁面去跟規格文件作比對,看看是那邊出現了問題。
在我所屬的開發團隊裡,Help Page 已經是一項標準且必備的一個功能,不必開啟程式也不必另外整理程式裡的規格,只要保持並養成要寫 Summary(XML 註解)的習慣,只要加上 ASP.NET Web Api Help Page 的功能,就可以隨時在線上瀏覽 Web Api 服務的文件。
如果你已經有使用了 ASP.NET Web API Help Page,但你希望可以在這個頁面上去執行 API 服務然後直接看結果的話,也可以參考使用「Simple Test Client to ASP,NET Web API Help Page」,但是我這邊並不會介紹如何去使用,因為之後會介紹另外一個套件「Swashbuckle - Swagger for WebApi」,這應該是下一代 Web Api 文件產生器的套件,除了一樣可以看 Web Api 服務的文件之外,還能夠直接在上面執行 Api 並看結果,在之後會藉上給大家。
有關 API 線上文件,真的不要再用 Word 文件檔案,也不要用 Google Doc,因為真的不好用,這邊我推薦各位可以使用「apiary」
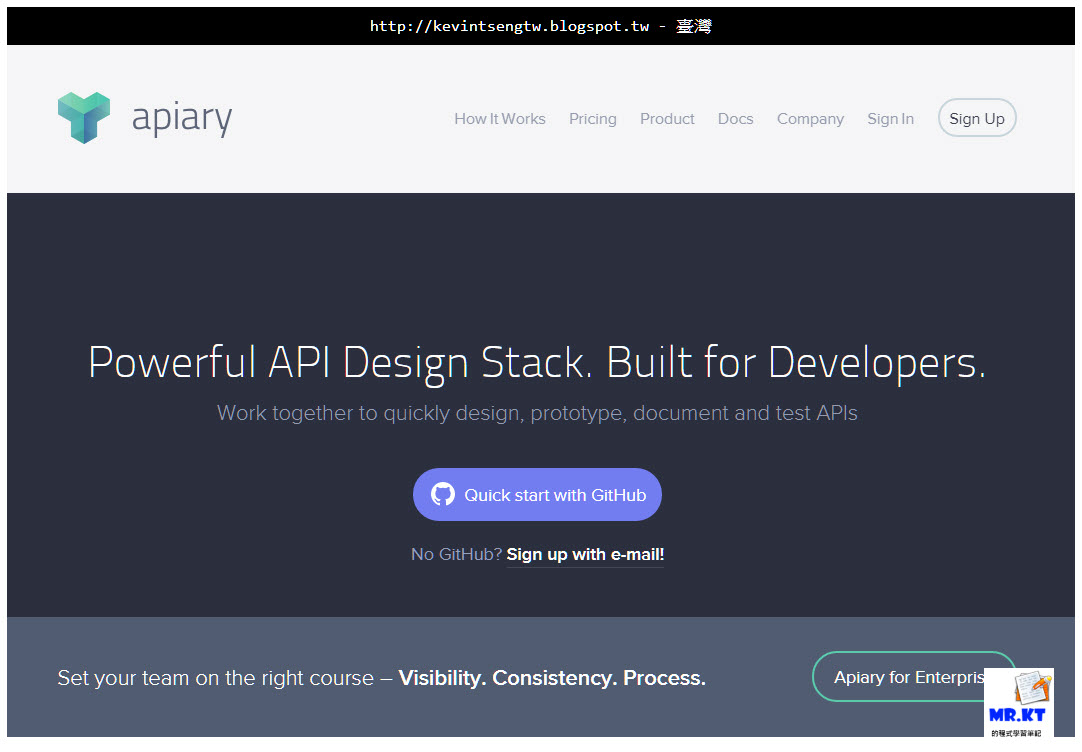
以下連結是別人公開的 API 文件,就是使用 apiary,在上面除了是當作一般的規格文件外,也可以直接在上面去做執行並取得結果,大家可以去看看做個瞭解,真的不要再用 Word 檔案或是 Google Doc 來做 Api 規格文件的管理了。
http://docs.gistfoxapi.apiary.io/
相關連結
Creating Help Pages for ASP.NET Web API | The ASP.NET Site
KingKong Bruce記事: ASP.NET Web API 文件產生器(1) - Help Page
Adding a simple Test Client to ASP.NET Web API Help Page - Yao's blog - Site Home - MSDN Blogs
以上
純粹是在寫興趣的,用寫程式、寫文章來抒解工作壓力