本篇介紹是要替一個即將登上 App Store 的 iOS App 進行實機開發、測試、與發佈的設定準備
App 不是只要寫好程式就能出發,它還需要在 Apple Developer 裡擁有清楚的身分,也就是正確的 Bundle Identifier;需要能證明開發者身分的 Certificates;也需要讓開發、測試與發佈流程順利通行的 Provisioning Profiles。
當這些資料都整理好後,macOS 的 Xcode 也就可以像是一個本機端的檢查站,負責確認 Apple Account、Team、憑證與 Profiles 是否都能被正確使用。
在這當中就是要確保 Identifier、Certificate、Profile 與 App Store Connect 的 App 紀錄彼此對得上。
開始吧~~~
檢視既有 Profiles
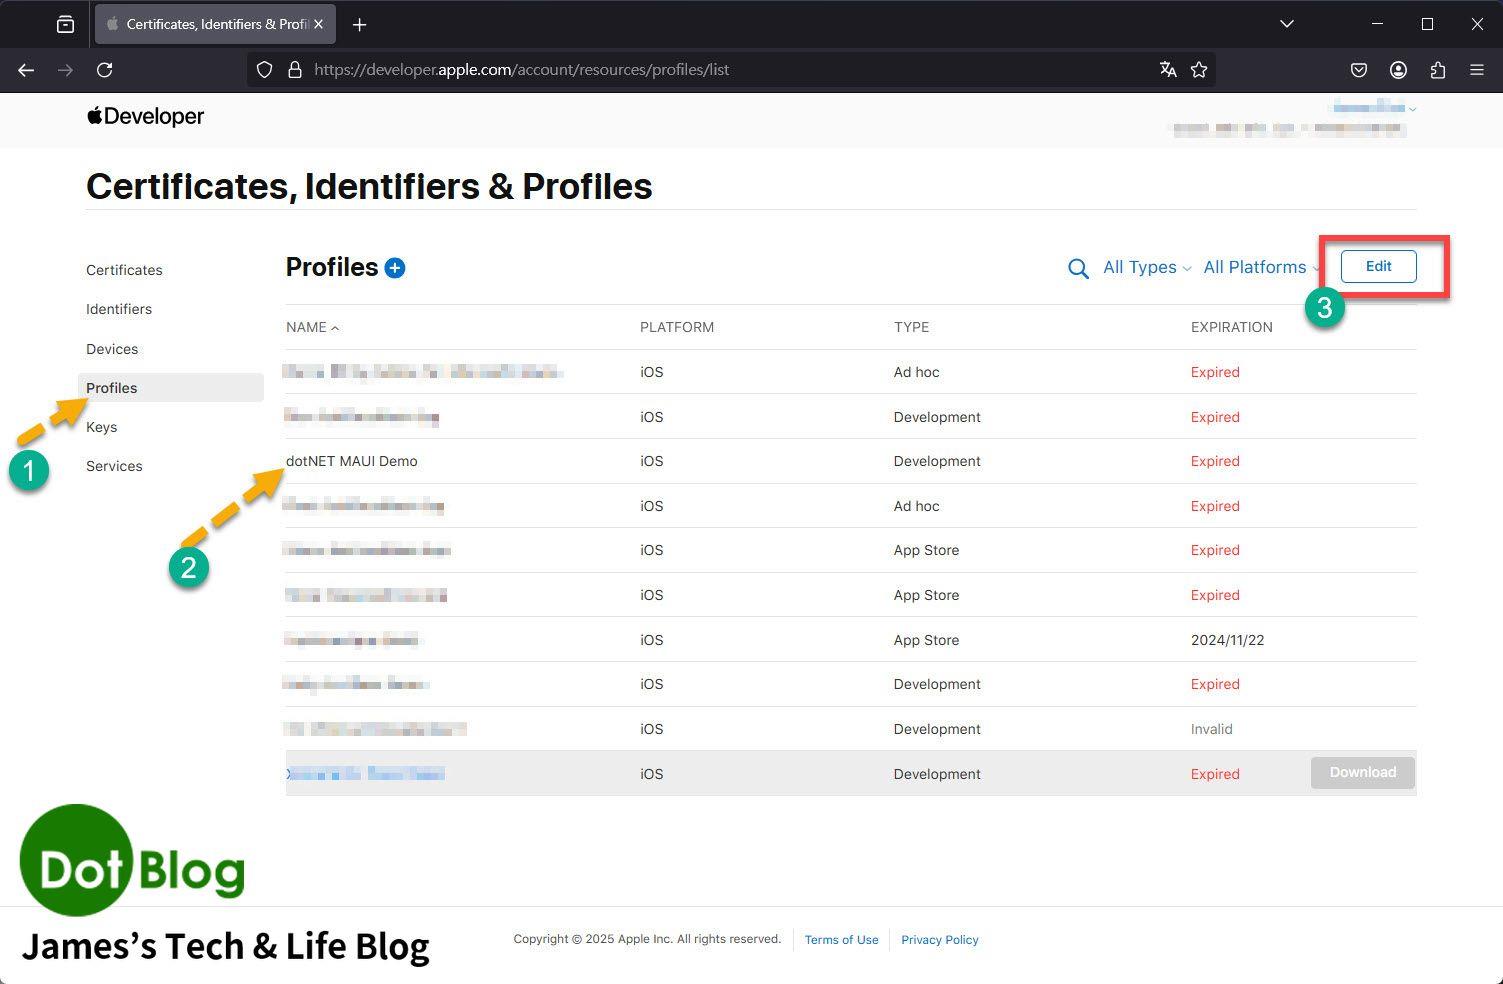
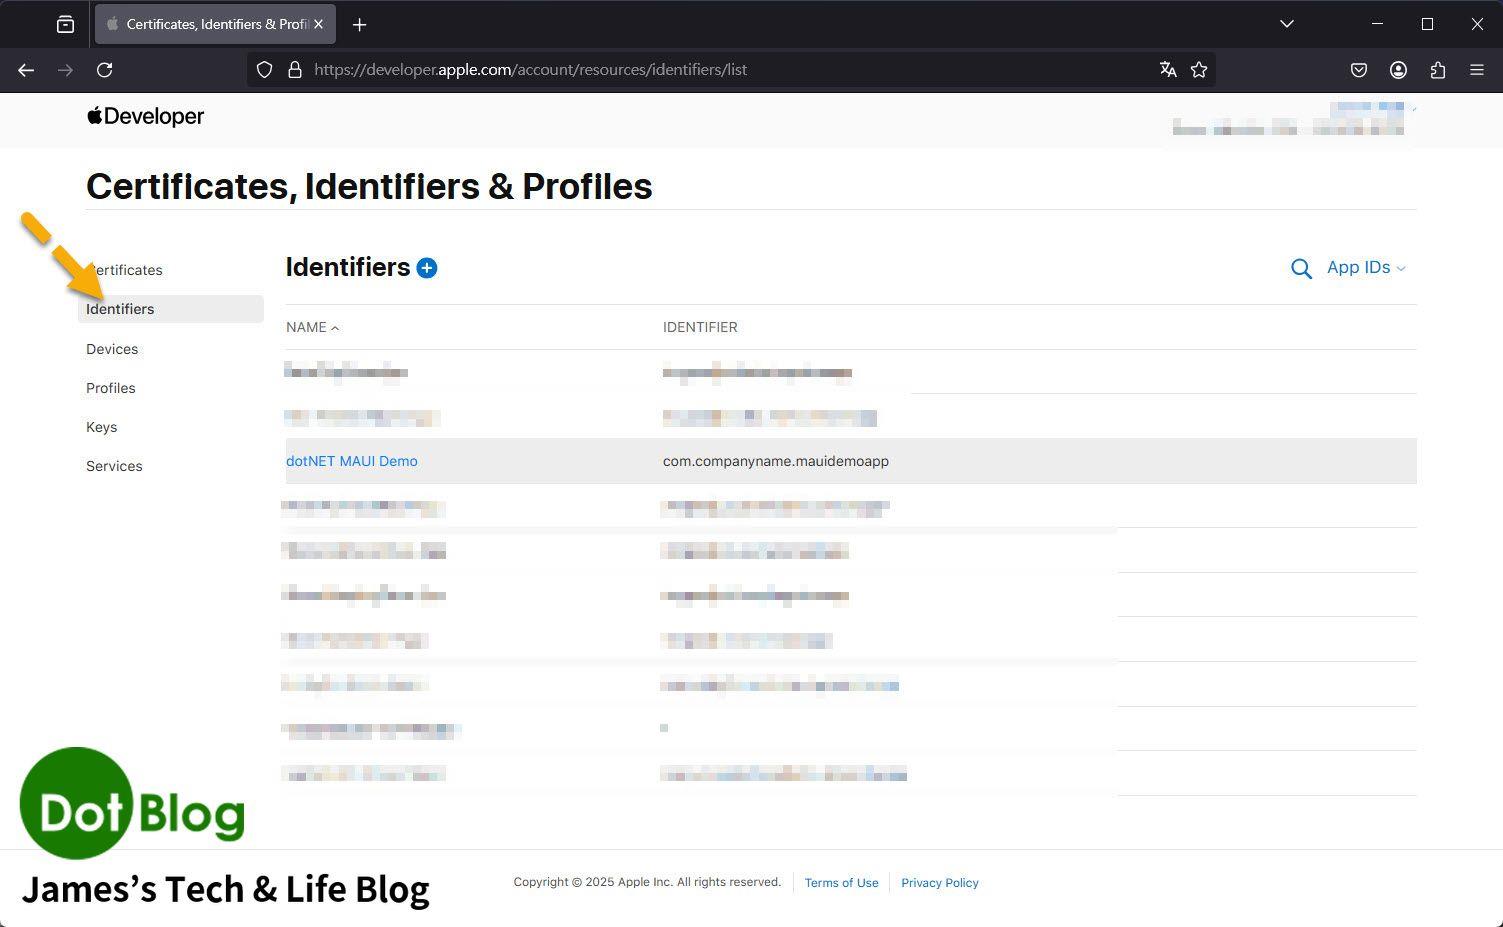
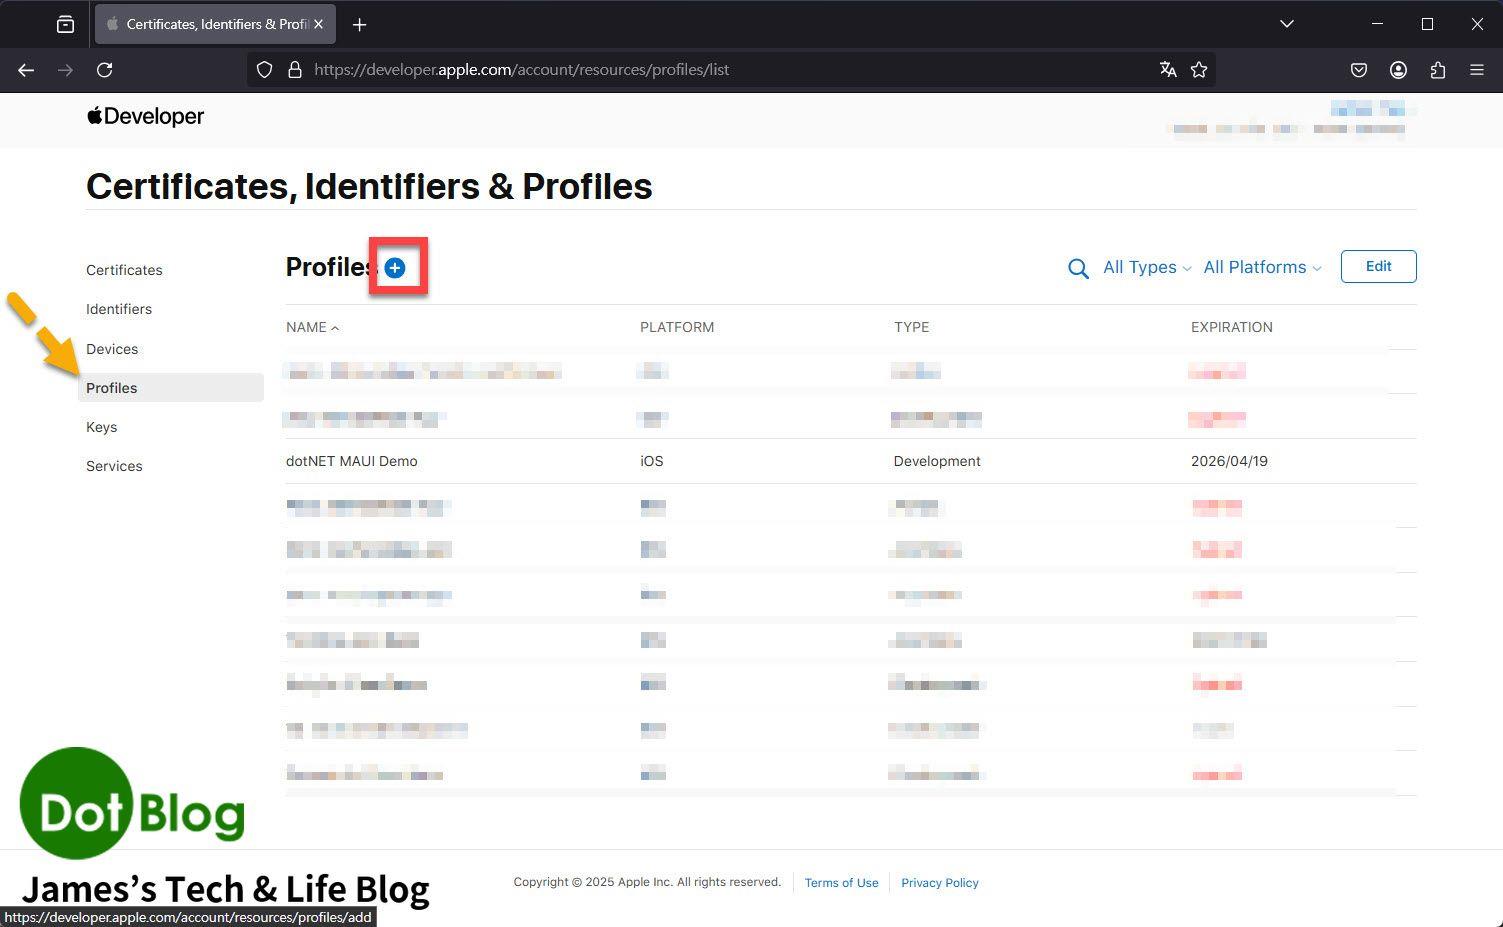
進入 Apple Developer 的 Certificates, Identifiers & Profiles 後,可以在左側選單切換 Certificates、Identifiers、Devices、Profiles 等項目。此畫面可確認目前帳號底下已有的 Provisioning Profiles、平台、類型、到期日與狀態。
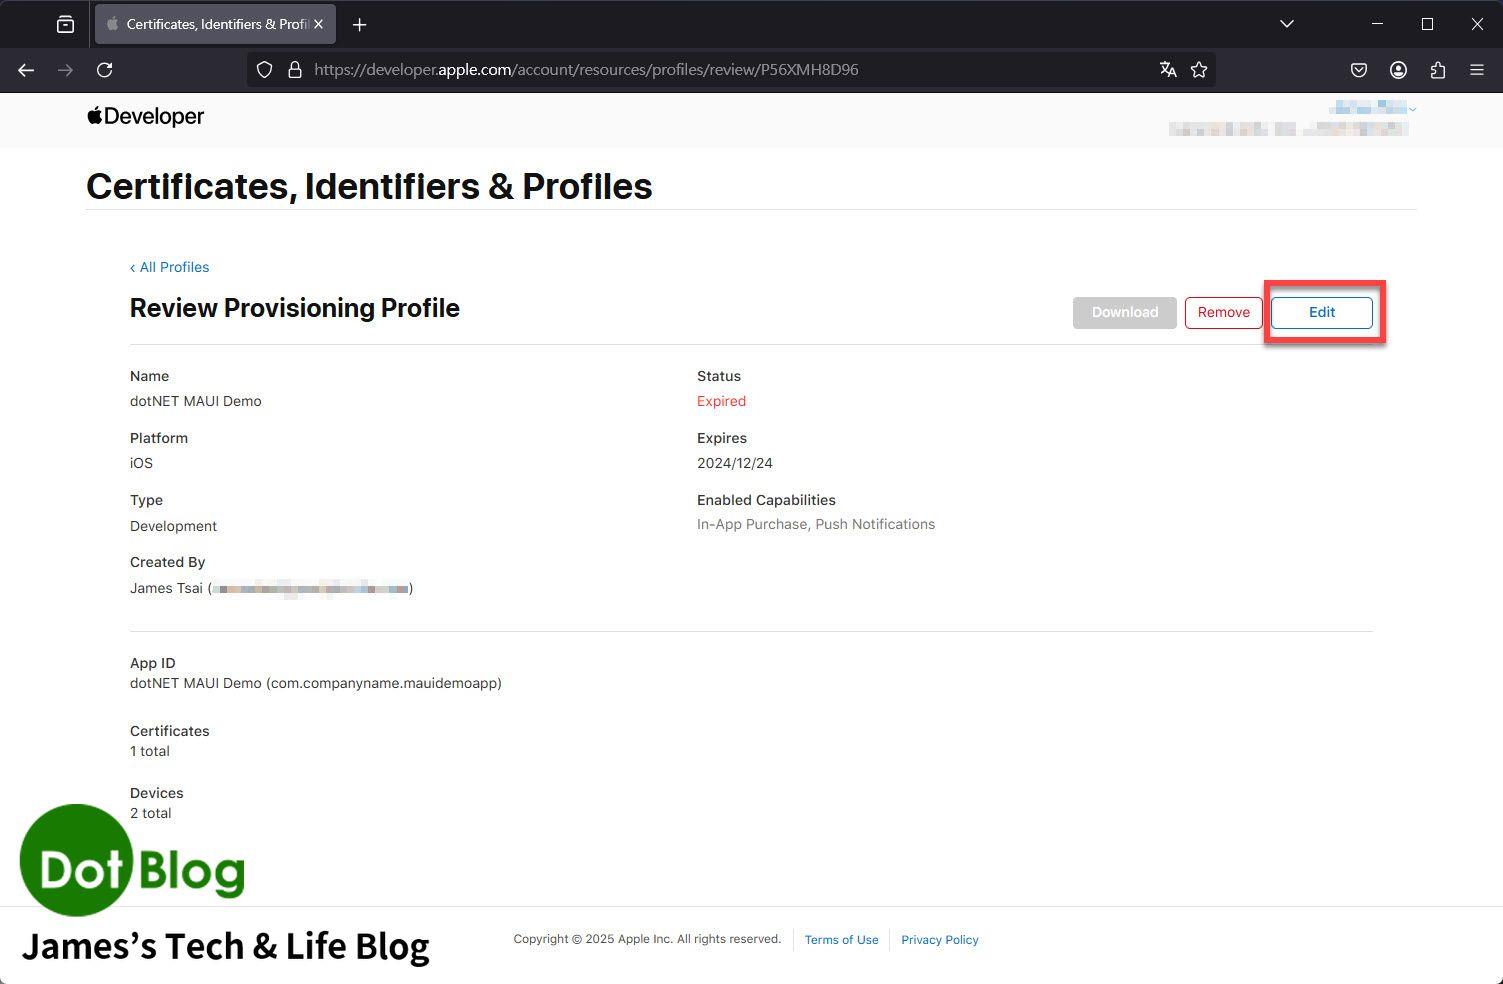
點進既有 Profile 後,可以查看 Profile 的詳細內容,例如名稱、狀態、平台、類型、Team、Bundle Identifier、憑證、裝置與 Entitlements 等資訊。若這個 Profile 已不再需要,也可以在此進行刪除或重新產生。
產生 Development Provisioning Profile
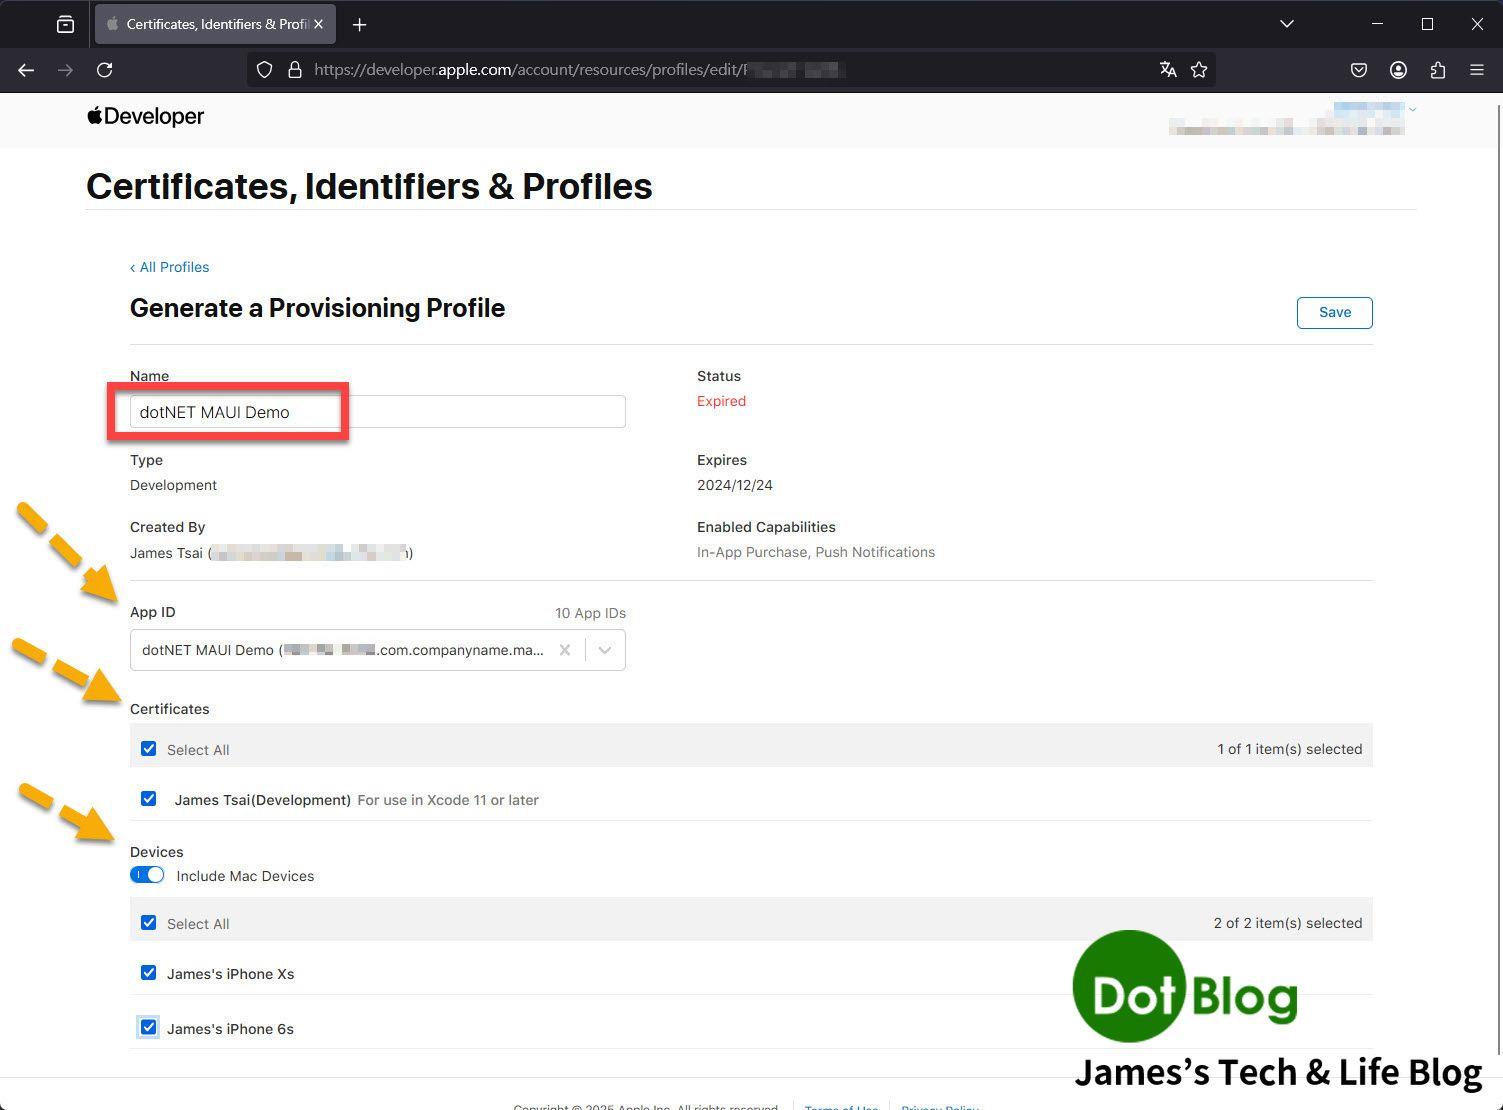
建立新的 Provisioning Profile 時,需要先輸入 Profile 名稱,並確認 App ID、憑證、裝置與其他相關設定。Development 類型的 Profile 會用於本機開發與實機測試,因此通常需要選擇可用的開發憑證與測試裝置。
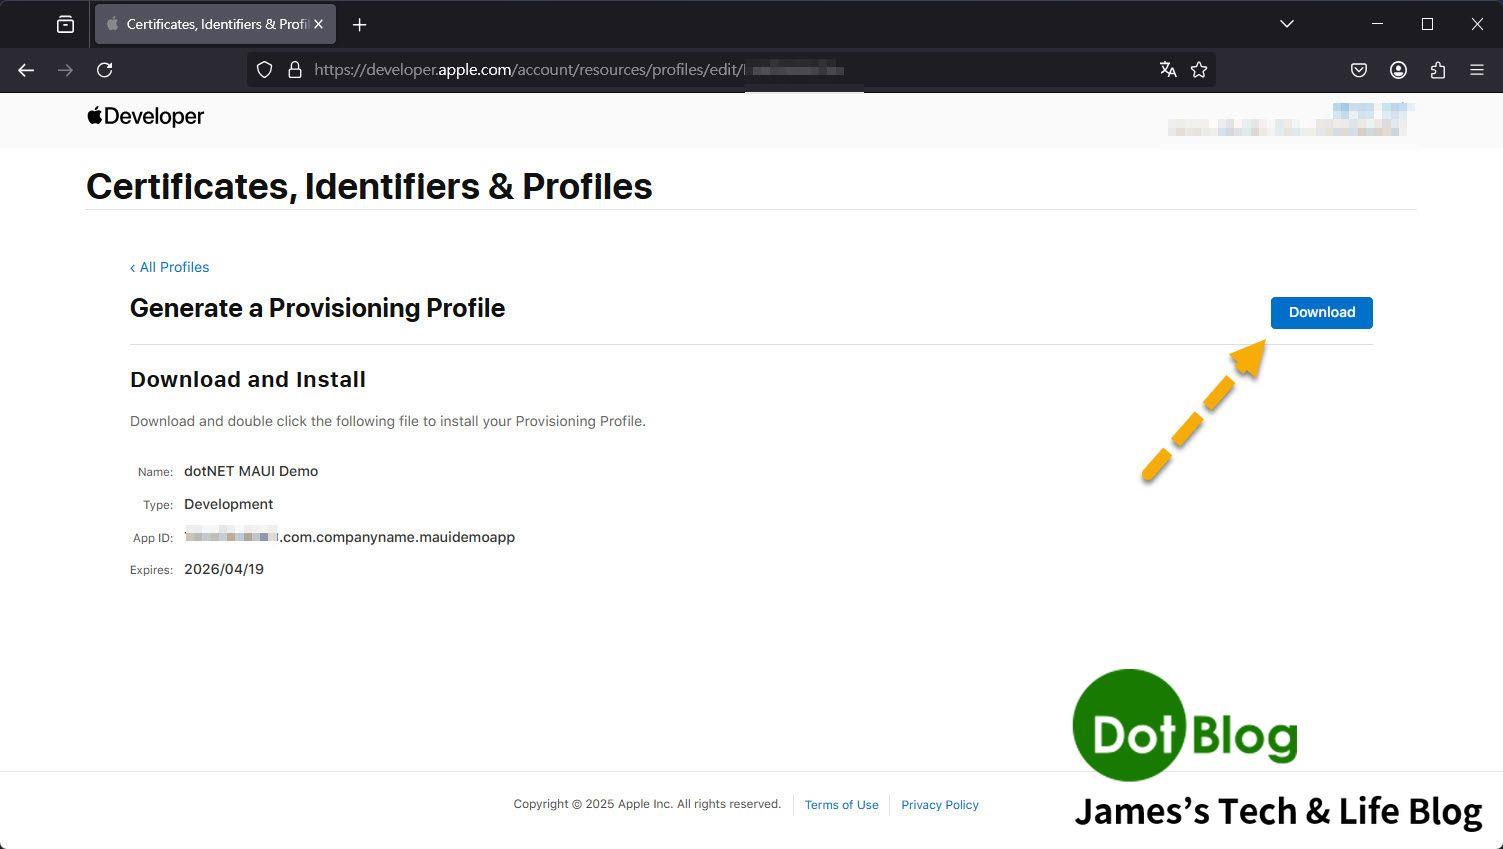
Profile 建立完成後,畫面會提供下載按鈕。下載後可將 Provisioning Profile 安裝到本機環境,讓 Xcode 或建置工具能使用它進行簽章。
回到 Profiles 清單後,可以確認新建立的 Profile 是否出現在清單中,以及狀態是否為 Active。

接著可切換到 Identifiers 清單,確認 App 使用的 Bundle Identifier 已經存在。若要發佈或建置指定 App,Identifier 與專案中的 Bundle ID 必須一致。
建立 App Store 發佈用 Provisioning Profile
若 App 需要上架或送到 App Store Connect,除了 Development Profile 外,也需要建立 Distribution 用的 Provisioning Profile。
先回到 Profiles 清單,按下新增按鈕開始建立新的 Profile。
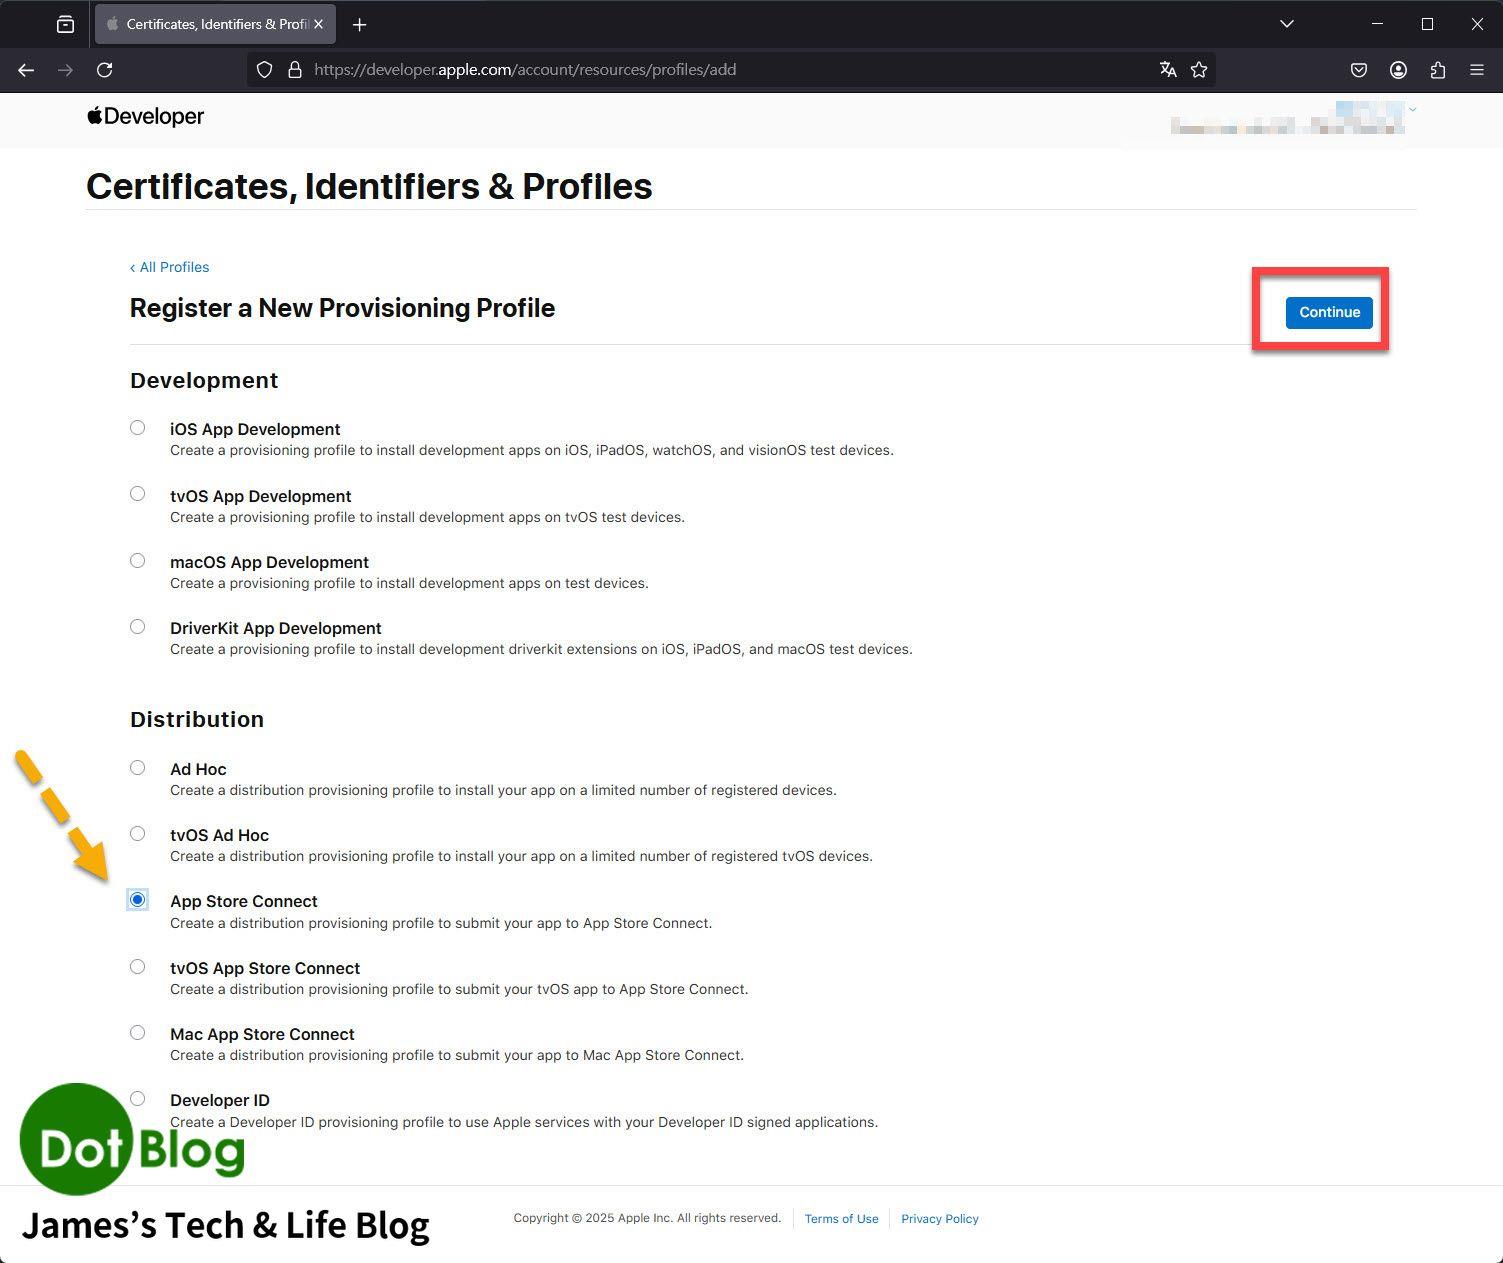
在 Register a New Provisioning Profile 頁面中,選擇 Distribution 類型。用於 App Store Connect 發佈時,通常會選擇 App Store Connect。
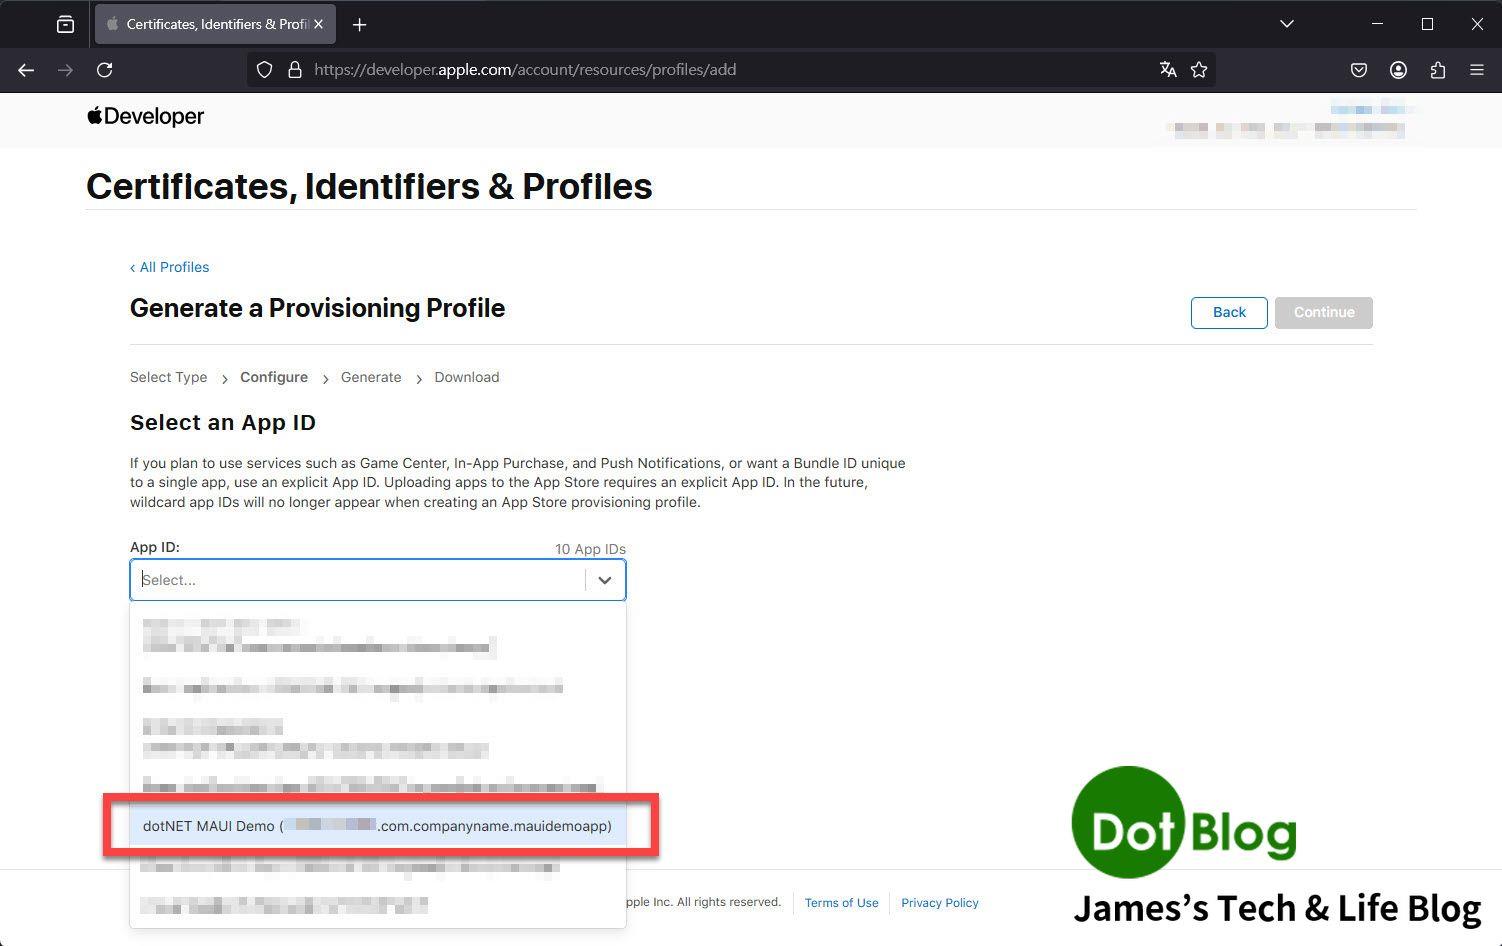
接著選擇要套用的 App ID。這裡會列出 Team 底下可用的 App ID,請選擇與要發佈的 App Bundle ID 相符的項目。
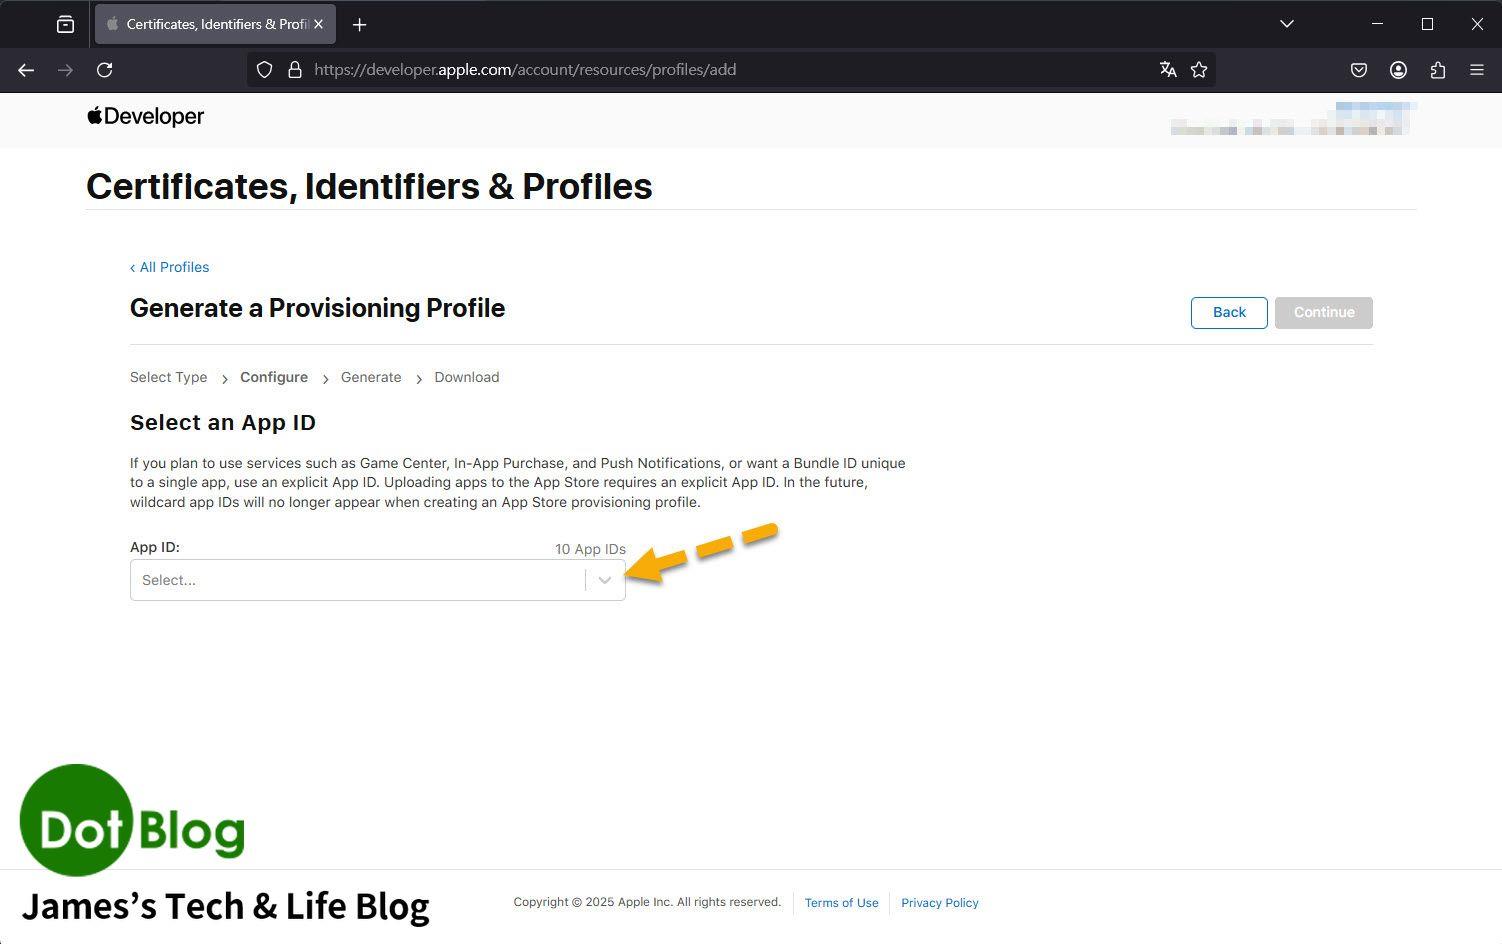
選單展開後,可從清單中挑選目標 App ID。若清單中沒有看到需要的 App ID,代表要先回到 Identifiers 建立或修正 Bundle Identifier。
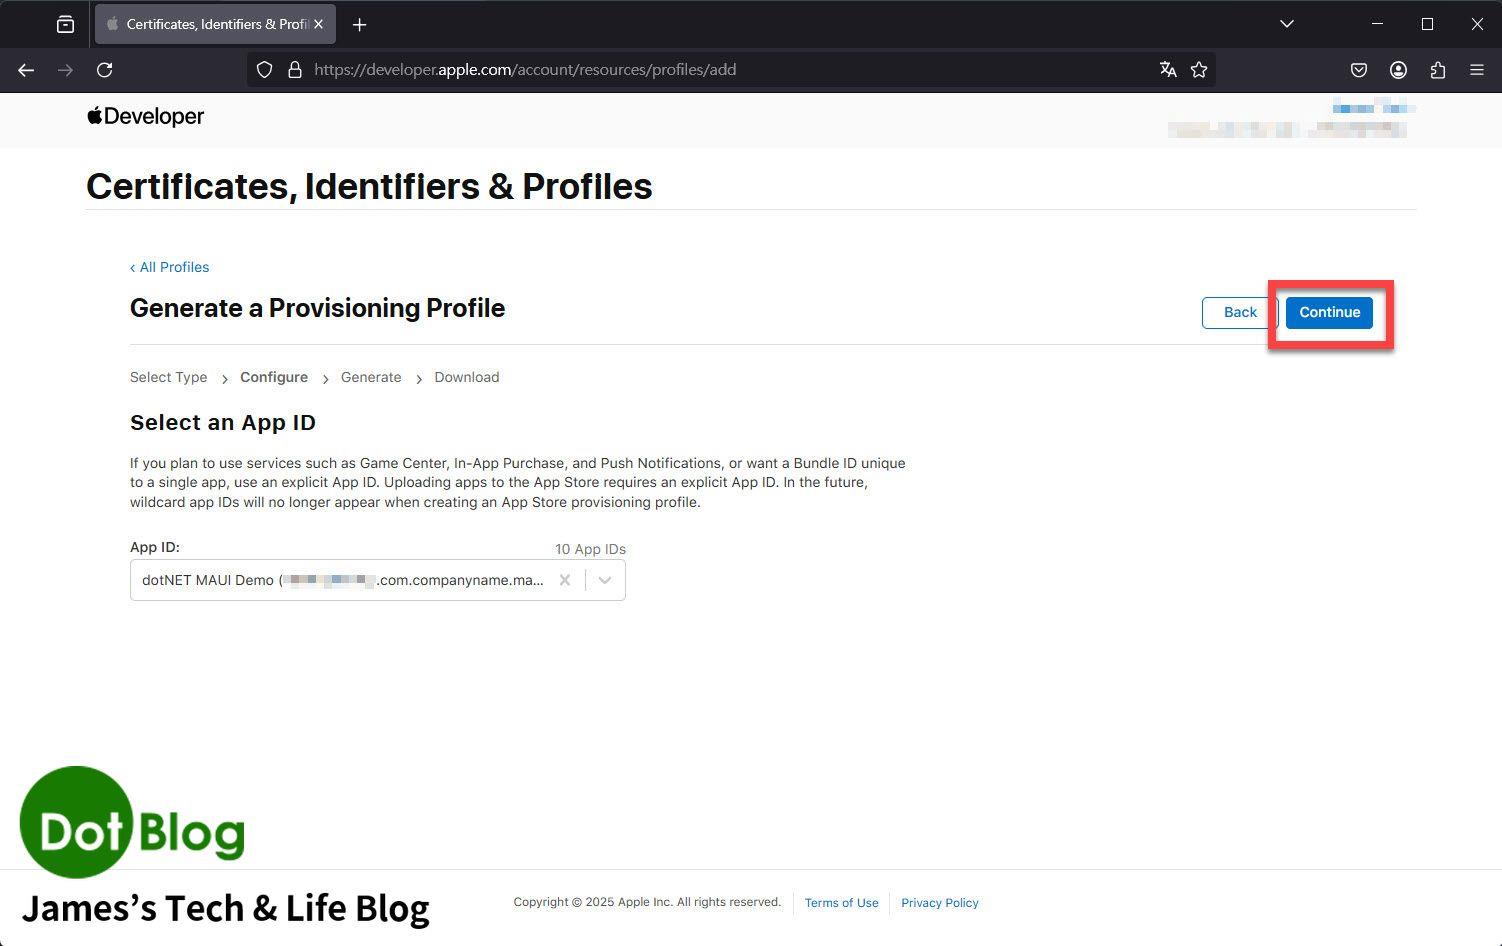
選好 App ID 後,進入下一步選擇憑證。
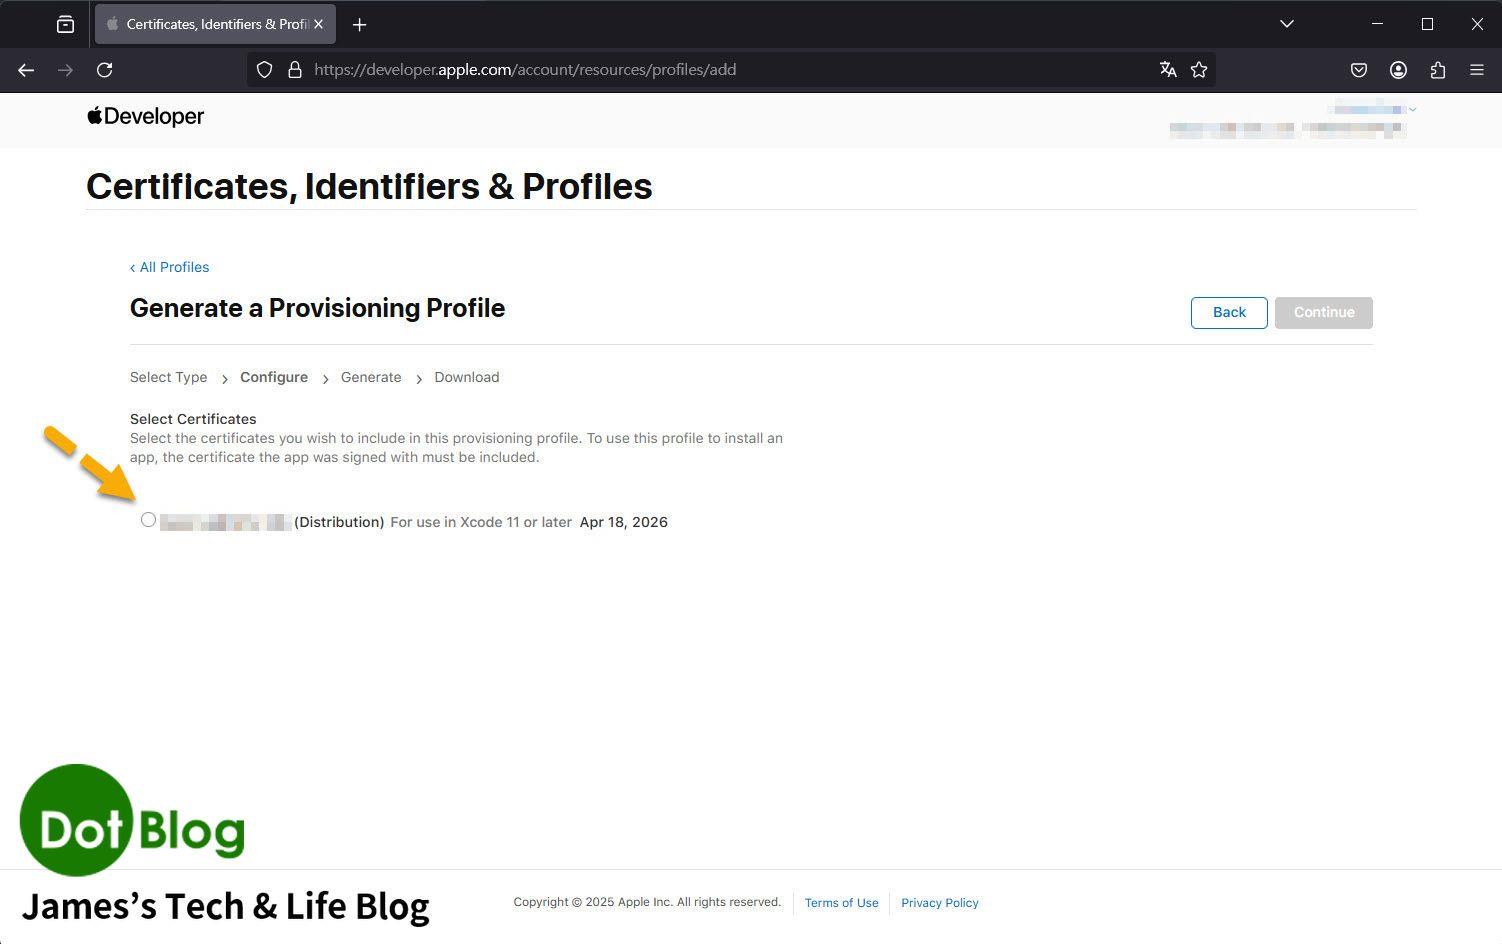
如果是發佈用途,憑證會使用 Distribution Certificate。畫面中會列出可用的憑證與到期日,確認後繼續下一步。
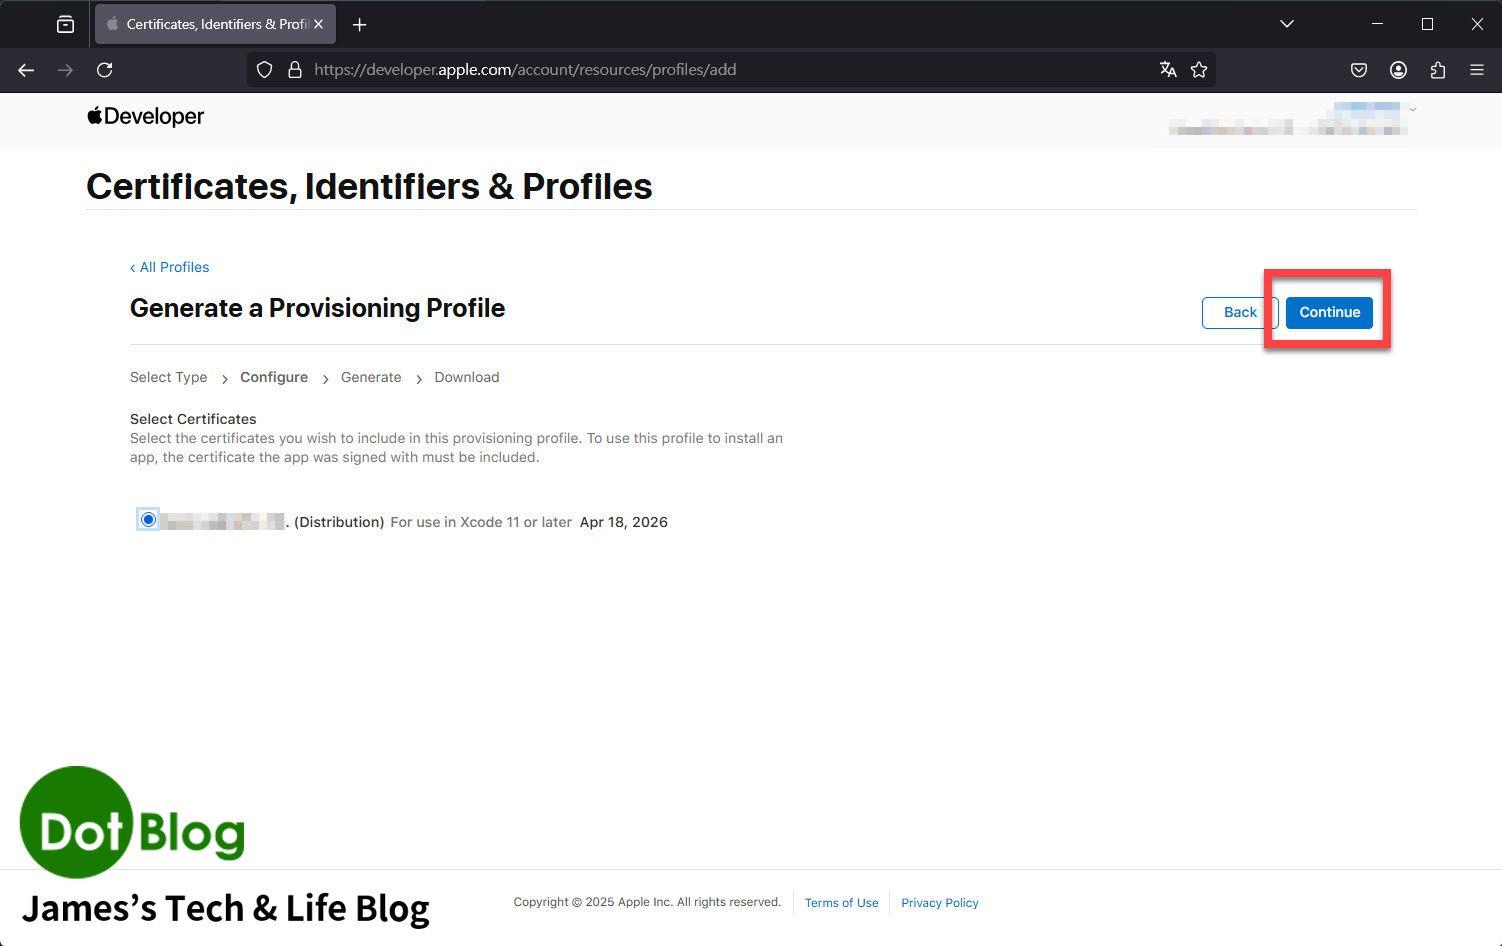
勾選要使用的 Distribution Certificate 後,按下 Continue。
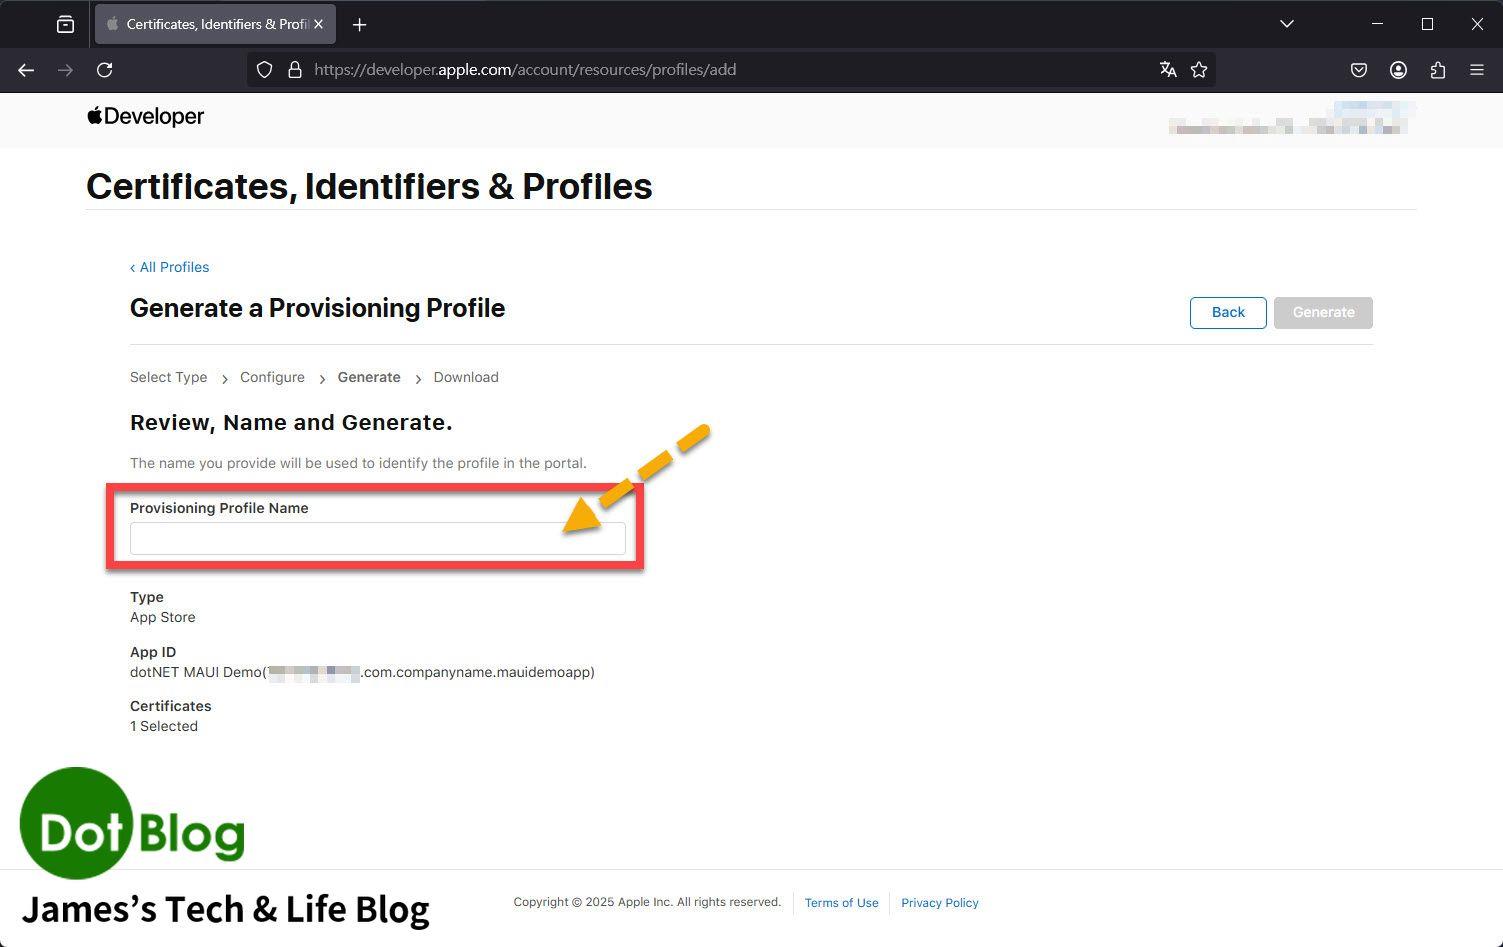
接著輸入 Provisioning Profile Name。建議名稱能清楚反應出 App、用途與環境,例如 App 名稱加上 AppStore 或 Distribution。
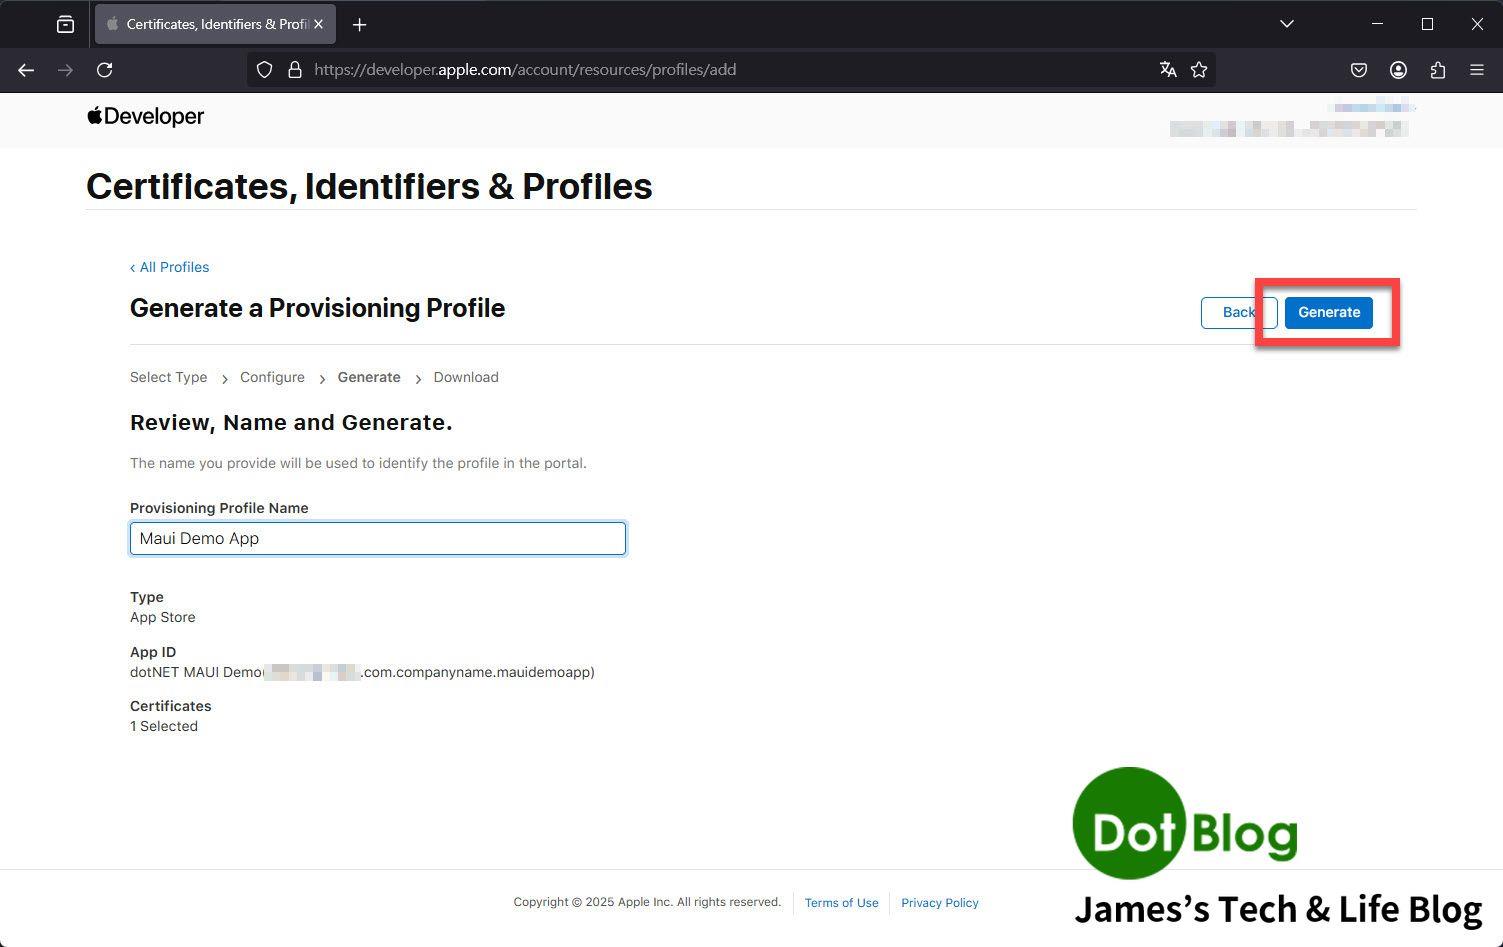
完成名稱設定後,確認 Profile 摘要資訊,包含平台、類型、App ID 與憑證數量。
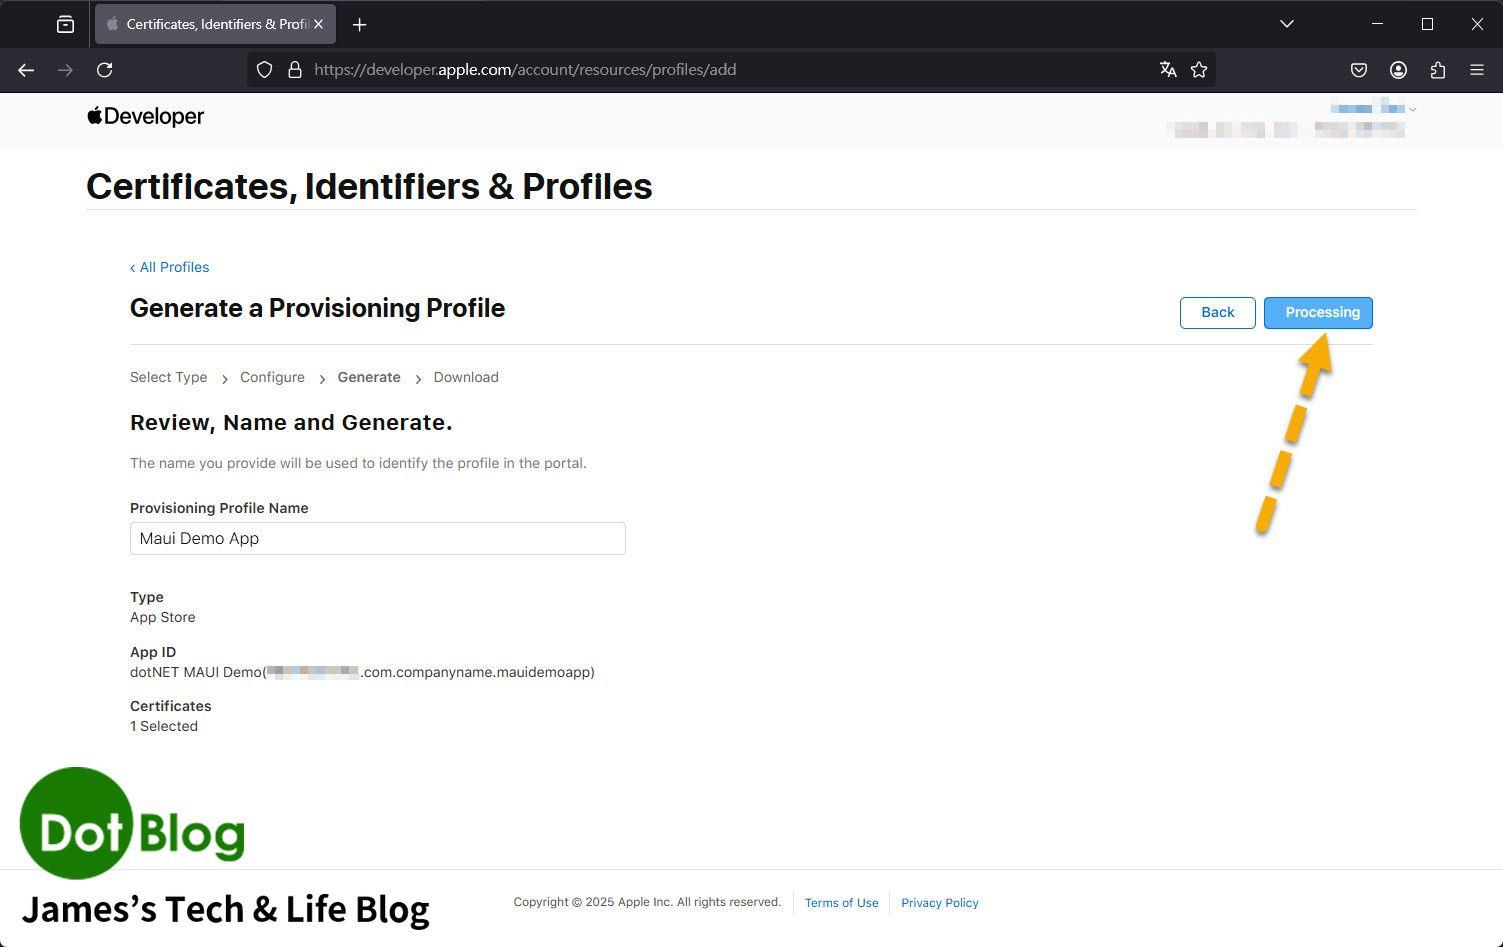
下載並確認發佈用 Profile
系統產生 Profile 後,畫面會顯示 Processing 或完成狀態。若仍在處理中,稍候再重新整理即可。
Profile 產生完成後,按下 Download 下載發佈用 Provisioning Profile。

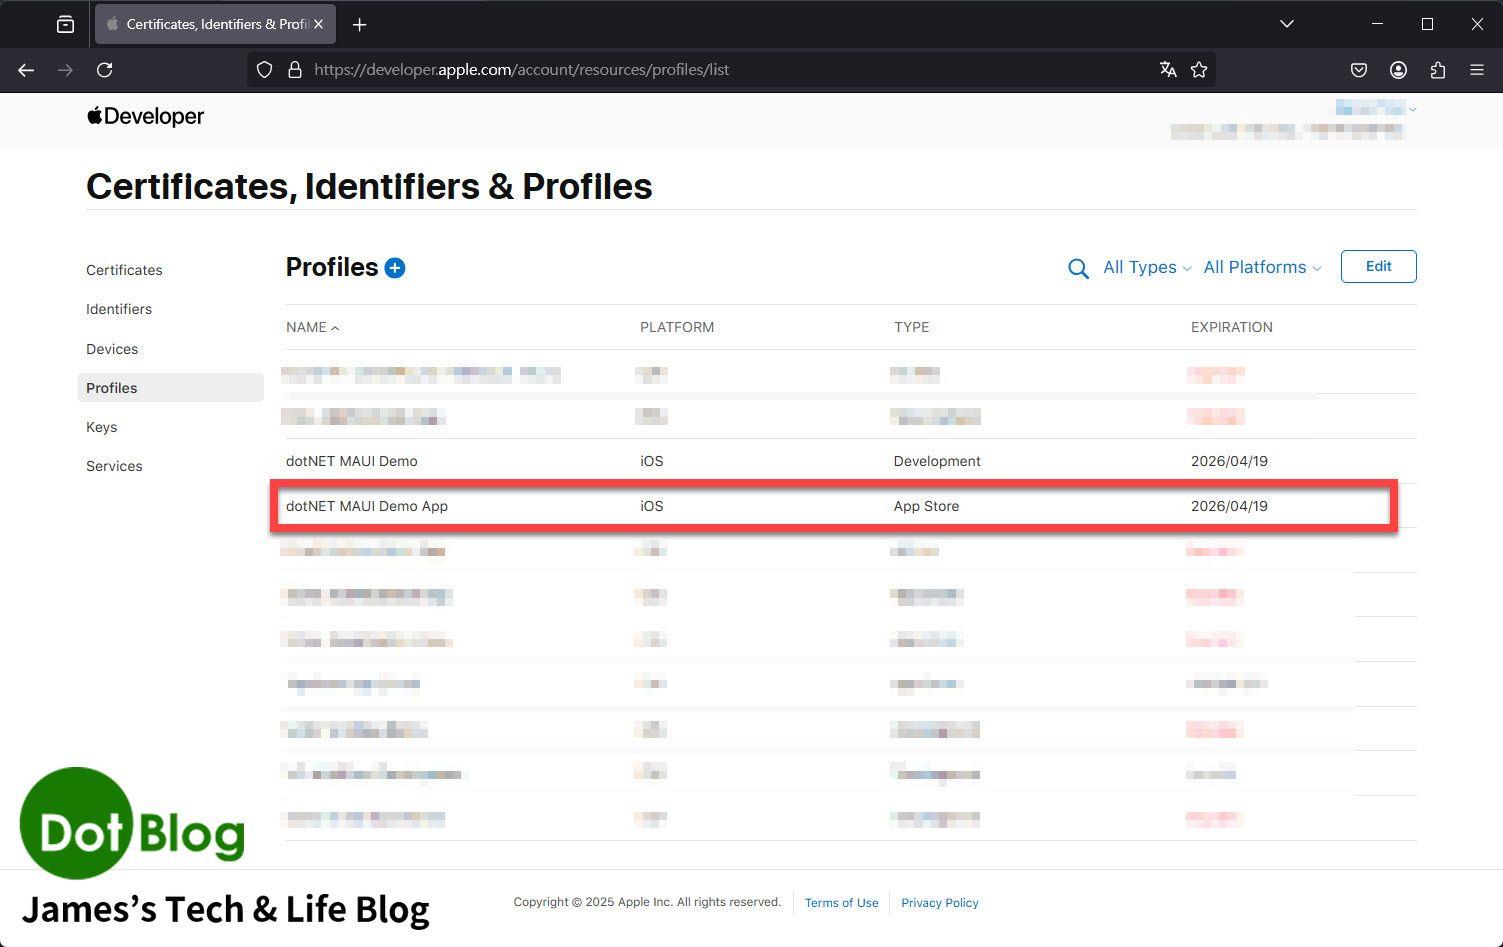
回到 Profiles 清單後,可以看到新建立的發佈用 Profile 已出現在清單中,並確認它的 Type 與狀態。
使用 Xcode 確認
打開 Xcode 的 Settings 或 Preferences,切換到 Accounts 頁籤。這裡可以確認目前登入的 Apple Account,以及 Team 權限是否正確。
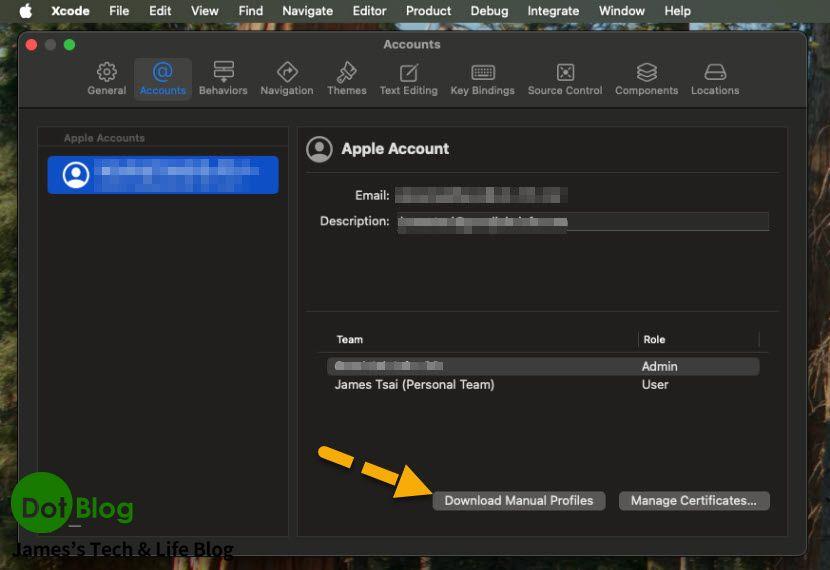
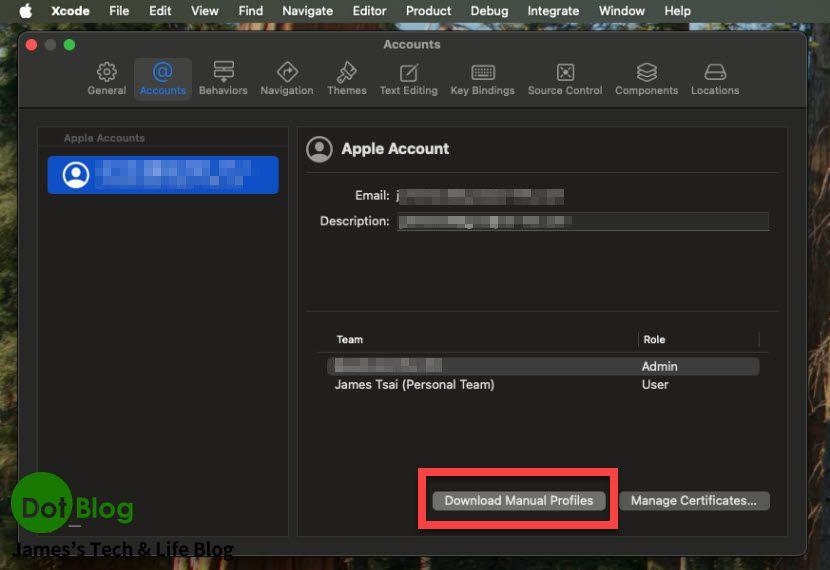
選取帳號後,確認 Team 清單中是否有對應的團隊與角色。若要下載或管理憑證,可按下 Download Manual Profiles 或 Manage Certificates。
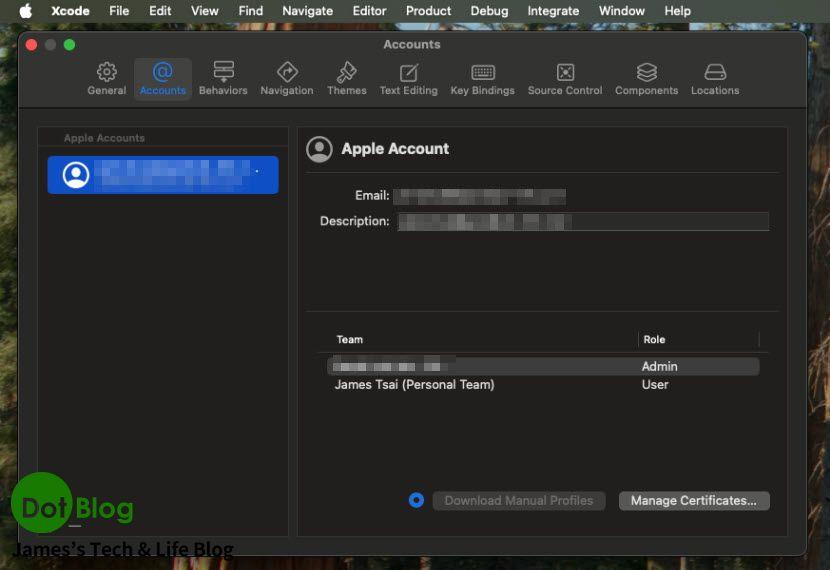
下載完成後,Xcode 就能使用 Apple Developer 入口網站中建立好的 Profiles 與 Certificates 進行簽章與建置。
接著可以繼續觀看:
在 Apple 的 App Store Connect 服務中建立 App
就會讓你在接下來要進行 Device 實機測試、TestFlight 邀測,少走許多冤枉路。
I'm a Microsoft MVP - Developer Technologies (From 2015 ~).
I focus on the following topics: Xamarin Technology, Azure, Mobile DevOps, and Microsoft EM+S.
If you want to know more about them, welcome to my website:
https://jamestsai.tw
本部落格文章之圖片相關後製處理皆透過 Techsmith 公司 所贊助其授權使用之 "Snagit" 與 "Snagit Editor" 軟體製作。