Samba提供Linux的檔案和印表機,SMB(Server Message Block)是一種區域網路上,
分享檔案和印表機的協議(Client-Server)。最大功用就是Linux和Windows可互相分享檔案和印表機,
當然也可以用於Linux和Linux,而我主要分享zookeeper和kafka給Windows,提高我查詢Log效率。
拜讀鳥哥詳細Samba文章,原來安裝Samba還挺簡單的,主要步驟如下
安裝samba相關套件
Server設定,如NetBIOS主機名、密碼使用狀態..等
設定預計要分享目錄和可供使用的帳號密碼
針對分享出去的檔案設定相關存取權限
設定開機自動啟動
@install samba’s packages
$ yum install samba samba-client samba-common -y
Note:if you got yum lock problem please enter below command
rm -f /var/run/yum.pid #force kill yum process
@vi /etc/samba/lmhosts and /etc/hosts
192.168.1.199 kafkaserver
@vi /etc/samba/smb.conf
[global]
        workgroup = WORKGROUP
        security = user
        netbios name= kafkaserver
        map to guest= bad user
        dns proxy = no
        passdb backend = tdbsam
unix password sync = yes  #讓 Samba 與 Linux 密碼同步
passwd program = /usr/bin/passwd %u #以 root 呼叫修改密碼的指令
pam password change = yes #並且支援 pam 模組

[KafkaLogs]
comment = Logs Directories
path = /opt/kafka1.0/kafka_2.11-1.0.0/logs
valid users = @smbgrp
guest ok = no
writable = yes
browsable = yes


[Zookeeper]
comment = zookeeper Directories
path = /usr/lib/zookeeper-3.4.10/zookeeper-3.4.10
valid users = @smbgrp
guest ok = no
writable = yes
browsable = yes
P.S沒用的記得comment
@create a group and user for accessing samba
$ groupadd smbgrp
$ useradd smbuser -G smbgrp
$ smbpasswd -a smbuser
![]() Note: $ passwd smbuser #change user password
Note: $ passwd smbuser #change user password
@ set up folder and file permissions
$ chown -R smbuser:smbgrp /opt/kafka1.0/kafka_2.11-1.0.0/logs
$ chmod -R 0770 /opt/kafka1.0/kafka_2.11-1.0.0/logs
$ chcon -t samba_share_t /opt/kafka1.0/kafka_2.11-1.0.0/logs #將 SELinux type 轉為 samba_share_t

$ chown -R smbuser:smbgrp /usr/lib/zookeeper-3.4.10/zookeeper-3.4.10
$ chmod -R 0770 /usr/lib/zookeeper-3.4.10/zookeeper-3.4.10
$ chcon -t samba_share_t /usr/lib/zookeeper-3.4.10/zookeeper-3.4.10
@start samba service
$ systemctl start smb.service
$ systemctl start nmb.service
$ systemctl enable smb.service
$ systemctl enable nmb.service
@set up firewall for samba
$ firewall-cmd --permanent --zone=public --add-service=samba
$ firewall-cmd –reload
Check samba
$ testparm

@check process of samba
ps -ef | grep -E 'smb|nmb'
@check ports usage of samba
netstat -tunlp | grep -E 'smbd|nmbd'
@client win10
目前我安裝的Samba version $ smbstatus
![]()
透過UNC存取Samba share
 如果你和我一樣,點選samba share會發生無法存取或找不到網路路徑,我最後是關閉SMB2Protocol。
Select
Get-SmbServerConfiguration | Select EnableSMB1Protocol
Get-SmbServerConfiguration | Select EnableSMB2Protocol
Disable
Set-SmbServerConfiguration -EnableSMB2Protocol $false
Enable
Set-SmbServerConfiguration -EnableSMB2Protocol $true
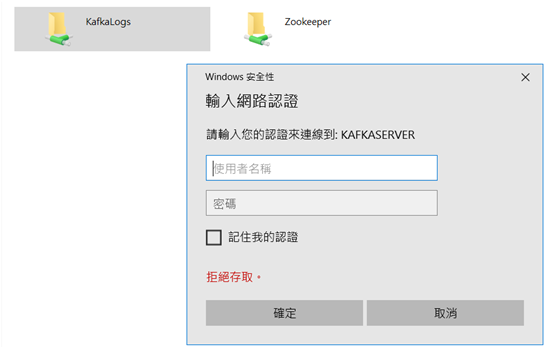
 點選相關folder會要求輸入當時所設定的samba帳號密碼,如果你遇到一直要求輸入正確密碼,
那麼可以先重新設定samba user密碼,並重新啟動samba service。
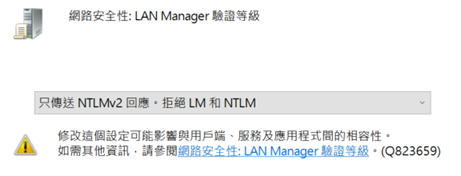
非必要:window 10可以先改為send NTLMv2 response only, Refuse LM and NTLM。
Run>Secpol.msc
 P.S: must reboot
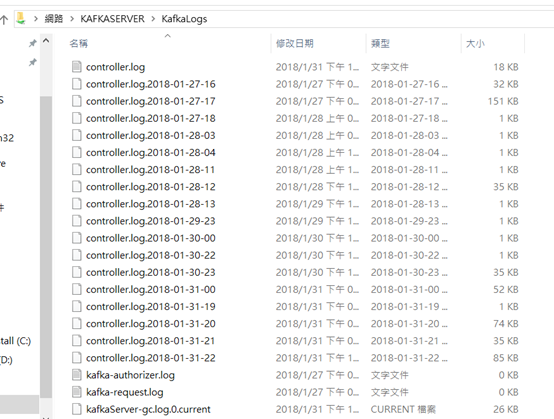
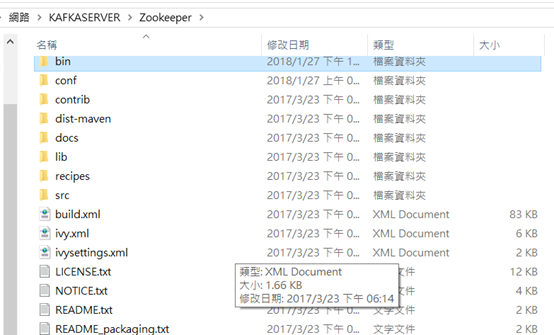
最後,我終於可以從windows順利存取了samba share


參考
How to detect, enable and disable SMBv1, SMBv2, and SMBv3 in Windows and Windows Server