在大多的範例中,我們大多看到的是一個 Sender ,一個 Receiver。
但如果企業中有多個系統,總不能都用 1 對 1 的方式去處理吧!
所以我們可以使用 Id 來區別。
我們使用前一篇「[ASP.NET]Microsoft ASP.NET WebHook Preview」的範例,
調整 Receiver 專案可以處理預設的訂閱及Id為Product的訂閱。
1.在 web.config 中,多加入 Id 為 product 的 Secret,以逗號分隔,如下,
<appSettings>
	<add key="MS_WebHookReceiverSecret_Custom"
		value="12345678901234567890123456789012,product=rainmaker0123456789rainmaker0123456789" />
</appSettings>
2.調整 DefaultHookHandler 中,如果 context?.Id 不為空,則不處理,如下,
public override Task ExecuteAsync(string receiver, WebHookHandlerContext context)
{
	//如果有 Id 則離開,只處理沒有 Id 的...
	if (context?.Id != "")
		return Task.FromResult(true);

	CustomNotifications data = context.GetDataOrDefault<CustomNotifications>();

	// 如果這裡會處理太久的話,建議將資料放到 Queue 之中慢慢處理,先回傳 true
	//https://docs.asp.net/projects/webhooks/en/latest/receiving/handlers.html
	// Get data from each notification in this WebHook
	foreach (IDictionary<string, object> notification in data.Notifications)
	{
		var action = notification["Action"];
		JObject product = (JObject)notification["Product"];
	}
	return Task.FromResult(true);
}
3.新增一個 ProductHookHandler 來處理 context?.Id 為 product 的訂閱,如下,
public class ProductHookHandler : WebHookHandler
{

	public override Task ExecuteAsync(string receiver, WebHookHandlerContext context)
	{
		//Id為product的才進來處理
		if (context?.Id != "product")
			return Task.FromResult(true);

		// Get data from WebHook
		CustomNotifications data = context.GetDataOrDefault<CustomNotifications>();

		// 如果這裡會處理太久的話,建議將資料放到 Queue 之中慢慢處理,先回傳 true
		//https://docs.asp.net/projects/webhooks/en/latest/receiving/handlers.html
		// Get data from each notification in this WebHook
		foreach (IDictionary<string, object> notification in data.Notifications)
		{
			var action = notification["Action"];
			JObject product = (JObject)notification["Product"];
		}
		return Task.FromResult(true);
	}
}
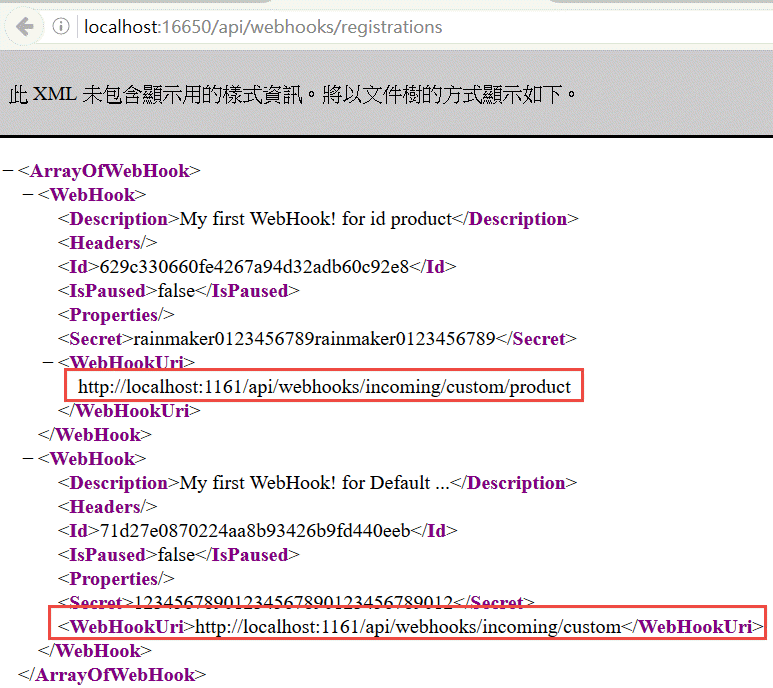
再來就是在訂閱時,預設的URL為 api/webhooks/incoming/custom ,
如果 id 為 product ,就在後面再串接上 product ,
如 api/webhooks/incoming/custom/product 。
所以在 Index.cshtml 中,多加入處理 product 的訂閱,如下,
<form onsubmit="return subscribeProduct()">
    Subscribe Id = Product to all events <input type="submit" value="submit">
</form>

function subscribeProduct() {
    $.ajax({
        type: "POST",
        url: "/api/webhooks/registrations",
        data: JSON.stringify({
            WebHookUri: "http://localhost:1161/api/webhooks/incoming/custom/product",
            Secret: "rainmaker0123456789rainmaker0123456789",
            Description: "My first WebHook! for id product"
        }),
        contentType: "application/json; charset=utf-8",
        dataType: "json",
        success: function (data, status) { alert(status); },
        failure: function (errMsg) { alert(errMsg); }
    });
    return false;
}
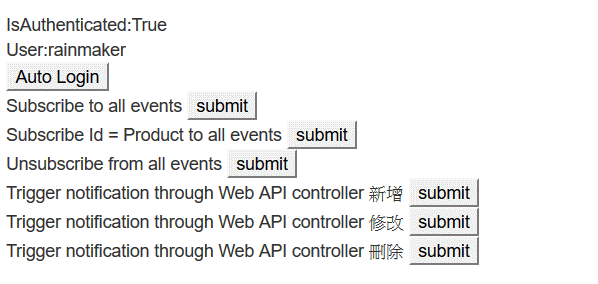
接著就來測試看看(Receiver 專案請用 Debug 方式),從 UI 上分別訂閱預設及product,

可以從 api/webhooks/registrations 來看訂閱的結果,如下,

再來按下 Trigger 新增的 Submit ,就可以分別在 DefaultHookHandler 及 ProductHookHandler ,
處理 Trigger 進來的資訊,各進入2次,所以前面我們使用 context?.Id 來判斷是否要處理,如下,


測試程式碼:Microsoft ASP.NET WebHook Preview 的測試專案
Hi,
亂馬客Blog已移到了 「亂馬客 : Re:從零開始的軟體開發生活」
請大家繼續支持 ^_^

