只實做一個service層級,用entity來當做repository層級,並能直接對entity做單元測試
前言
筆者其實實做過不少種架構,通常都會取決於專案的需求來實做,而這個則是只有service層的架構,省略了repository層,不過也是有適當的另外再包一個父共用層,並且將一些新刪修包裝得更簡潔一點,並且fake了entity,我們就能直接針對entity來做測試了,這篇算是筆者兩三年之前做過的東西分享出來,並也算是記錄一下幫助一下自己,如果有任何更好的意見或批評的,再請多多指教讓筆者有更多的成長空間。
導覽
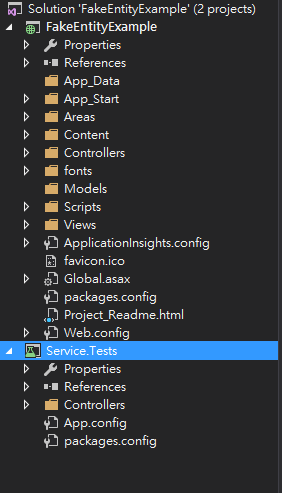
因為此專案一樣使用web api,所以我會簡易的分成ap、service、model三個層級,而一開始專案的樣子只有一個很簡單的web api層,那我們就開始新增新的dll吧,先看一下我new一個新專案目前的結構
接著新增Model層,專門來放一些dto還有dbcontext的東西
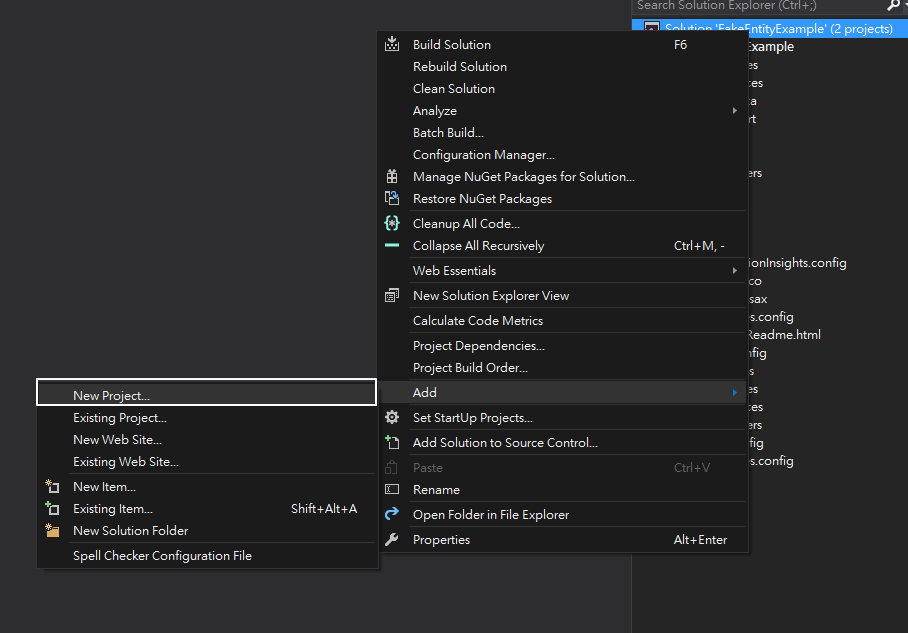
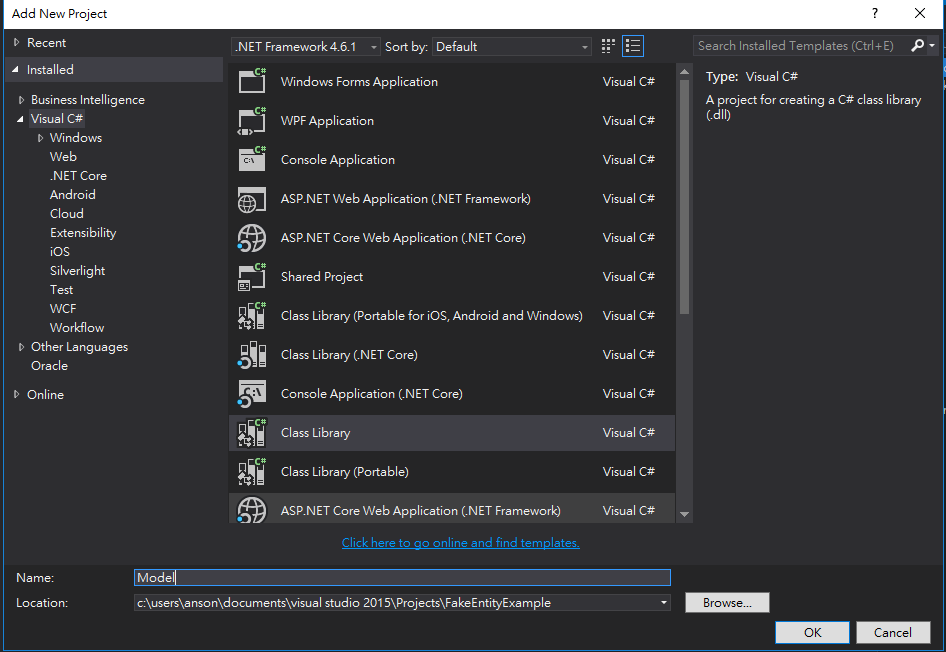
接著新增Service層,如上述的方式來增加,最後再引用參考,基本上ap層參考了service和model層,而service層則會參考model層,Service.Test層則會參考model和service層,以便之後做單元測試的部份,model層則是最上面的,並無依賴任何一層,但實務上它可能會再參考了共用工具層,一切視專案架構而定。
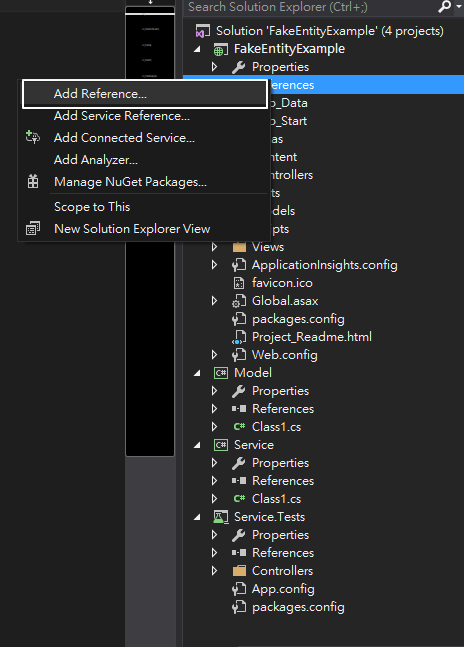
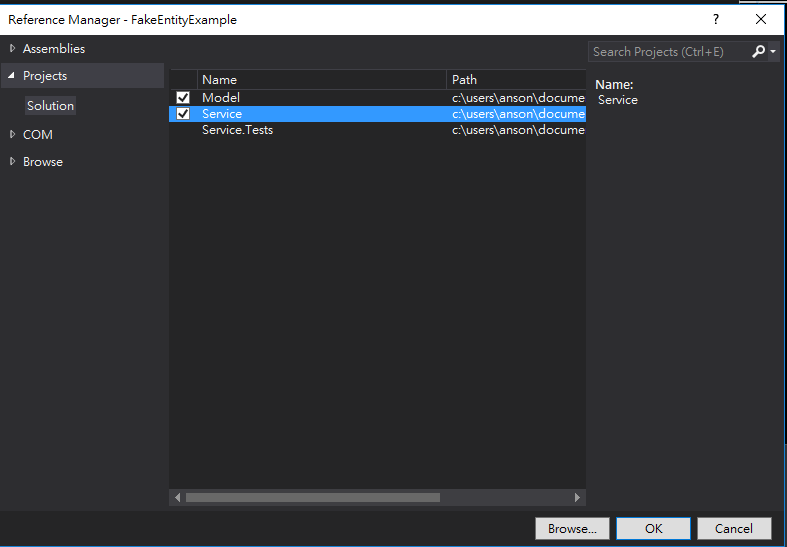
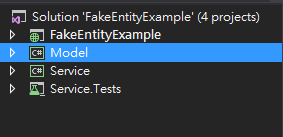
最後我的專案結構會長如下圖示
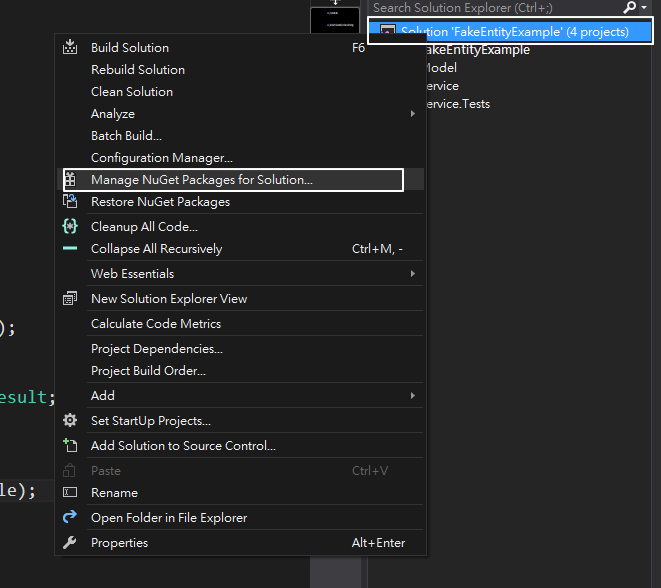
首先即然我們使用了EntityFramework,那我們就全局安裝起來吧,對著方案直接做安裝的動作
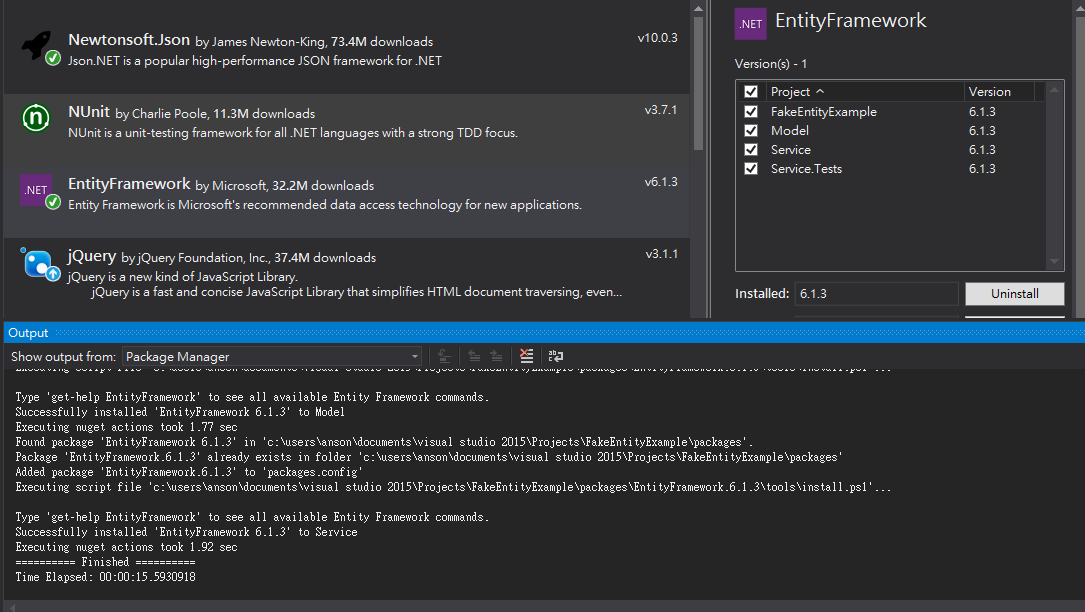
接下來我是安裝之前有寫過文章介紹過的unity來做di,有興趣者可以參考(https://dotblogs.com.tw/kinanson/2017/04/11/162321),只需要安裝在ap層就夠了


接著是在service.test安裝nusbstitute和FluentAssertions,說到nsubstitute這個工具,筆者三年前從中國某篇文章看到就開始用了,那時候在台灣還沒有什麼人用,後來經由91大神發揚光大,現在相關nsubstitute的參考資源越來越多,並且也變成現在c#大家的首選,証明了此工具確實是非常好用啊。


之前已經有介紹過了,Model層會放一些dto(物件傳輸),還有Dbcontext的部份,而此專案會使用code first的模式,所以關於Table定義也會放在Model層裡面,那就開始實做吧
新增一個Models的資料夾,專門放一些資料表的定義,這邊為求簡單只放兩個table,一個是書藉一個則是出版社
Models/Book
public class Book
    {
        [Display(Name = "書號")]
        [Key]
        [MaxLength(10)]
        public string BookID { get; set; }

        [Display(Name = "書名")]
        [MaxLength(100)]
        [Required]
        public string Title { get; set; }

        [Display(Name = "作者")]
        [MaxLength(30)]
        [Required]
        public string Author { get; set; }

        [Display(Name = "定價")]
        [Required]
        public int Price { get; set; }

        [Display(Name = "倉庫庫存量")]
        [Required]
        public int WarehouseStock { get; set; }

        [Display(Name = "門市庫存量")]
        [Required]
        public int ShopStock { get; set; }

        [Required]
        [MaxLength(5)]
        public string PublishID { get; set; }
        public virtual Publish Publish { get; set; }

    }
Models/Publsih
public class Publish
    {
        [Display(Name = "出版社編號")]
        [MaxLength(5)]
        [ReadOnly(true)]
        public string PublishID { get; set; }

        [Display(Name = "出版社名稱")]
        [MaxLength(20)]
        [Required]
        public string PublishName { get; set; }

        [JsonIgnore]
        public virtual ICollection<Book> Books { get; set; }
    }
新增一個DbEntity的資料夾,專門放一些跟Entity有關的介面或類別
DbEntity/IDbContext
    public interface IDbContext
    {
        IDbSet<Book> Book { get; set; }
        IDbSet<Publish> Publish { get; set; }

        /// <summary>
        /// 包裝一些簡單新刪的Repository,如果邏輯簡單,直接在controller調用就好,service就不用實做了
        /// </summary>
        /// <typeparam name="TEntity"></typeparam>
        /// <returns></returns>
        DbSet<TEntity> Set<TEntity>() where TEntity : class;

        /// <summary>
        /// 可以包裝修改的部份,理由同上
        /// </summary>
        /// <typeparam name="TEntity"></typeparam>
        /// <param name="entity"></param>
        /// <returns></returns>
        DbEntityEntry<TEntity> Entry<TEntity>(TEntity entity) where TEntity : class;

        /// <summary>
        /// 如果在controller調用的時候,會順便呼叫以方便達成儲存
        /// </summary>
        /// <returns></returns>
        int SaveChanges();
    }
DbEntity/ApplicationDbContext
    public class ApplicationDbContext : DbContext,IDbContext
    {

        public ApplicationDbContext()
            : base("Context")
        {

        }
        public IDbSet<Book> Book { get; set; }

        public IDbSet<Publish> Publish { get; set; }

        protected override void OnModelCreating(DbModelBuilder modelBuilder)
        {
            //不要Entity幫我們轉換複數名
            modelBuilder.Conventions.Remove<PluralizingTableNameConvention>();
            base.OnModelCreating(modelBuilder);
        }
    }
接著新增一支專門fake table定義的,可以給單元測試使用
DbEntity/FakeApplicationDbContext
public class FakeApplicationDbContext
{
    public IDbSet<Book> Book { get; set; }
    public IDbSet<Publish> Publish { get; set; }
}
最後則是很關鍵的,fake db set的部份
DbEntity/FakeDbSet
    public class FakeDbSet<T> : System.Data.Entity.IDbSet<T> where T : class
    {
        private readonly List<T> list = new List<T>();

        public FakeDbSet()
        {
            list = new List<T>();
        }

        public FakeDbSet(IEnumerable<T> contents)
        {
            this.list = contents.ToList();
        }

        public T Add(T entity)
        {
            this.list.Add(entity);
            return entity;
        }

        public T Attach(T entity)
        {
            this.list.Add(entity);
            return entity;
        }

        public TDerivedEntity Create<TDerivedEntity>() where TDerivedEntity : class, T
        {
            throw new NotImplementedException();
        }

        public T Create()
        {
            throw new NotImplementedException();
        }

        public T Find(params object[] keyValues)
        {
            throw new NotImplementedException();
        }

        public System.Collections.ObjectModel.ObservableCollection<T> Local
        {
            get
            {
                throw new NotImplementedException();
            }
        }

        public T Remove(T entity)
        {
            this.list.Remove(entity);
            return entity;
        }

        public IEnumerator<T> GetEnumerator()
        {
            return this.list.GetEnumerator();
        }

        System.Collections.IEnumerator System.Collections.IEnumerable.GetEnumerator()
        {
            return this.list.GetEnumerator();
        }

        public Type ElementType
        {
            get { return this.list.AsQueryable().ElementType; }
        }

        public System.Linq.Expressions.Expression Expression
        {
            get { return this.list.AsQueryable().Expression; }
        }

        public IQueryProvider Provider
        {
            get { return this.list.AsQueryable().Provider; }
        }
    }
緊接著就是code first的部份,需要把db建立起來了
請在web api的web.config加上要連db的connection
<add name="Context" connectionString="data source=(localdb)\v11.0;initial catalog=FakeExample;integrated security=True;MultipleActiveResultSets=True;App=EntityFramework" providerName="System.Data.SqlClient" />
請先選擇package console,如下圖示
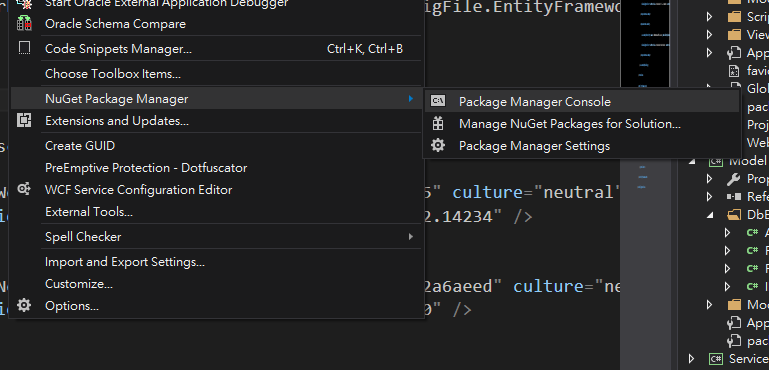
值得注意一下的是如果你要建立db,需特別注意要選到ApplicationDbContext的那一層

然後首先輸入enable-migrations,第二個指令則是輸入add-migration init,最後是update-database,成功之後應該可以看到在資料庫已經有建立此db了。
首先來實做基本的Repository,這一支目的只是為了如果只有單純的新刪修或用主鍵取得資料的話,就可以直接在controller操作,不用再建service了,力求方便為主而已
    public interface IEntityService<T> where T : class
    {
        void Add(T entity);
        void Delete(T entity);
        void Update(T entity);
        T GetById(int id);
    }

    public abstract class EntityService<T> : IEntityService<T> where T : class
    {
        protected IDbContext db;
        protected DbSet<T> dbset;

        public EntityService(IDbContext db)
        {
            this.db = db;
            dbset = db.Set<T>();
        }

        public virtual void Add(T entity)
        {
            if (entity == null) throw new ArgumentNullException("請提供泛型類別");
            dbset.Add(entity);
            db.SaveChanges();
        }

        public virtual void Update(T entity)
        {
            if (entity == null) throw new ArgumentNullException("請提供泛型類別");
            db.Entry(entity).State = System.Data.Entity.EntityState.Modified;
            db.SaveChanges();
        }

        public virtual void Delete(T entity)
        {
            if (entity == null) throw new ArgumentNullException("請提供泛型類別");
            dbset.Remove(entity);
            db.SaveChanges();
        }

        public T GetById(int id)
        {
            return dbset.Find(id);
        }
    }
接著建立IBookService
    public interface IBookService:IEntityService<Book>
    {
    }

    public class BookService : EntityService<Book>, IBookService
    {
        public BookService(IDbContext db) : base(db)
        {
        }
    }
還有建立IPublishService
    public interface IPublishService : IEntityService<Publish>
    {
    }

    public class PublishService : EntityService<Publish>, IPublishService
    {
        public PublishService(IDbContext db)
            : base(db)
        {
        }
    }
如果我們只是要簡單新增的話,只要在controller層直接Add就好了,就不用再定義方法了
    public class PublishController : ApiController
    {
        IPublishService _service;
        public PublishController(IPublishService service)
        {
            _service = service;
        }

        public IHttpActionResult Post(Publish publish)
        {
            _service.Add(publish);
            return Ok();
        }
    }
因為web api有用到unity來方便做注入的部份,所以首先簡單來實做unity的部份,首先在App_Start新增UnityConfig
    public class UnityConfig
    {
        public static void RegisterComponents()
        {
            var container = new UnityContainer();
            RegistAll(container);
            container.RegisterType<IDbContext, ApplicationDbContext>();
            GlobalConfiguration.Configuration.DependencyResolver = new UnityDependencyResolver(container);
        }

        private static void RegistAll(UnityContainer container)
        {
            container.RegisterTypes(
               AllClasses.FromLoadedAssemblies(),
               WithMappings.FromMatchingInterface,
               WithName.Default,
               overwriteExistingMappings: true
            );
        }
    }
接著則是在global.asax的生命周期裡面註冊進去就行了
protected void Application_Start()
{
    AreaRegistration.RegisterAllAreas();
    UnityConfig.RegisterComponents(); //註冊unity
    GlobalConfiguration.Configure(WebApiConfig.Register);
    FilterConfig.RegisterGlobalFilters(GlobalFilters.Filters);
    RouteConfig.RegisterRoutes(RouteTable.Routes);
    BundleConfig.RegisterBundles(BundleTable.Bundles);
}
我先新增兩支Controller,一支是對應Book的一支則是對應Publish的
public class BookController : ApiController
{
    IBookService _bookService;
    public BookController(IBookService bookService)
    {
        _bookService = bookService;
    }

    public IHttpActionResult Post(Book book)
    {
        _bookService.Add(book);
        return Ok();
    }
}
    public class PublishController : ApiController
    {
        IPublishService _service;
        public PublishController(IPublishService service)
        {
            _service = service;
        }

        public IHttpActionResult Post(Publish publish)
        {
            _service.Add(publish);
            return Ok();
        }
    }
首先在單元測試專案新增BookServiceTest.cs,因為我的目標是只會測試service層級的,而這邊要注意一下,因為我已fake dbset了,所以在此我模擬的不是方法的回傳值,而是模擬db應該會有怎樣的資料,這樣子這些資料經過lambda然後一連串的邏輯,全部都會測試到,就能測試得更完整了,先來建一些db的假資料,之後供測試使用,在此我選擇把這些假資料建立在Model層,這樣子不管是單元測試,或者要拿假資料給ui測試,都可以很方便共同使用,那就先在Model層加個FakeData的類別,然後建立Books和Publishs的屬性吧。
    public class FakeData
    {
        public List<Book> Books { get; set; } = new List<Book>
        {
            new Book {Id=1,Author="Anson",Price=400,PublishID=1,
                ShopStock =10,WarehouseStock=10 ,Title="Angularjs 權威指南"},
            new Book {Id=2,Author="Anson",Price=400,PublishID=2,
                ShopStock =10,WarehouseStock=10 ,Title="Vue.js 由淺入深"},
            new Book {Id=1,Author="Anson",Price=400,PublishID=3,
                ShopStock =10,WarehouseStock=10 ,Title="React.js 指引"},
        };

        public List<Publish> Publishs { get; set; } = new List<Publish>
        {
            new Publish {Id=1,PublishName="東英出版社" },
            new Publish {Id=2,PublishName="國光出版社" },
            new Publish {Id=3,PublishName="蘋果出版社" }
        };
    }
接著就來建立測試吧,因為這只是個簡單練習,所以測試案例都會極為簡單,看一下PublishServiceTest的部份
    [TestClass]
    public class PublishServiceTest
    {

        IPublishService service = null;
        //使用我們Fack的IDbSet
        IDbContext db = new FakeApplicationDbContext();
        public PublishServiceTest()
        {
            //使用我們Fake的出版社資料,並傳進我們模擬的db裡面
            db.Publish = new FakeDbSet<Publish>(new FakeData().Publishs);
            //最後把db注入到service裡面
            service = new PublishService(db);
        }

        [TestMethod]
        public void GetFirst_ReturnIdWillBeOne()
        {
            var id = 1;
            var actual = service.GetFirst(id);

            Assert.IsTrue(actual.Id == id);
        }

        [TestMethod]
        public void GetByName_ReturnResultWillBeOneItem()
        {
            var name = "東英";

            var expected = new List<Publish>
            {
                new Publish
                {
                    Books=null,
                    Id = 1,
                    PublishName = "東英出版社"
                }
            };

            var actual = service.GetByName(name);
            expected.ShouldBeEquivalentTo(actual);
        }
    }
接著再建立相對應的方法
    public interface IPublishService : IEntityService<Publish>
    {
        Publish GetFirst(int id);
        List<Publish> GetByName(string name);
    }

    public class PublishService : EntityService<Publish>, IPublishService
    {
        public PublishService(IDbContext db)
            : base(db)
        {
        }

        public Publish GetFirst(int id)
        {
            return db.Publish.FirstOrDefault(x => x.Id == id);
        }

        public List<Publish> GetByName(string name)
        {
            return db.Publish.Where(x => x.PublishName.Contains(name)).ToList();
        }
    }
結果
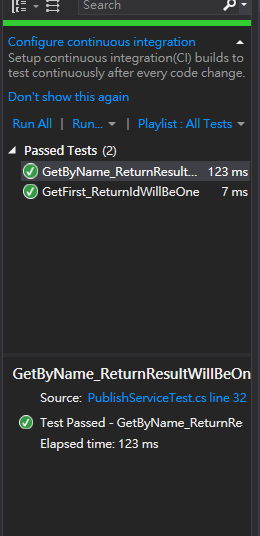
接著為了証明這個測試是正確的,我們來把預設結果修改一下,讓測試是故意出錯的
[TestMethod]
public void GetFirst_ReturnIdWillBeOne()
{
    var id = 1;
    var actual = service.GetFirst(id);

    Assert.IsTrue(actual.Id == 3); //故意把預期的改成3,讓測試出錯
}
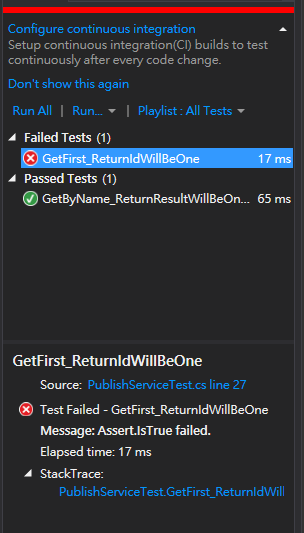
把測試程式碼還原回來,再修改service的邏輯,故意把Id寫死為2,測試測試是否真的有完整包含entity的部份
        public Publish GetFirst(int id)
        {
            return db.Publish.FirstOrDefault(x => x.Id == 2);
        }
然後把測試程式碼改成Equal的方式,讓錯誤提示更友善一點,証明我們的測試是真的如預期在跑的
[TestMethod]
public void GetFirst_ReturnIdWillBeOne()
{
    var id = 1;
    var actual = service.GetFirst(id);

    Assert.AreEqual(1, actual.Id);
}
因為我們寫死了為2,所以撈出來的資料應該是2,但我們預期為1,所以此測試應該會是失敗的
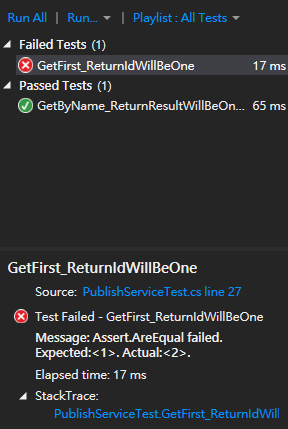
那接下來完成Web Api的程式碼,然後使用我們service已建立的方法
    public class PublishController : ApiController
    {
        IPublishService _service;
        public PublishController(IPublishService service)
        {
            _service = service;
        }

        public IHttpActionResult Post(Publish publish)
        {
            _service.Add(publish);
            return Ok();
        }

        public IHttpActionResult GetById(int id)
        {
            return Ok(_service.GetFirst(id));
        }

        public IHttpActionResult GetByName(string name)
        {
            return Ok(_service.GetByName(name));
        }
    }
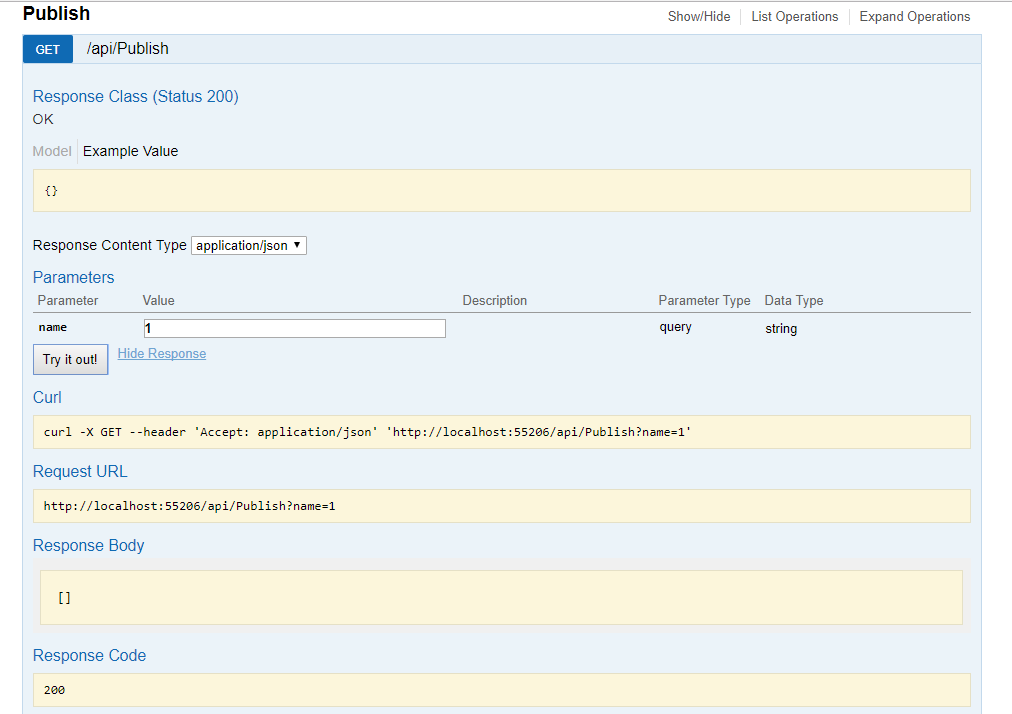
測試結果可以看出,我們確實都還未在db建立任何資料,但是我們已經開始先寫測試,並且完成邏輯,最後才寫調用的程式碼。
整個測試完成了,有用心在看的讀者應該可以發現一件事情,就是我們雖然在測試專案加入了Nsubstitute,但我們卻完全沒有用到耶,是的這邊到目前為此都還不需要用到,不過隨著情境越來越複雜,測試要預期的結果越來越多的狀況下,遲早會用到Nsubstitute這個利器的。
這個架構是筆者大約兩年多以前做的一種架構,算是比較簡便性的,就省略了Repository的部份,只包裝一些最簡單沒有邏輯可言的新刪修為類似Repository的部份,但是我在IEntityService裡面已經直接依賴於DbSet了,當然這邊也可以使用IDbSet然後用注入的方式來做,而此架構能提供我們有很完整的測試保護,當需求開始複雜起來的時候,因為基本架構切分不細,之後要調整都會很好調整,不會有過度over design的感覺,當然因應各種策略實做不同架構,這也只是筆者曾經實做的其中一種,如果再搭配前端框架的話,變化性就又更多了,而通常因應不同策略可能會變成Repository和unit of work的方式,或者使用Dapper的話又會變成不太一樣的架構,不過在筆者的想法裡面,任何架構都只是一種規範,最重要的是能達到自動測試的需求,以可測試可抽換為原則的架構就都會是一個合宜的架構了,這邊並沒有針對很多細節的部份說明的很清楚,筆者認為如果你會來看到這篇文章,你應該不是初學者了,所以寫下這篇文章的角度就是基礎的部份你都理解了,而如果你對此篇有任何看法或意見的話,再請指教和回覆囉。
