這邊是想紀綠一下該如何處理rxjs的observable部份
前言
在angular2裡面,你一定會使用到rxjs,或許你只是用到subscribe,其餘的operator都沒用到,但是如果你想要避免memory leak的話,就需要注意一下了
導覽
- 什麼情境之下不需要unsubscribe
- 在onDestory去unsubscribe
- 做一個陣列去unsubscribe
- 用ng2-destroy-subscribers來unsubscribe
- 用angular2-take-until-destroy來unsubscribe
- 實作一個baseComponent來unsubscribe
- 結論
什麼情境之下不需要unsubscribe
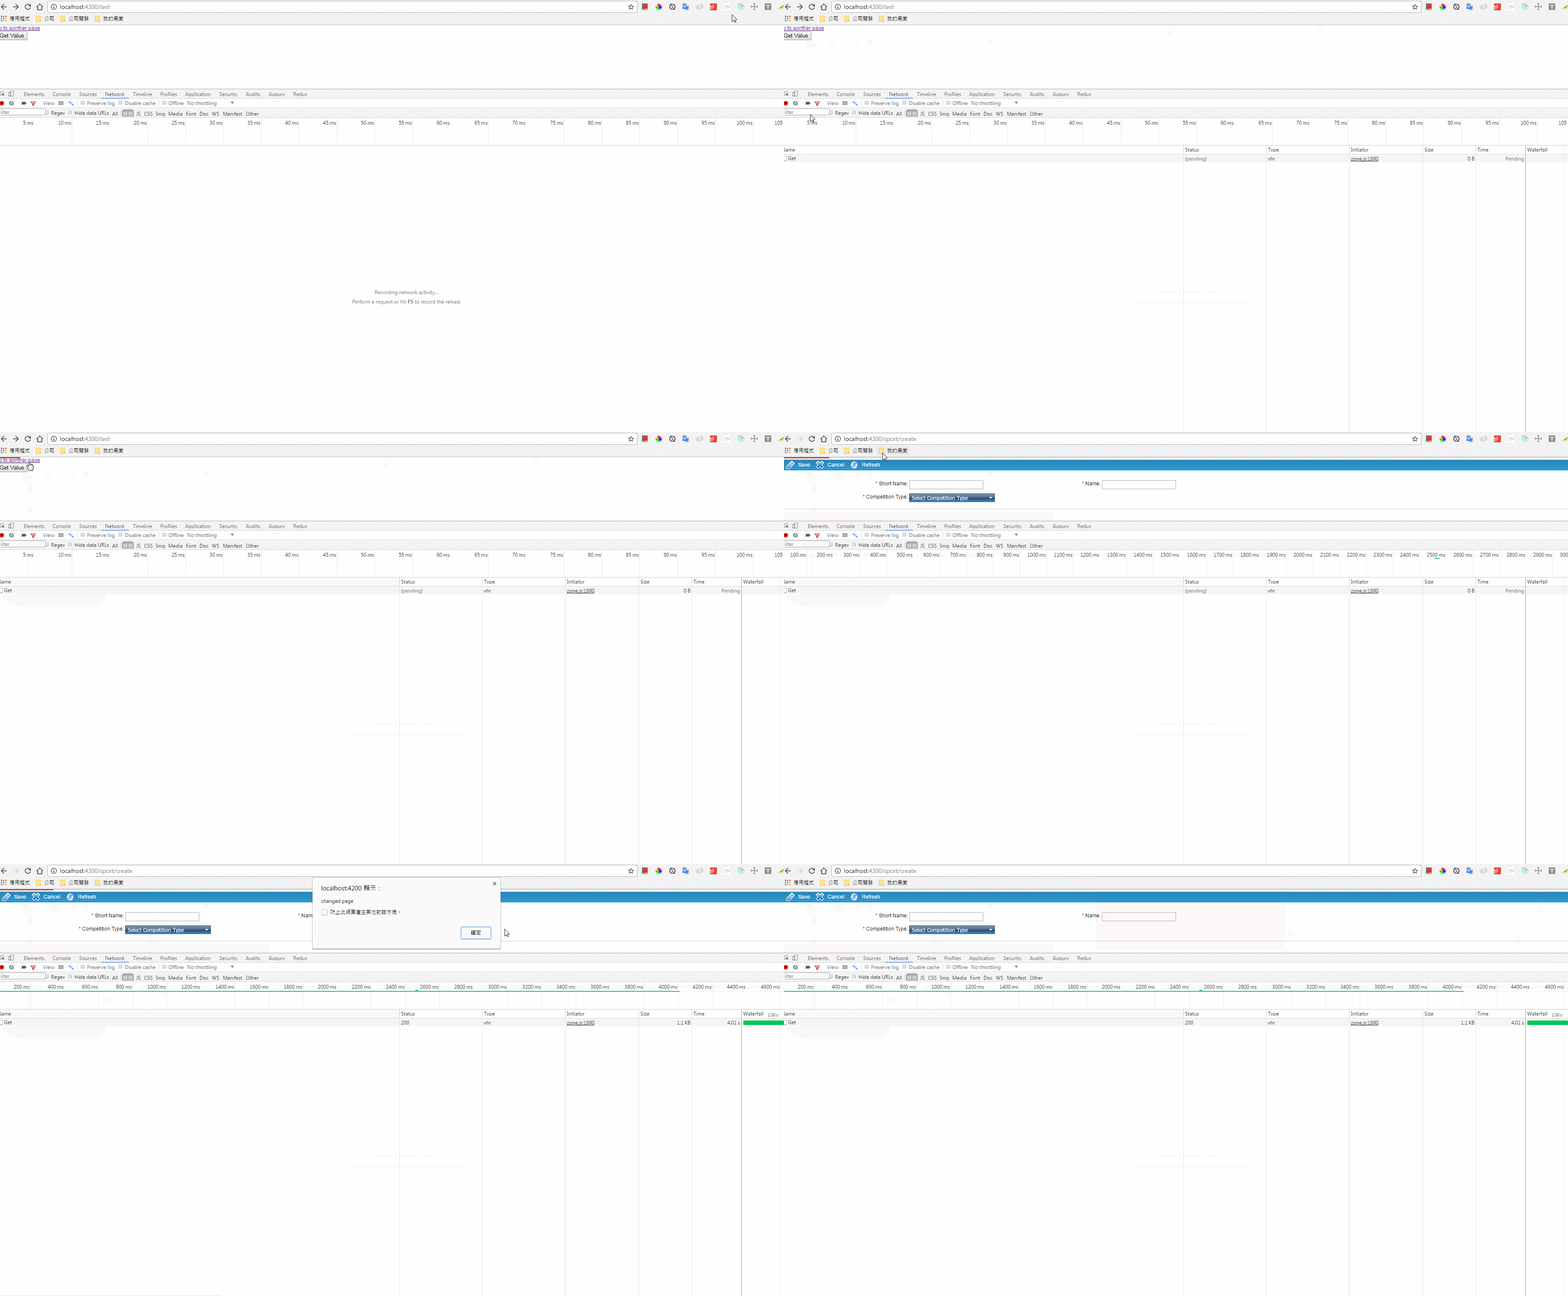
以官方說明來講,有一個pipe叫做是async,當你只要使用這個pipe的話,ng2會自動幫忙的unsubscribe,所以我們應該盡量的使用async來做處理,但現實狀況是我們常常要拿subscribe的值來做一些處理,如果我們沒有去取消訂閱的話,可能只要有一個request過久,當我們換去別的頁面的時候,這個request忽然回傳500的狀況,這時候如果有做錯誤處理的話,就會到了別的頁面,才發生處理這個錯誤的奇怪狀況,下面示範一下如果我讀取一個request過久,使用者忽然跳去別的頁面的話,結果卻會在別的頁面才處理回傳的結果來秀訊息,這樣子就會讓使用者感到非常的疑惑。

雖然有人說明http的部份,angular 2會自動的去unsubscribe,但其實我們最好不管在任何狀況之下,都自己去取消訂閱會是最保險的方式,而且因為spa的狀況,當跳轉頁面的時候,應該就像傳統頁面一樣把所有之前的動作都取消掉才是最理想的。
在onDestory去unsubscribe
這是最基本的方式,就是在onDestroy的時候,自己去手動去取消訂閱,只要我們取消訂閱的話,在client端的http就會cancel掉,效果可以看下圖示例

程式碼如下
export class TestComponent implements OnInit, OnDestroy {
  sportGet: Subscription;

  constructor(private sportService: SportService) { }
  ngOnInit() {

  }

  refresh() {
    this.sportGet = this.sportService.get()
      .subscribe(x => console.log(x));
  }

  ngOnDestroy(): void {
    this.sportGet.unsubscribe();
  }
}
但是這樣子的話卻很麻煩,如果我們一個component有很多observable的話,我們就要定義多個變數而且去手動清除
export class TestComponent implements OnInit, OnDestroy {
  sportGet: Subscription;
  search: Subscription;

  constructor(private sportService: SportService) { }
  ngOnInit() {

  }

  refresh() {
    this.sportGet = this.sportService.get()
      .subscribe(x => console.log(x));

    this.search = this.sportService.search()
      .subscribe(x => console.log(x));
  }

  ngOnDestroy(): void {
    this.sportGet.unsubscribe();
    this.search.unsubscribe();
  }
}
所以我們就得想個辦法去更方便的處理這個問題。
做一個陣列去unsubscribe
也就是定義一個Subscription的陣列,最後在onDestroy的時候,用迴圈去取消訂閱
export class TestComponent implements OnInit, OnDestroy {
  subscriptions: Subscription[] = [];

  constructor(private sportService: SportService) { }
  ngOnInit() {

  }

  refresh() {
    this.subscriptions.push(this.sportService.get()
      .subscribe(x => console.log(x)));

    this.subscriptions.push(this.sportService.search()
      .subscribe(x => console.log(x)));
  }

  ngOnDestroy(): void {
    this.subscriptions.forEach(s => s.unsubscribe());
  }
}
用ng2-destroy-subscribers來unsubscribe
這個就可以直接去npm下載囉,github位置可以參考https://github.com/2muchcoffeecom/ng2-destroy-subscribers,這是使用Decorator的方式來做取消訂閱,不過請注意一下,如果照著官方的說明去實做,會有點問題,如果我們一個訂閱同時觸發多個的話,他只會取消最後一個,所以我把程式碼改成用陣列的方式,就可以自動取消訂閱囉,這個好處是我們就可以不用再多實做OnDestroy了。
@DestroySubscribers()
export class TestComponent implements OnInit {
  subscriptions: any = [];

  constructor(private sportService: SportService) { }
  ngOnInit() {

  }

  refresh() {
    this.subscriptions.push(this.sportService.get()
      .subscribe(x => console.log(x)));

    this.subscriptions.push(this.sportService.search()
      .subscribe(x => console.log(x)));
  }
}
用angular2-take-until-destroy來unsubscribe
這個也是直接參考npm囉,位置可參考https://github.com/NetanelBasal/angular2-take-until-destroy,這個也是使用Decorator的方式,官方說明也很清楚,我也把我自己實做的程式碼貼上來供參考,這個好處是不用再多定義一個陣列,而且每次訂閱都要新增進陣列裡,用使operator的方式,感覺上程式碼可讀性比較好。
@TakeUntilDestroy
export class TestComponent implements OnInit {

  constructor(private sportService: SportService) { }
  ngOnInit() {

  }

  refresh() {
    this.sportService.get()
      .takeUntil((<any>this).componentDestroy())
      .subscribe(x => console.log(x));

    this.subscriptions.push(this.sportService.search()
      .takeUntil((<any>this).componentDestroy())
      .subscribe(x => console.log(x));
  }
}
實作一個baseComponent來unsubscribe
這個方式也是很方便,而且其實有時候我們難免會有所有的component都有相同的實作邏輯,這時候用這種方式就很適合
先做一個父元件吧
export abstract class BaseComponent implements OnDestroy {
  protected _destroy$ = new Subject<void>();

  constructor() {
  }

  ngOnInit() {
  }

  ngOnDestroy(): void {
    this._destroy$.next();
    this._destroy$.unsubscribe();
  }
}
接著就是繼承後怎麼使用了
export class TestComponent extends BaseComponent implements OnInit {

  constructor(private sportService: SportService) {
    super();
  }
  ngOnInit() {

  }

  refresh() {
    this.sportService.get()
      .takeUntil(this._destroy$)
      .subscribe(x => console.log(x));

    this.subscriptions.push(this.sportService.search()
      .takeUntil(this._destroy$)
      .subscribe(x => console.log(x));
  }
}
結論
其實還有很多種取消訂閱的方式,有興趣的讀者可以自行去搜尋看看各種做法,如果有什麼更好的建議或發現更好的做法,再請指導筆者一下。

