摘要:[WebAPI]以Basic Authentication驗證(Windows驗證或資料庫驗證)WebAPI 2
由於基本驗證是根據RFC 2617實作,而且其數位憑證必須透過加密的方式傳送,不然就會被人看光光,所以先來設定IIS如何使用https
首先先做一次Windows驗證方式的https
建立憑證:
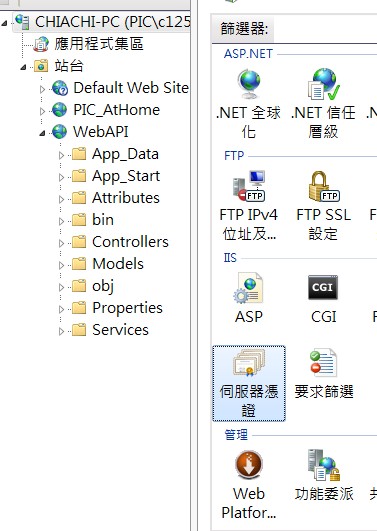
首先打開iis, 滑鼠先點一下自己的pc名稱之後,選擇右方的(伺服器憑證選項)
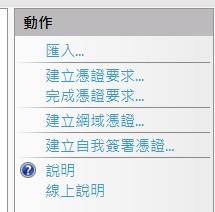
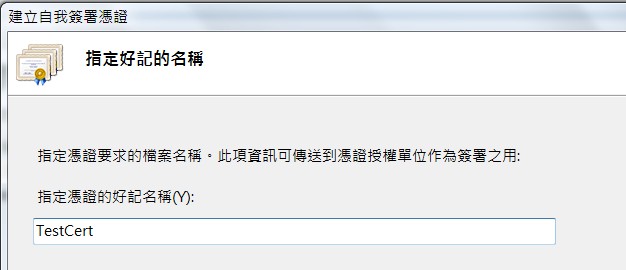
然後選擇(建立自我簽署憑證),然後打入自己希望的名稱之後,按下確認就建立憑證成功了
iis就是利用剛剛建立的憑證,去檢查使用者打入的帳號密碼是否為本機電腦帳號之一
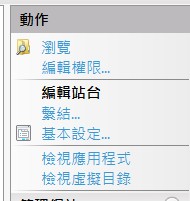
然後我們隨便選擇一個站台來使用剛剛產生的憑證,選擇某某站台之後,選擇右方的(繫結)選項
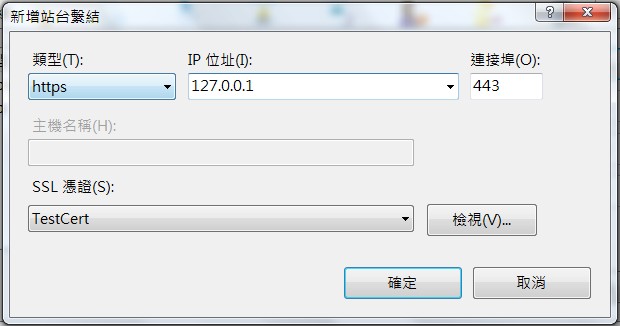
然後按下(新增),類型就選擇https,ip就選本機,port就先用預設443就好,SSL憑證就選擇剛剛我們手動產生的憑證
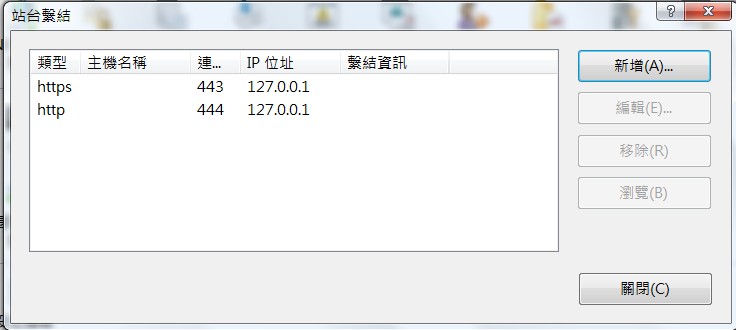
然後繫結就設定完畢了,於是乎這個網站就有兩種繫結http + https
https的效能只有https的十分之一,所以如果不是很需要保密的需求
盡量使用http就好,這個可以在WebAPI的Controller裡面設定不同的
Action是否使用https,屆時測試的時候只要分別打入
https://127.0.0.1:443/WebAPI的使用路徑/
http://127.0.0.1:444/WebAPI的使用路徑/
便可使用https或是http來測試WebAPI
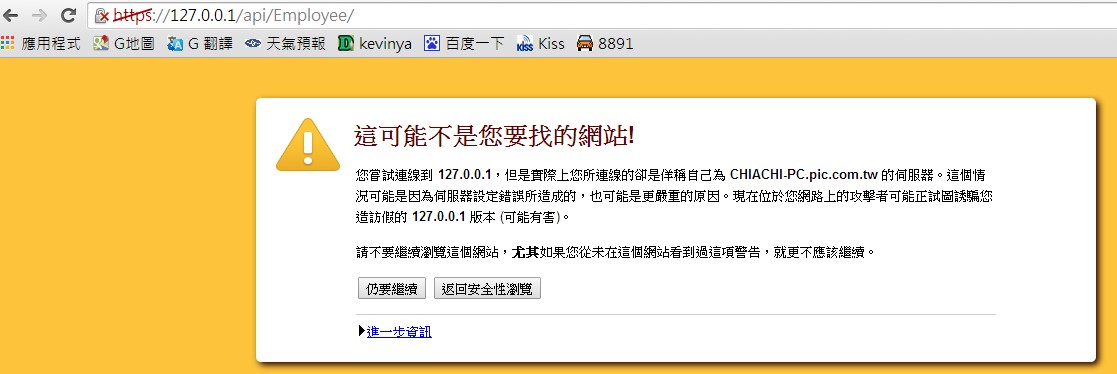
不過在測試階段的話,當然也可以用iis express去測試https就好
用iis express的話,不用手動建立憑證(因為系統已經自動建了)
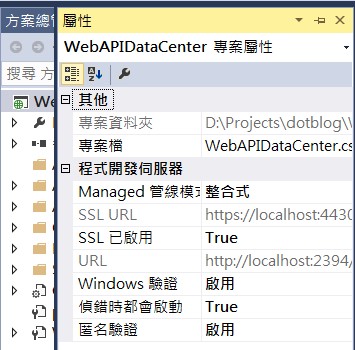
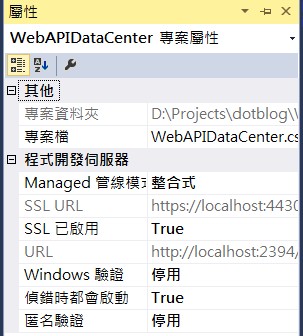
也不用像剛剛一樣手動加入https的繫結,只要滑鼠左鍵點選專案之後
按下F4的屬性裡面,把SSL啟用以及Windows驗證啟用即可。
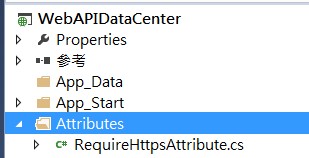
public class RequireHttpsAttribute : AuthorizationFilterAttribute
{
    public override void OnAuthorization(HttpActionContext actionContext)
    {
        if (actionContext.Request.RequestUri.Scheme != Uri.UriSchemeHttps)
        {
            actionContext.Response = new HttpResponseMessage(System.Net.HttpStatusCode.Forbidden)
            {
                ReasonPhrase = "HTTPS Required"
            };
        }
        else
        {
            base.OnAuthorization(actionContext);
        }
    }
}
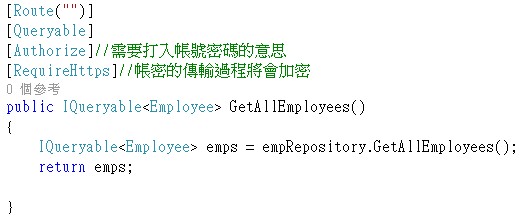
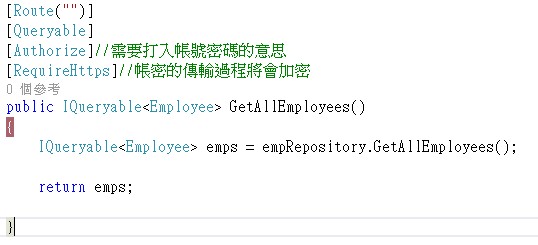
然後要驗證的就加上[Authorize]與[RequireHttps]屬性,
依照需求自行設定,自己要確記https的效能只有http的十分之一
有必要才用,所以我也不是每一個Action都設定要驗證。
ps.有需要打帳號密碼的時候,帳密傳輸時才需要用https
沒人這麼無聊只加其中一樣屬性吧。
namespace WebHostBasicAuth.Modules
{
    public class BasicAuthHttpModule : IHttpModule
    {
        private const string Realm = "My Realm";

        public void Init(HttpApplication context)
        {
            // Register event handlers
            context.AuthenticateRequest += OnApplicationAuthenticateRequest;
            context.EndRequest += OnApplicationEndRequest;
        }

        private static void SetPrincipal(IPrincipal principal)
        {
            Thread.CurrentPrincipal = principal;
            if (HttpContext.Current != null)
            {
                HttpContext.Current.User = principal;
            }
        }

        // TODO: Here is where you would validate the username and password.
        private static bool CheckPassword(string username, string password)
        {
            return username == "user" && password == "password";
        }

        private static bool AuthenticateUser(string credentials)
        {
            bool validated = false;
            try
            {
                var encoding = Encoding.GetEncoding("iso-8859-1");
                credentials = encoding.GetString(Convert.FromBase64String(credentials));

                int separator = credentials.IndexOf(':');
                string name = credentials.Substring(0, separator);
                string password = credentials.Substring(separator + 1);

                validated = CheckPassword(name, password);
                if (validated)
                {
                    var identity = new GenericIdentity(name);
                    SetPrincipal(new GenericPrincipal(identity, null));
                }
            }
            catch (FormatException)
            {
                // Credentials were not formatted correctly.
                validated = false;

            }
            return validated;
        }

        private static void OnApplicationAuthenticateRequest(object sender, EventArgs e)
        {
            var request = HttpContext.Current.Request;
            var authHeader = request.Headers["Authorization"];
            if (authHeader != null)
            {
                var authHeaderVal = AuthenticationHeaderValue.Parse(authHeader);

                // RFC 2617 sec 1.2, "scheme" name is case-insensitive
                if (authHeaderVal.Scheme.Equals("basic",
                        StringComparison.OrdinalIgnoreCase) &&
                    authHeaderVal.Parameter != null)
                {
                    AuthenticateUser(authHeaderVal.Parameter);
                }
            }
        }

        // If the request was unauthorized, add the WWW-Authenticate header
        // to the response.
        private static void OnApplicationEndRequest(object sender, EventArgs e)
        {
            var response = HttpContext.Current.Response;
            if (response.StatusCode == 401)
            {
                response.Headers.Add("WWW-Authenticate",
                    string.Format("Basic realm=\"{0}\"", Realm));
            }
        }

        public void Dispose()
        {
        }
    }
}
然後呼叫我們改寫微軟提供的CheckPassword函數,去資料庫檢驗此組帳號密碼是否存在
private static bool CheckPassword(string username, string password)
        {
            WebAPIEntities db = new WebAPIEntities();
            //存在此筆帳號
            bool chkAccount = db.usp_chkLogin(username, password).First() == 1 ? true : false;
            return chkAccount;

        }
並且在Web.config裡面加上httpModule的設定來驗證
以下是順便紀錄如何在EF的情況下,呼叫預存程序來檢查使用者傳入的帳號密碼
要把帳號密碼存在資料庫,當然要先開一個資料表table存帳號密碼,姑且把資料表名稱取為Accounts
然後隨便新增一筆帳號
 insert into Accounts(uid,pwd)
 values('ironman',pwdencrypt('iampassword'))
create procedure usp_chkLogin
 @uid varchar(50),
 @pwd varchar(150)
as
 declare @exist int
 set @exist = 0
 set @exist = (
 select PWDCOMPARE(@pwd, Accounts.pwd)
 from Accounts
 where Accounts.uid = @uid)
 select isnull(@exist,0)
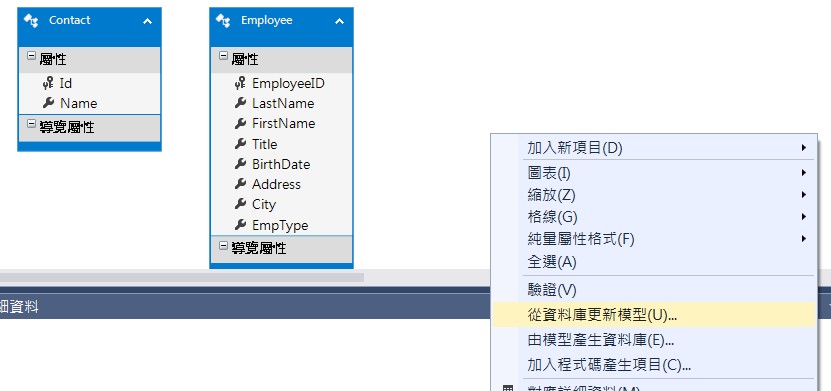
最後再記得更新Model資料夾裡面的EF物件(這裡的情況是Ado.net Entity Data Model),
就可以像上面CheckPassword函數一樣直接呼叫預存程序db.usp_chkLogin(ooxx)來用了
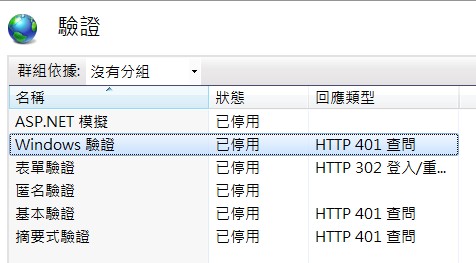
最後記得把IIS Express或IIS的 windows驗證還有匿名驗證關掉
寫到最後,發現一個很嚴重的問題,就是使用httpModule驗證的話
會導致http 以及 https都需要輸入帳號密碼
如此一來就會綁死只能用https
還是得花時間研究一下http message handler來實作這個驗證吧....聽說http message handler比較彈性
可以達成雙通道http + https
先這樣
以下改用http message handler做驗證,
並主要參考
Basic HTTP authentication in ASP.NET Web API using message handlers
好處就是:可以藉由[Authorize]屬性動態設定哪個Action,
哪個Controller需不需要驗證(驗證務必搭配[RequireHttps]屬性)了
先加入一個Message Handler類別,比較要注意的就是.CreatePrincipal(ooxx)的部分寫了兩次的原因,
是因為第一個是WinForm去取得驗證,第二個是WebForm去取得驗證,我們無法確定Client是哪一種
所以都要加上
using System;
using System.Collections.Generic;
using System.Linq;
using System.Net;
using System.Net.Http;
using System.Net.Http.Headers;
using System.Text;
using System.Threading;
using System.Web;
namespace WebAPIDataCenter
{
public class BasicAuthMessageHandler : DelegatingHandler
{
private const string BasicAuthResponseHeader = "WWW-Authenticate";
private const string BasicAuthResponseHeaderValue = "Basic";
public IProvidePrincipal PrincipalProvider { get; set; }
protected override System.Threading.Tasks.Task<HttpResponseMessage> SendAsync(
HttpRequestMessage request,
CancellationToken cancellationToken)
{
AuthenticationHeaderValue authValue = request.Headers.Authorization;
if (authValue != null && !String.IsNullOrWhiteSpace(authValue.Parameter))
{
Credentials parsedCredentials = ParseAuthorizationHeader(authValue.Parameter);
if (parsedCredentials != null)
{
//這個是winform用的
Thread.CurrentPrincipal = PrincipalProvider
.CreatePrincipal(parsedCredentials.Username, parsedCredentials.Password);
//這是WebForm用的
request.GetRequestContext().Principal =
PrincipalProvider.CreatePrincipal(parsedCredentials.Username, parsedCredentials.Password);
}
}
return base.SendAsync(request, cancellationToken)
.ContinueWith(task =>
{
var response = task.Result;
if (response.StatusCode == HttpStatusCode.Unauthorized
&& !response.Headers.Contains(BasicAuthResponseHeader))
{
response.Headers.Add(BasicAuthResponseHeader
, BasicAuthResponseHeaderValue);
}
return response;
});
}
private Credentials ParseAuthorizationHeader(string authHeader)
{
string[] credentials = Encoding.ASCII.GetString(Convert
.FromBase64String(authHeader))
.Split(
new[] { ':' });
if (credentials.Length != 2 || string.IsNullOrEmpty(credentials[0])
|| string.IsNullOrEmpty(credentials[1])) return null;
return new Credentials()
{
Username = credentials[0],
Password = credentials[1],
};
}
}
}
然後加入一個簡單的類別,以供上面的Message Handler傳入帳號密碼
using System;
using System.Collections.Generic;
using System.Linq;
using System.Web;

namespace WebAPIDataCenter
{
    public class Credentials
    {
        public string Username { get; set; }
        public string Password { get; set; }
    }
}
然後加入一個interface,讓developer自行實作客戶需求的驗證方式
public interface IProvidePrincipal
{
    IPrincipal CreatePrincipal(string username, string password);
}
以下就是簡單實作interface的類別內容,到資料庫檢查帳號密碼是否存在
並順便註記Emprepository.cs的CheckAccountExist的內容(透過EF呼叫預存程序)
using System.Security.Principal;
using WebAPIDataCenter.Services;

namespace WebAPIDataCenter
{
    public class DummyPrincipalProvider : IProvidePrincipal
    {
        private EmployeeRepository empRepository = new EmployeeRepository();

        public IPrincipal CreatePrincipal(string uid, string pwd)
        {
            if (empRepository.CheckAccountExist(uid,pwd)== false)
            {
                return null;
            }

            //GenericIdentity??
            var identity = new GenericIdentity(uid);
            //GenericPrincipal??
            IPrincipal principal = new GenericPrincipal(identity, new[] { "User" });
            return principal;
        }
    }
}
public Boolean CheckAccountExist( string uid , string pwd)
        {
            WebAPIEntities db = new WebAPIEntities();
            Boolean accountExisted = db.usp_chkLogin(uid, pwd).First() == 1 ? true : false;
            return accountExisted;
        }
並且於Gloabal.asax加入這個message handler, 之後只要在Controller或任何Action加入[Authorize]屬性,即可輸入帳密進行驗證, 如下
GlobalConfiguration.Configuration
                .MessageHandlers.Add(new BasicAuthMessageHandler()
                {
                    PrincipalProvider = new DummyPrincipalProvider()
                });
參考資料:
Entity Framwork 使用 SQL的PWDCOMPARE函數
ASP.NET MVC4 - Web API 開發系列 [從無到有,建立 CRUD 的應用程式]
Create request with POST, which response codes 200 or 201 and content
Using the ASP.NET Web API UrlHelper
Basic HTTP authentication in ASP.NET Web API using message handlers
