自從 Microsoft 推出地圖服務到目前為止,曾歷經了相當多的改朝換代的地圖服務方式,在此不論過去的功過,先把目光投向 Azure 上近期推出的其中一項雲端的 PaaS 服務: Azure Maps。
Azure Maps 所提供的服務當中,也提供了室內地圖 (Indoor Maps) 的部分,讓地圖的應用不再侷限於室外資訊的使用,而是可以朝向室內來發展,例如: 在停車場當中車道與車位佔用資訊、展場或市集的攤位販售資訊、辦公大樓的各會議室資訊是否使用中(或其溫度、濕度狀況監控)...等,這些都可以進一步協助應用廠商,完成在某個室內地域中處理其資訊的最後一哩路,讓使用者在獲取地域資料上能更加透明與便利。
其詳細介紹可參閱微軟提供的 Blog:
https://azure.microsoft.com/zh-tw/blog/azure-maps-creator-now-available-in-preview/
而此篇要根據前兩篇的設定來建立 Web 的前端頁面,其參考文件為
https://docs.microsoft.com/zh-tw/azure/azure-maps/how-to-use-indoor-module
首先,打開自行熟悉的 HTML 編輯相關的 IDE 工具(在本文選擇使用 Visual Studio Code)建立一份基本的 HTML 網頁頁面:

其原始碼如下:
<!DOCTYPE html>
<html>
    <head>
        <meta charset="utf-8" />
        <meta name="viewport" content="width=device-width, user-scalable=no" />
        <title>My Azure Map: Indoor Maps Demo</title>
    </head>
    <body>

    </body>
</html>
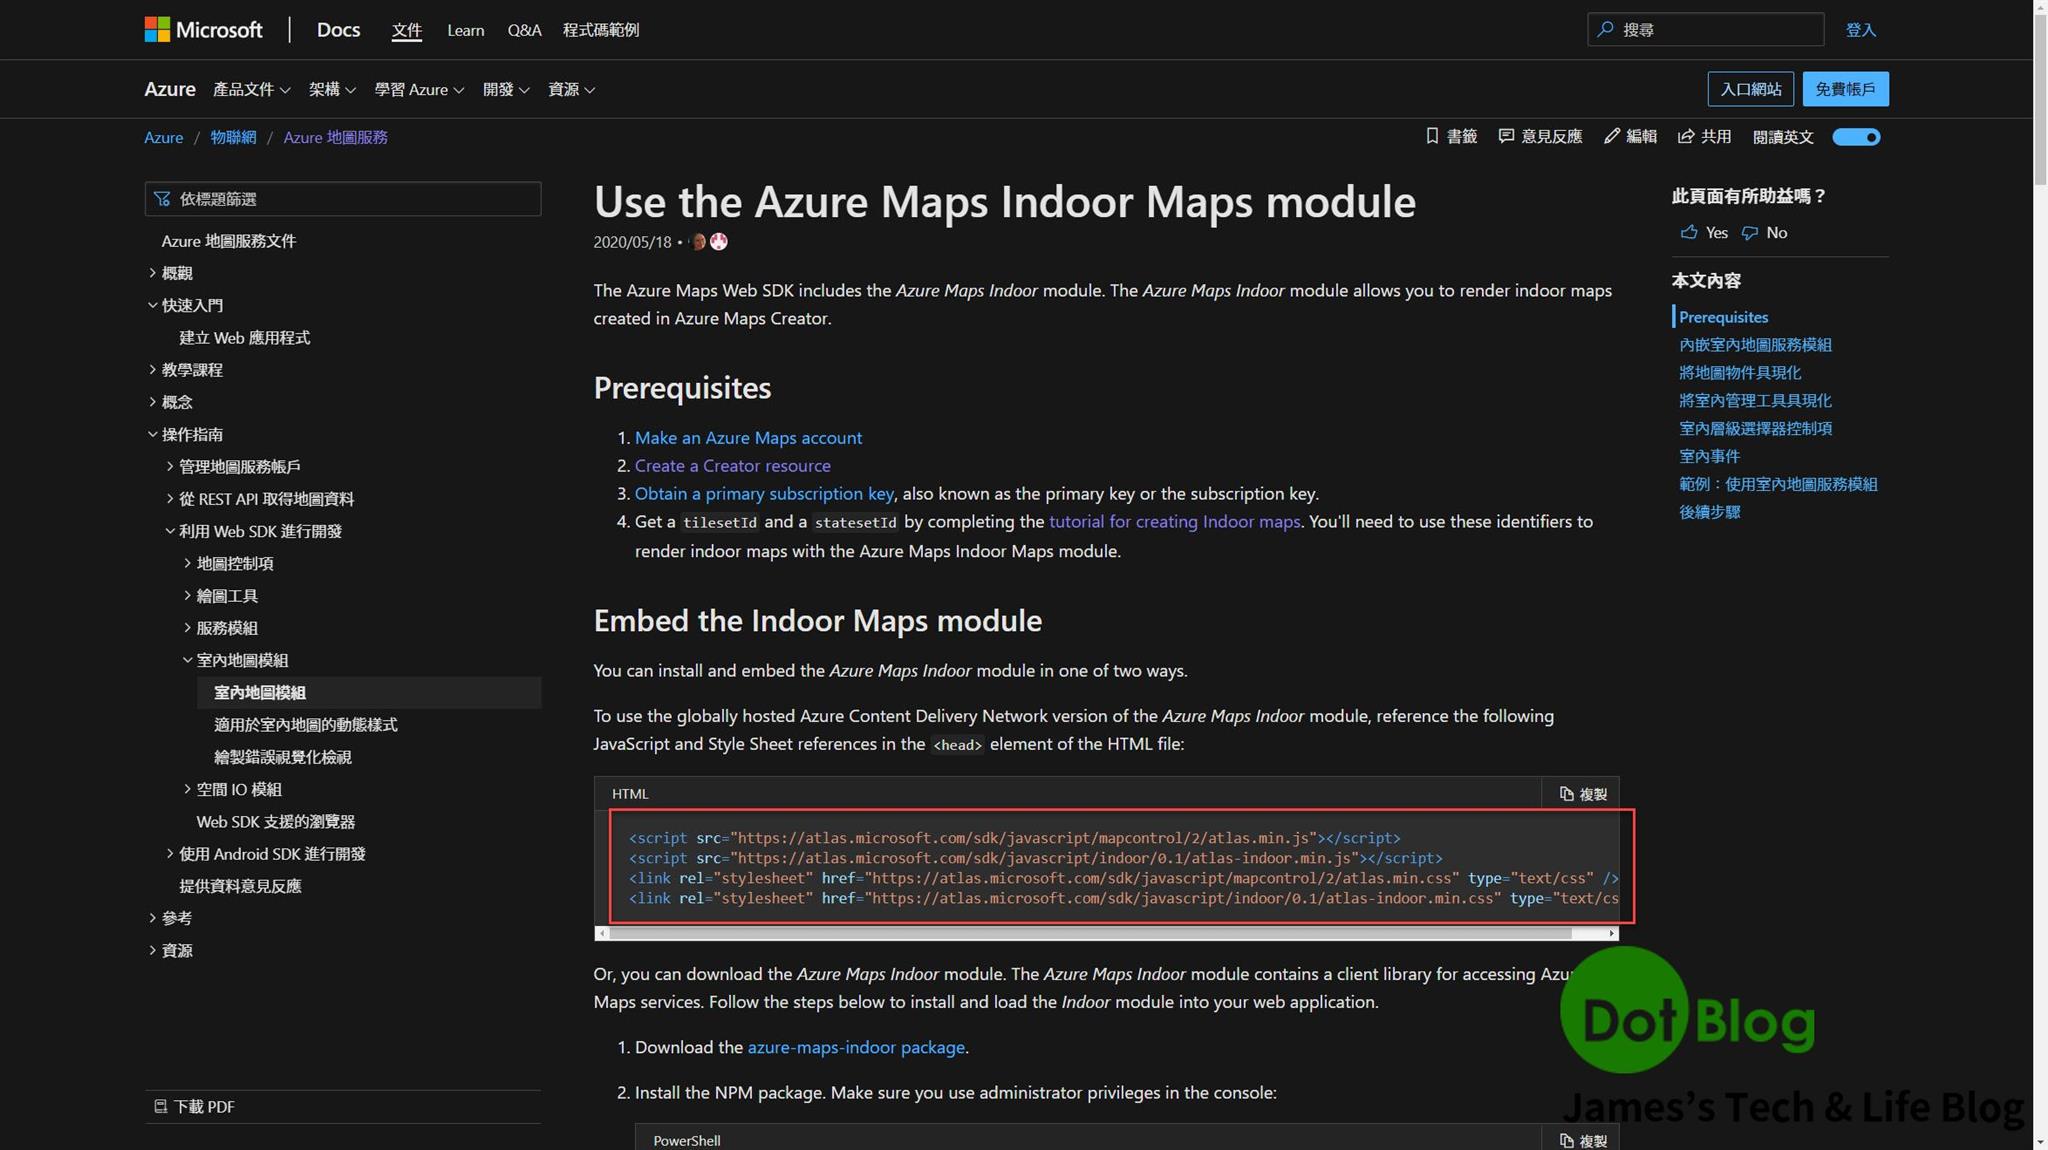
接著,在網頁當中要針對 Indoor Maps 使用時所需的 javascript 跟 css 引用,如文件上所提及:
原始碼如下:
  <script src="https://atlas.microsoft.com/sdk/javascript/mapcontrol/2/atlas.min.js"></script>
  <script src="https://atlas.microsoft.com/sdk/javascript/indoor/0.1/atlas-indoor.min.js"></script>
  <link rel="stylesheet" href="https://atlas.microsoft.com/sdk/javascript/mapcontrol/2/atlas.min.css" type="text/css" />
  <link rel="stylesheet" href="https://atlas.microsoft.com/sdk/javascript/indoor/0.1/atlas-indoor.min.css" type="text/css"/>
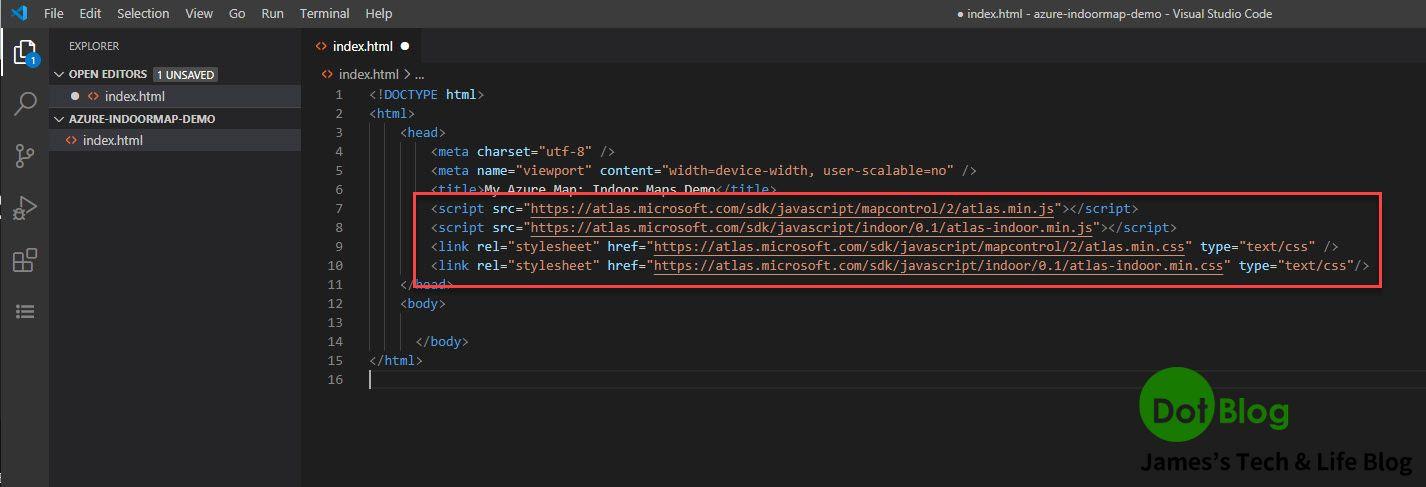
接著就回到編輯器中把上述步驟的 javascript 與 css 原始碼加入到 <head></head> 之間:
接著就是在這個網頁頁面上撰寫一些基本的 html/css 的部分:
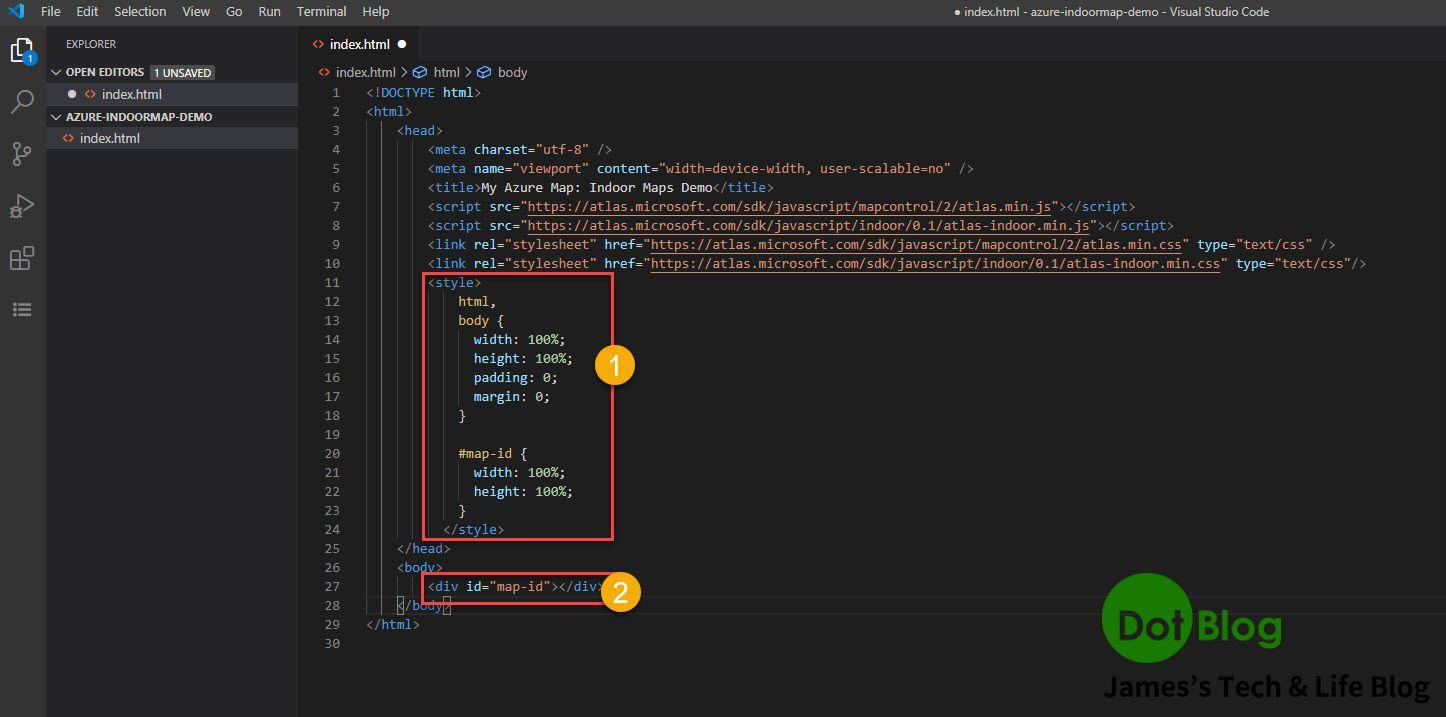
上圖 點 1 的原始碼如下:
<style>
   html, body {
       width: 100%;
       height: 100%;
       padding: 0;
       margin: 0;
   }

   #map-id {
       width: 100%;
       height: 100%;
   }
<style>
上圖 點 2 的原始碼如下:
<div id="map-id"></div>
接著在加入 javascript 的部分:
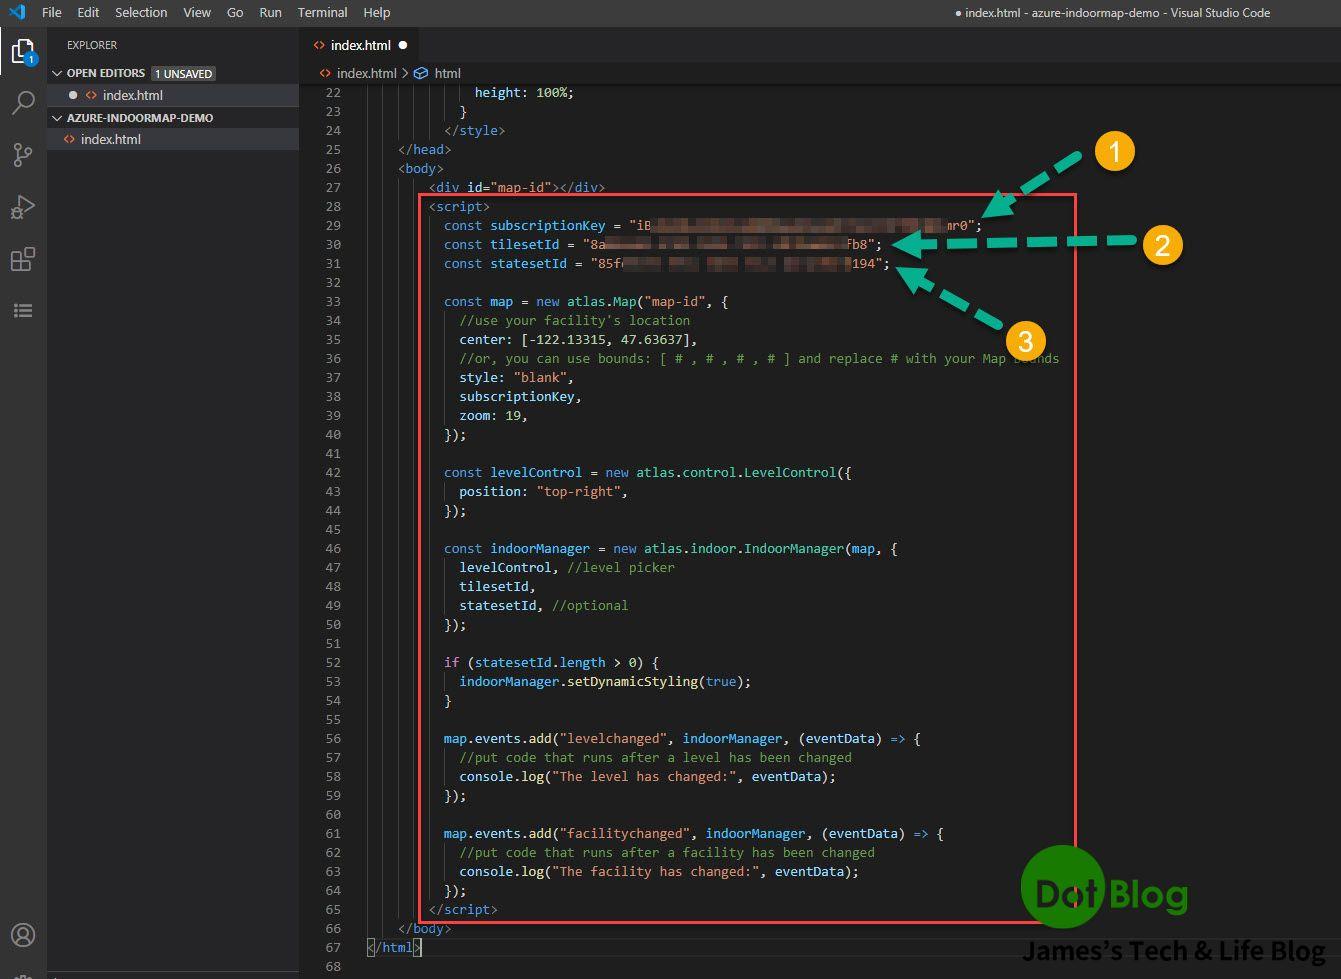
點 2 、點 3 皆在前一篇文章已經建立好,請直接使用。
其原始碼如下:
<script>
  const subscriptionKey = "<你的 Azure Maps 訂閱 ShareKey>";
  const tilesetId = "<你在 Maps Creator 服務中建立的 tilesetId>";
  const statesetId = "<你在 Maps Creator 服務中建立的 statesetId>";

  const map = new atlas.Map("map-id", {
    //use your facility's location
    center: [-122.13315, 47.63637],
    //or, you can use bounds: [ # , # , # , # ] and replace # with your Map bounds
    style: "blank",
    subscriptionKey,
    zoom: 19,
  });

  const levelControl = new atlas.control.LevelControl({
    position: "top-right",
  });

  const indoorManager = new atlas.indoor.IndoorManager(map, {
    levelControl, //level picker
    tilesetId,
    statesetId, //optional
  });

  if (statesetId.length > 0) {
    indoorManager.setDynamicStyling(true);
  }

  map.events.add("levelchanged", indoorManager, (eventData) => {
    //put code that runs after a level has been changed
    console.log("The level has changed:", eventData);
  });

  map.events.add("facilitychanged", indoorManager, (eventData) => {
    //put code that runs after a facility has been changed
    console.log("The facility has changed:", eventData);
  });
</script>
https://docs.microsoft.com/zh-tw/azure/azure-maps/how-to-use-indoor-module#example-use-the-indoor-maps-module
其 ShareKey、tilesetId、statesetId 的值,請替換成自己所建立的服務來使用。

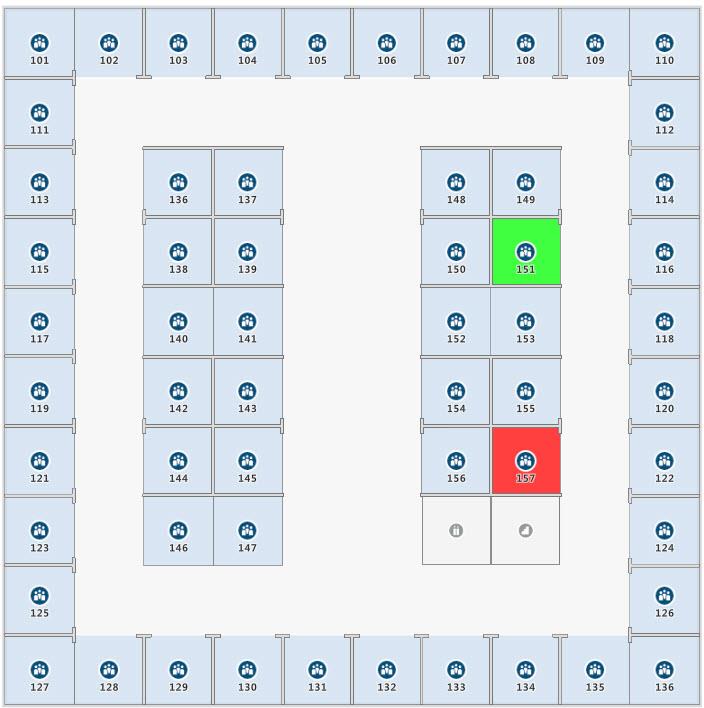
此範例的展示為三個樓層的會議室(或攤位),可以了解是否有被佔用等資訊。
(但因前篇跳過了一些步驟沒有實作其測試,只能瀏覽三個層樓的規劃狀態)
有興趣的人可以再參考此篇文件的介紹來完成:
"https://docs.microsoft.com/zh-tw/azure/azure-maps/indoor-map-dynamic-styling"
I'm a Microsoft MVP - Developer Technologies (From 2015 ~).

I focus on the following topics: Xamarin Technology, Azure, Mobile DevOps, and Microsoft EM+S.
If you want to know more about them, welcome to my website:
https://jamestsai.tw
本部落格文章之圖片相關後製處理皆透過 Techsmith 公司 所贊助其授權使用之 "Snagit" 與 "Snagit Editor" 軟體製作。