自從 Microsoft 推出地圖服務到目前為止,曾歷經了相當多的改朝換代的地圖服務方式,在此不論過去的功過,先把目光投向 Azure 上近期推出的其中一項雲端的 PaaS 服務: Azure Maps。
Azure Maps 所提供的服務當中,也提供了室內地圖 (Indoor Maps) 的部分,讓地圖的應用不再侷限於室外資訊的使用,而是可以朝向室內來發展,例如: 在停車場當中車道與車位佔用資訊、展場或市集的攤位販售資訊、辦公大樓的各會議室資訊是否使用中(或其溫度、濕度狀況監控)...等,這些都可以進一步協助應用廠商,完成在某個室內地域中處理其資訊的最後一哩路,讓使用者在獲取地域資料上能更加透明與便利。
其詳細介紹可參閱微軟提供的 Blog:
https://azure.microsoft.com/zh-tw/blog/azure-maps-creator-now-available-in-preview/
前篇 "Azure Maps - 室內地圖 (Indoor Maps) 文件範例操作演練 (I)" 在 Azure Maps 中設定好 Indoor Maps 的服務了,本篇接著介紹後續範例的使用。
其 Azure Maps 的 Indoor Maps 範例 使用介紹開始之前,我們先來下載 "Sample Drawing Package"。
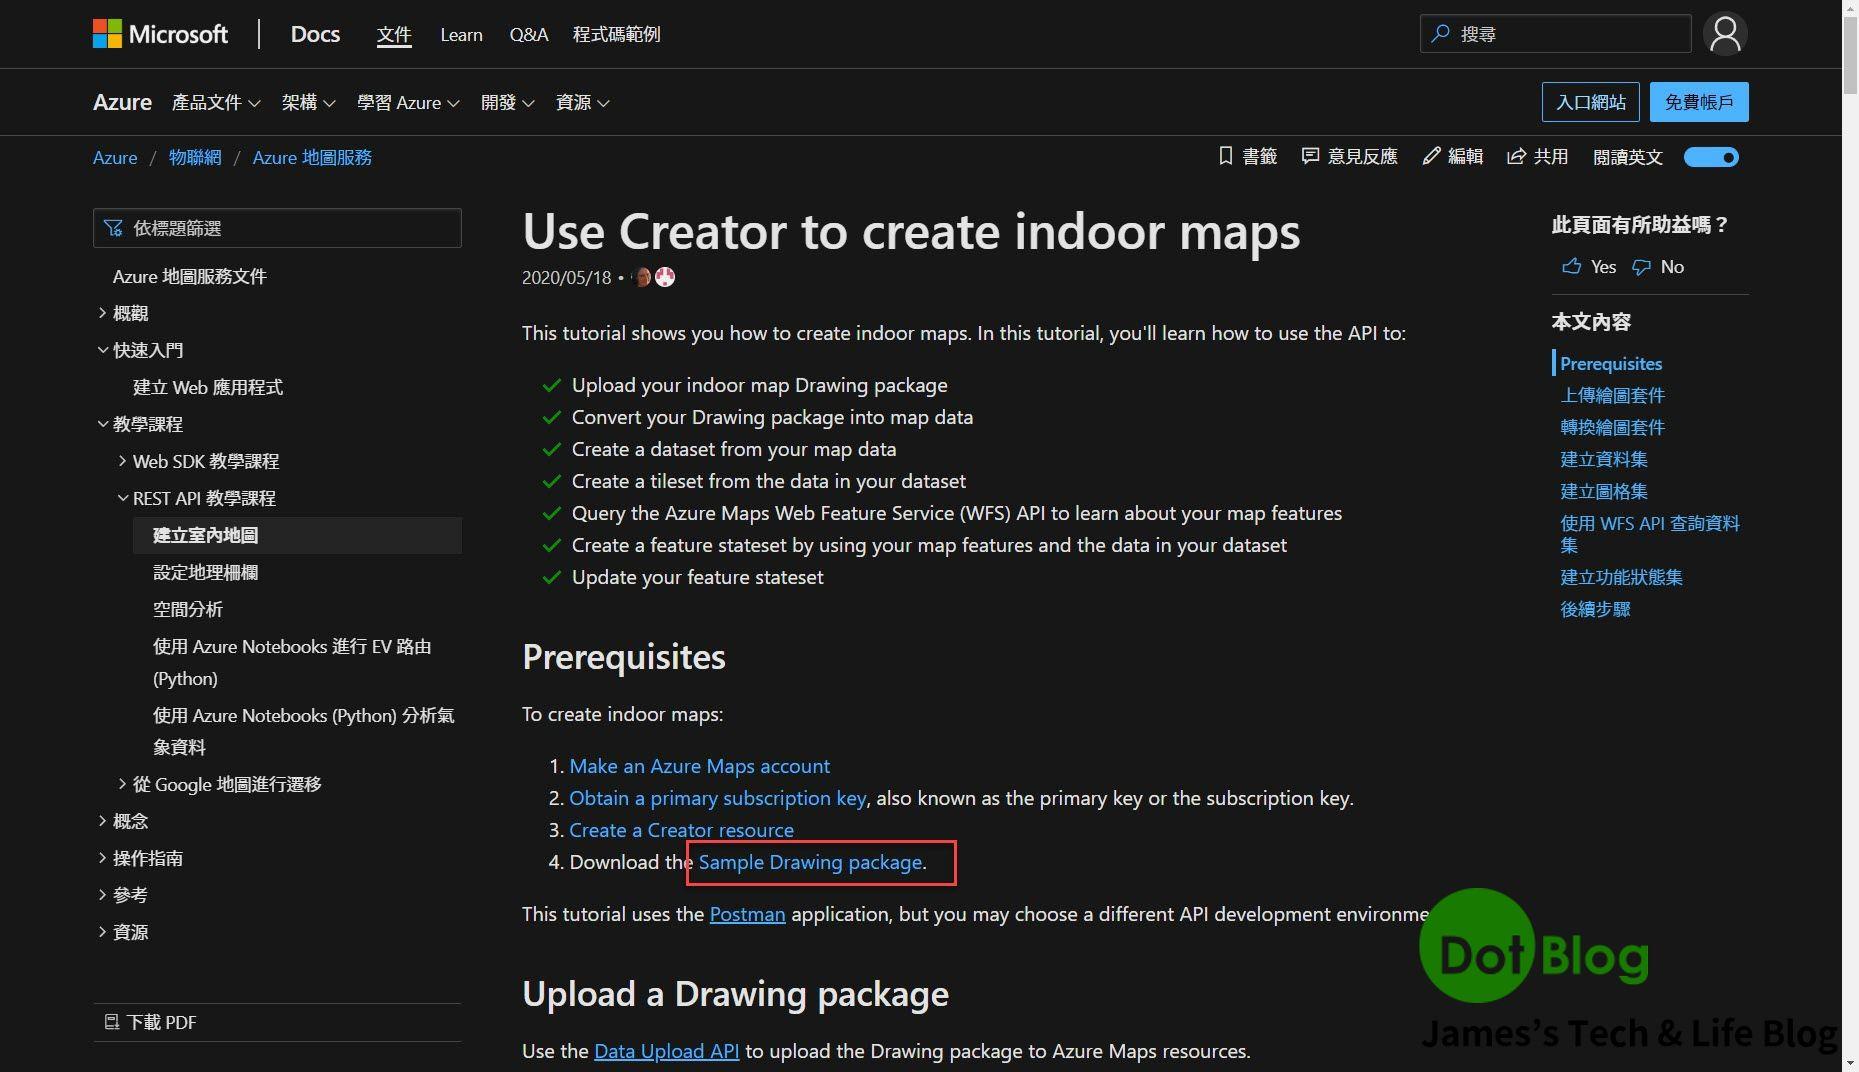
會轉跳到 GitHub 的 Repo,我們要它其中的 "Sample - Contoso Drawing Package.zip"。
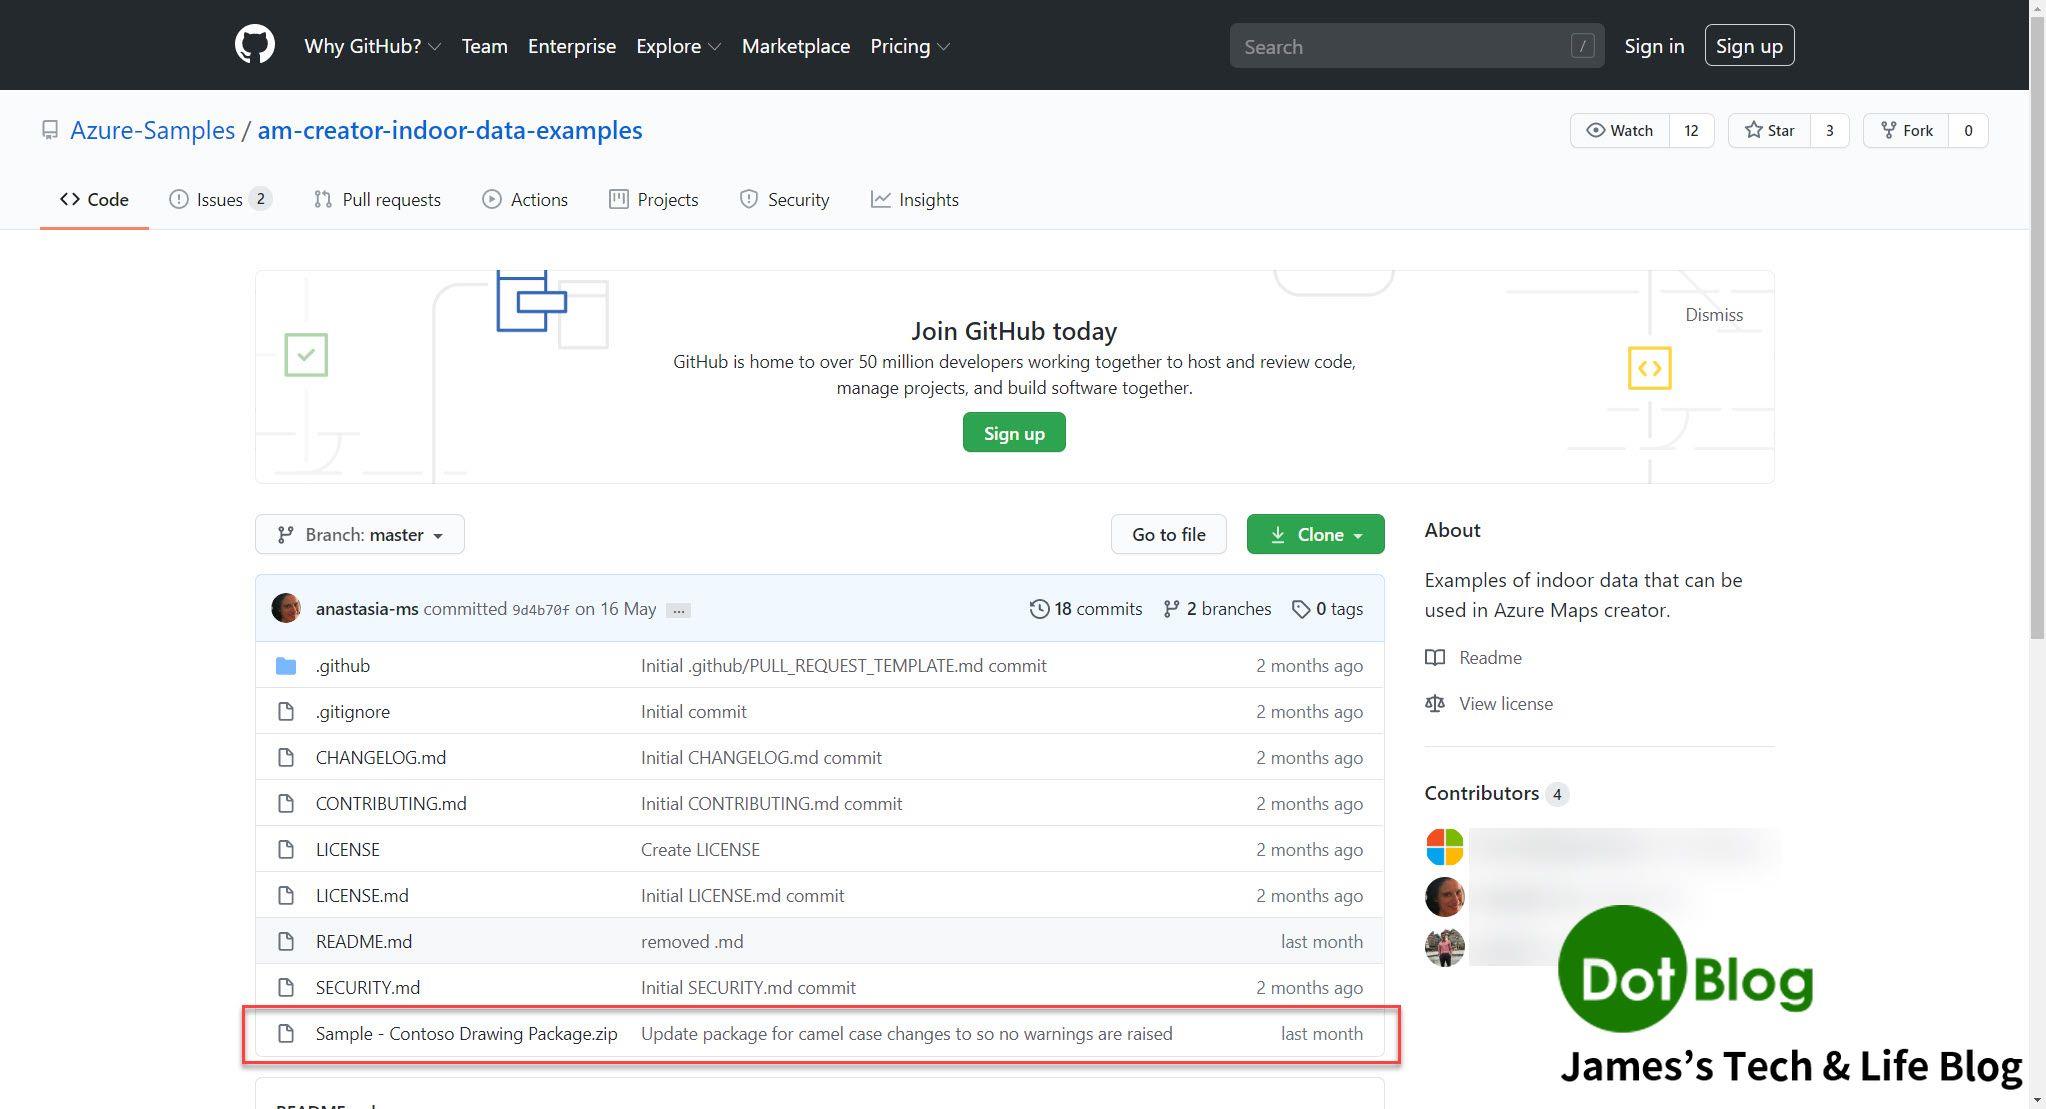
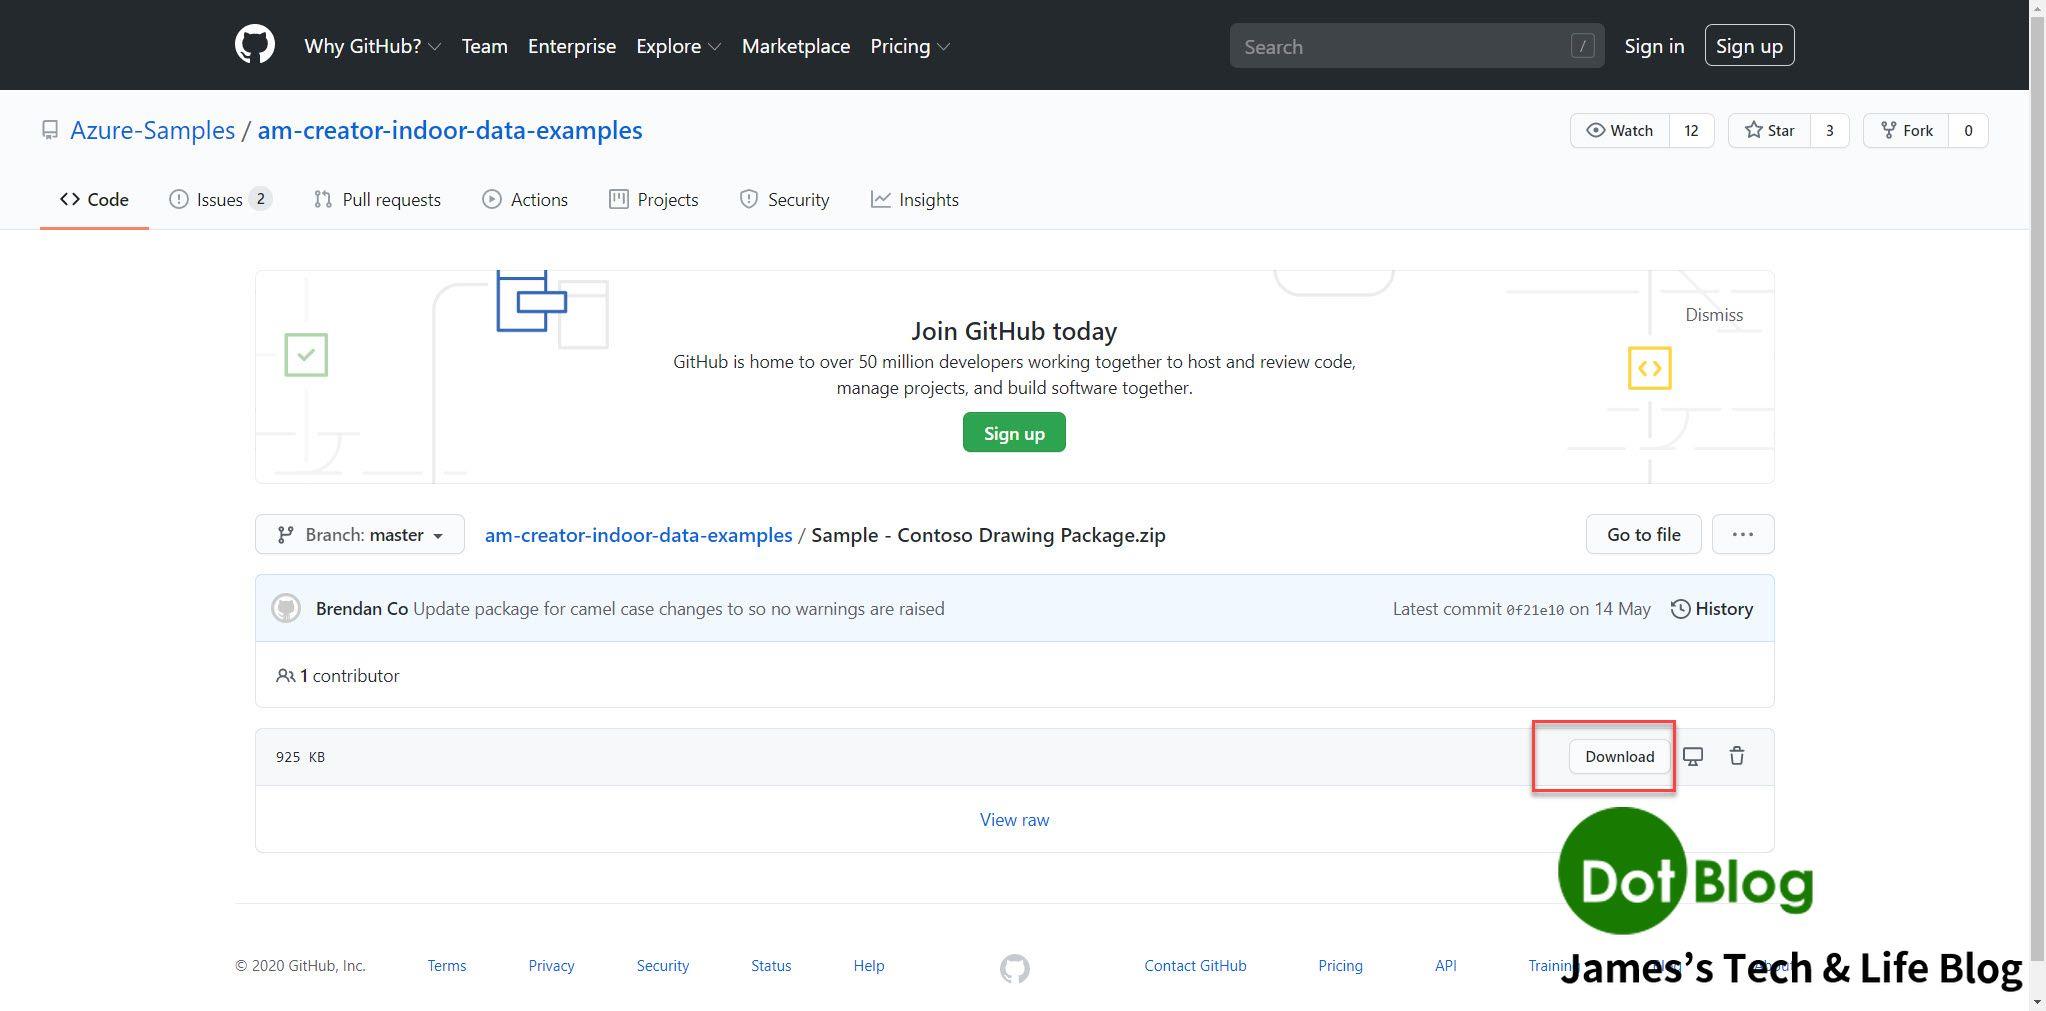
點選進去後,再點選 "Download" 下載該 *.zip 檔案。
後續 微軟官網文件 的介紹使用的是 Postman 這套 WebAPI 執行工具,本篇文章採用的是 Nightingale 這個 Windows Store 上的 App 來做為展示。
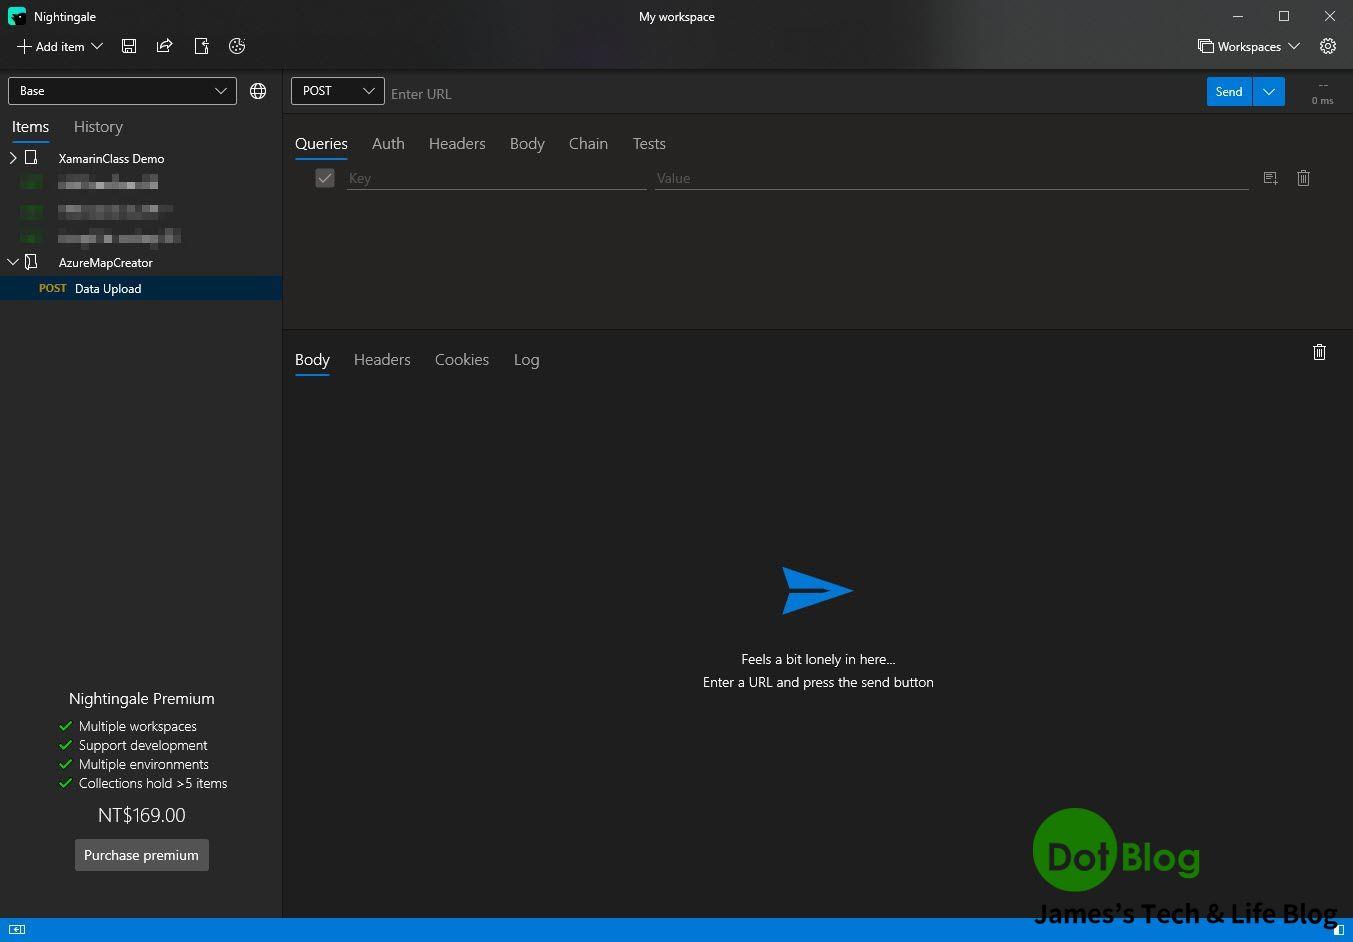
首先按照文件步驟當中的教學,使用上傳圖資的第一隻 WebAPI:
"https://atlas.microsoft.com/mapData/upload?api-version=1.0&dataFormat=zip&subscription-key={Azure-Maps-Primary-Subscription-key}"
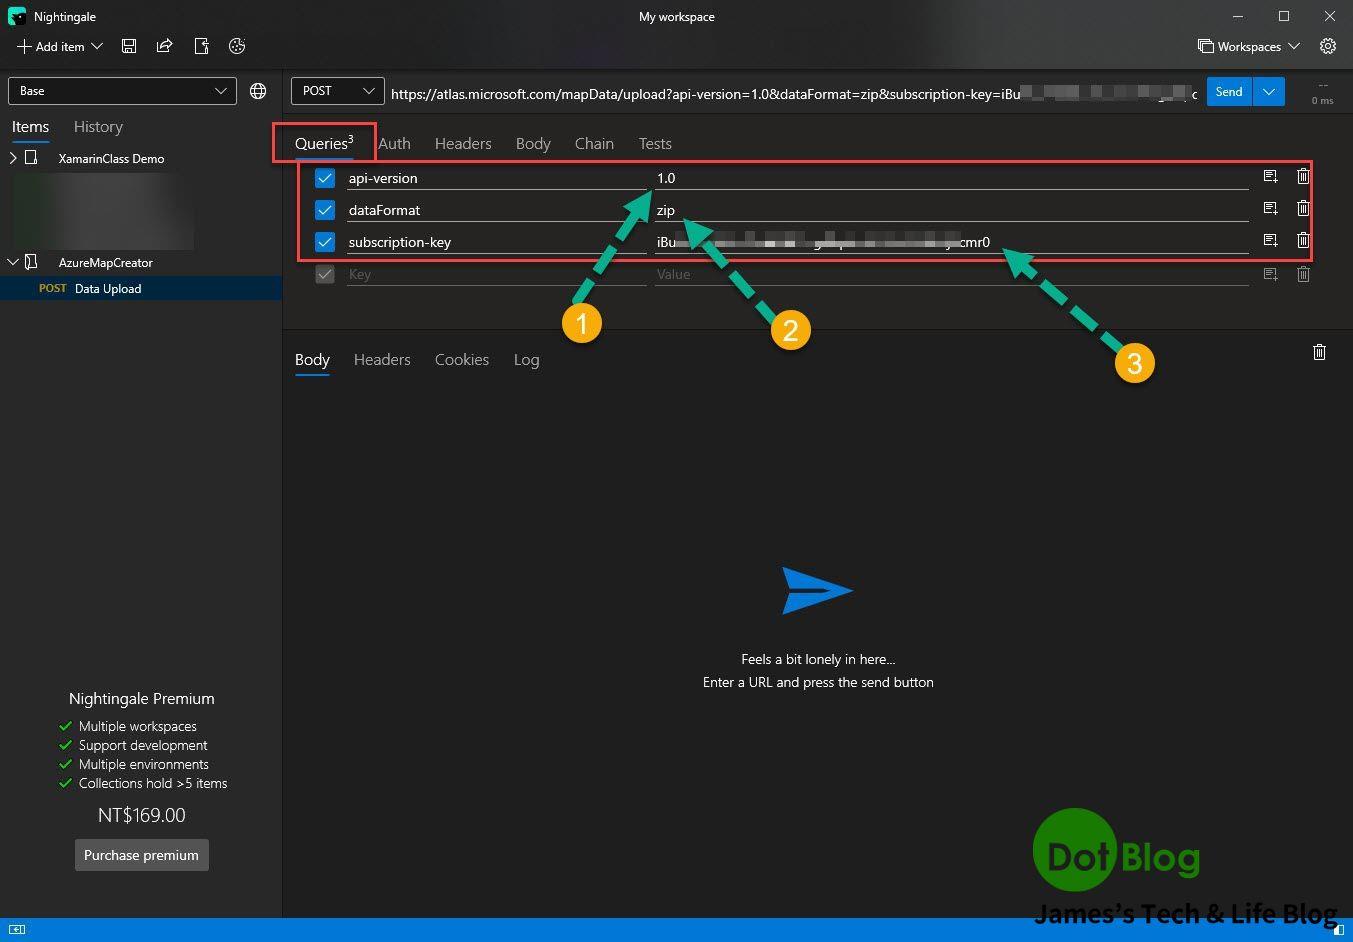
首先此 WebAPI 使用 POST 操作,接著在 Queries 的區域確認三個 URL Query String 的值為以下 點 1 ~ 點 3 的資訊,而點 3 就是在前一篇最後提到的 "Share Key"。
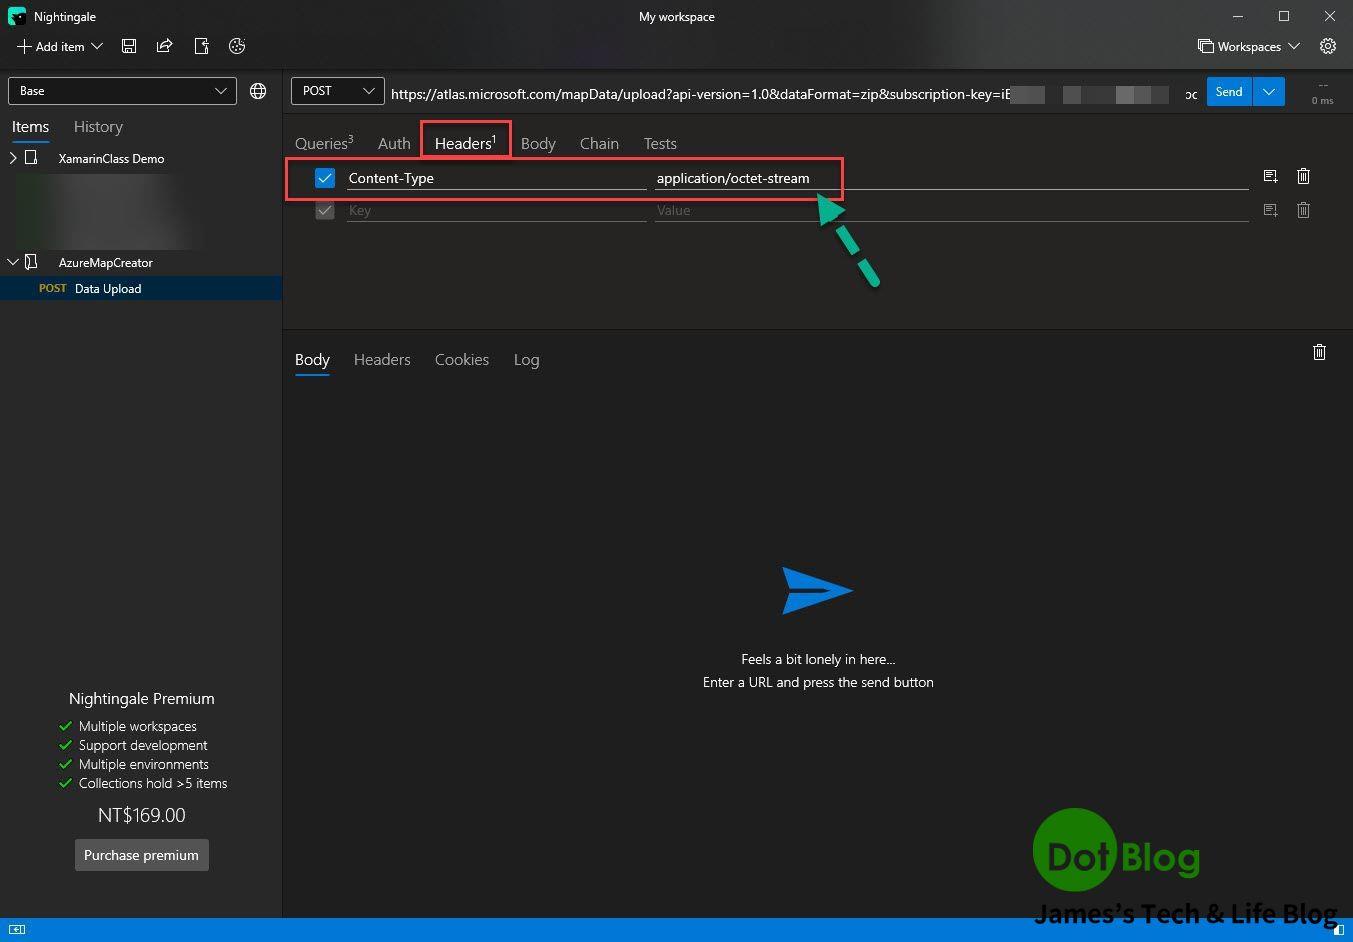
再來切到 Headers 設定 Content-Type 為 "application/octet-stream"。
(官方文件上就寫這樣)
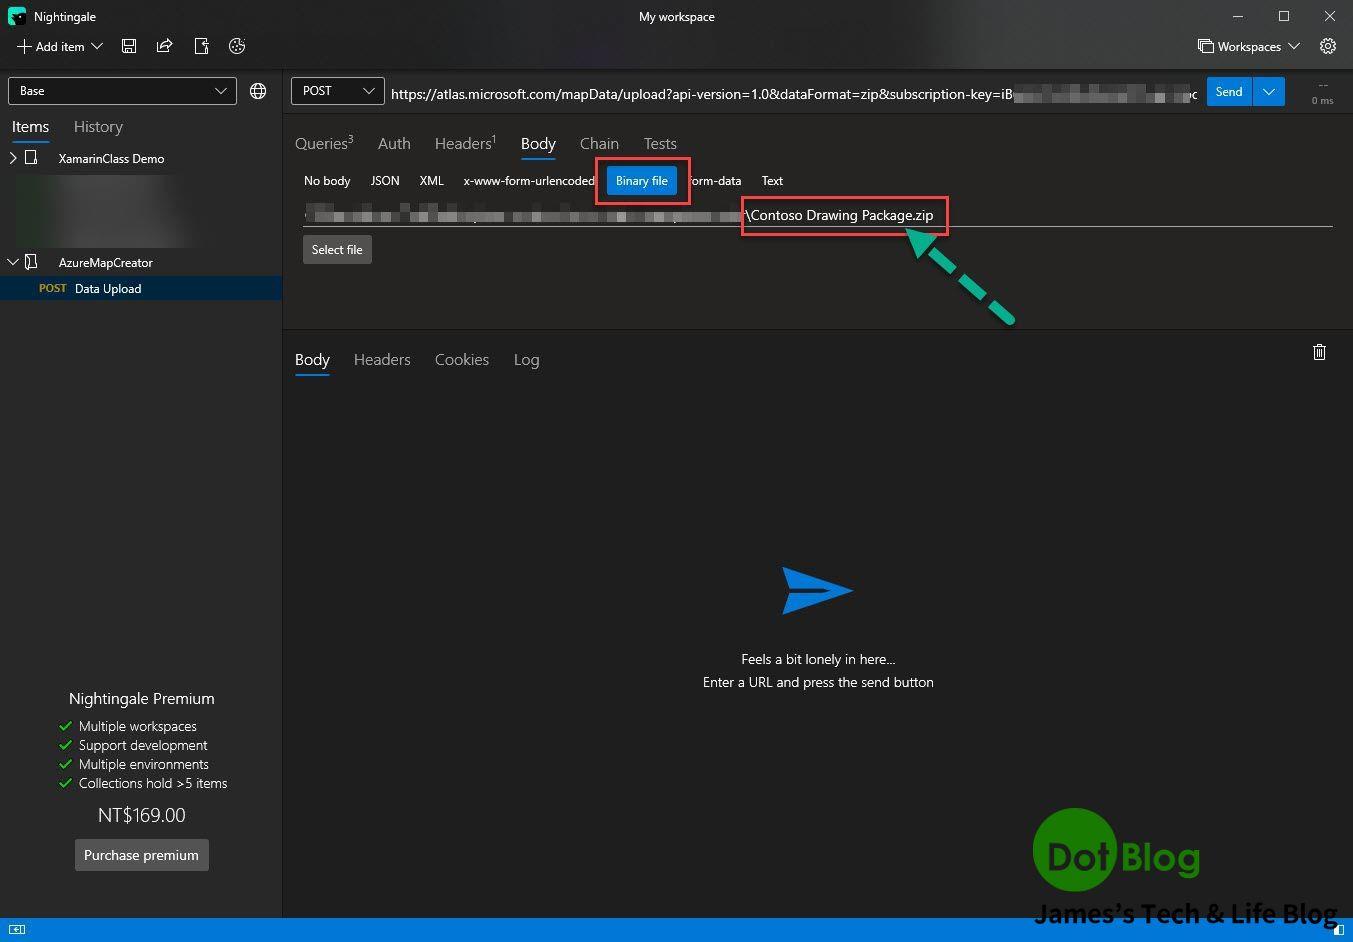
接著在切到 "Body" 當中選取 "Binary file",選取到剛剛我們下載的那份 *.zip 檔案。
上傳完成後 Azure Maps 應該會回應 202,並且在回應的 Headers 當中有相關的資料,如下:
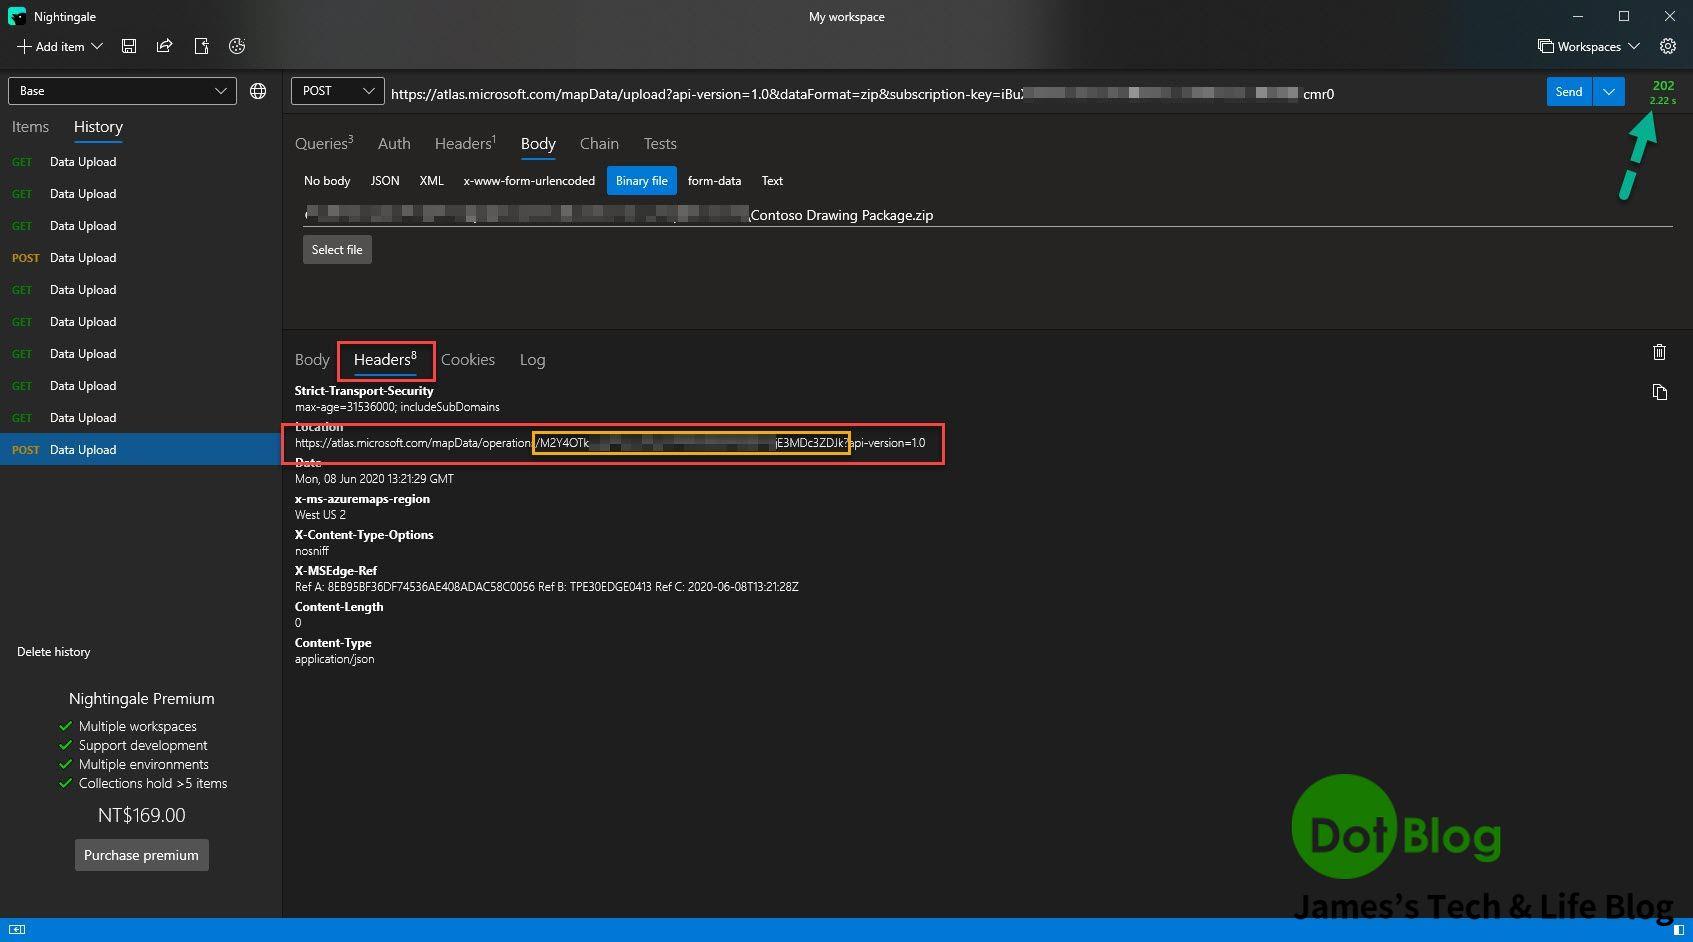
其中最重要的資訊是 "Response" 當中的 "Headers" 資訊,其中會看到一個 "Location" 位址,而其中有一段 "值" (上圖黃色框) 會在下一個步驟的 onerationsId 中用到。
接著上傳完成後可以使用 "Get" 操作呼叫上傳圖資的狀態檢查 WebAPI:
"https://atlas.microsoft.com/mapData/operations/{operationsId}?api-version=1.0&subscription-key={Azure-Maps-Primary-Subscription-key}"
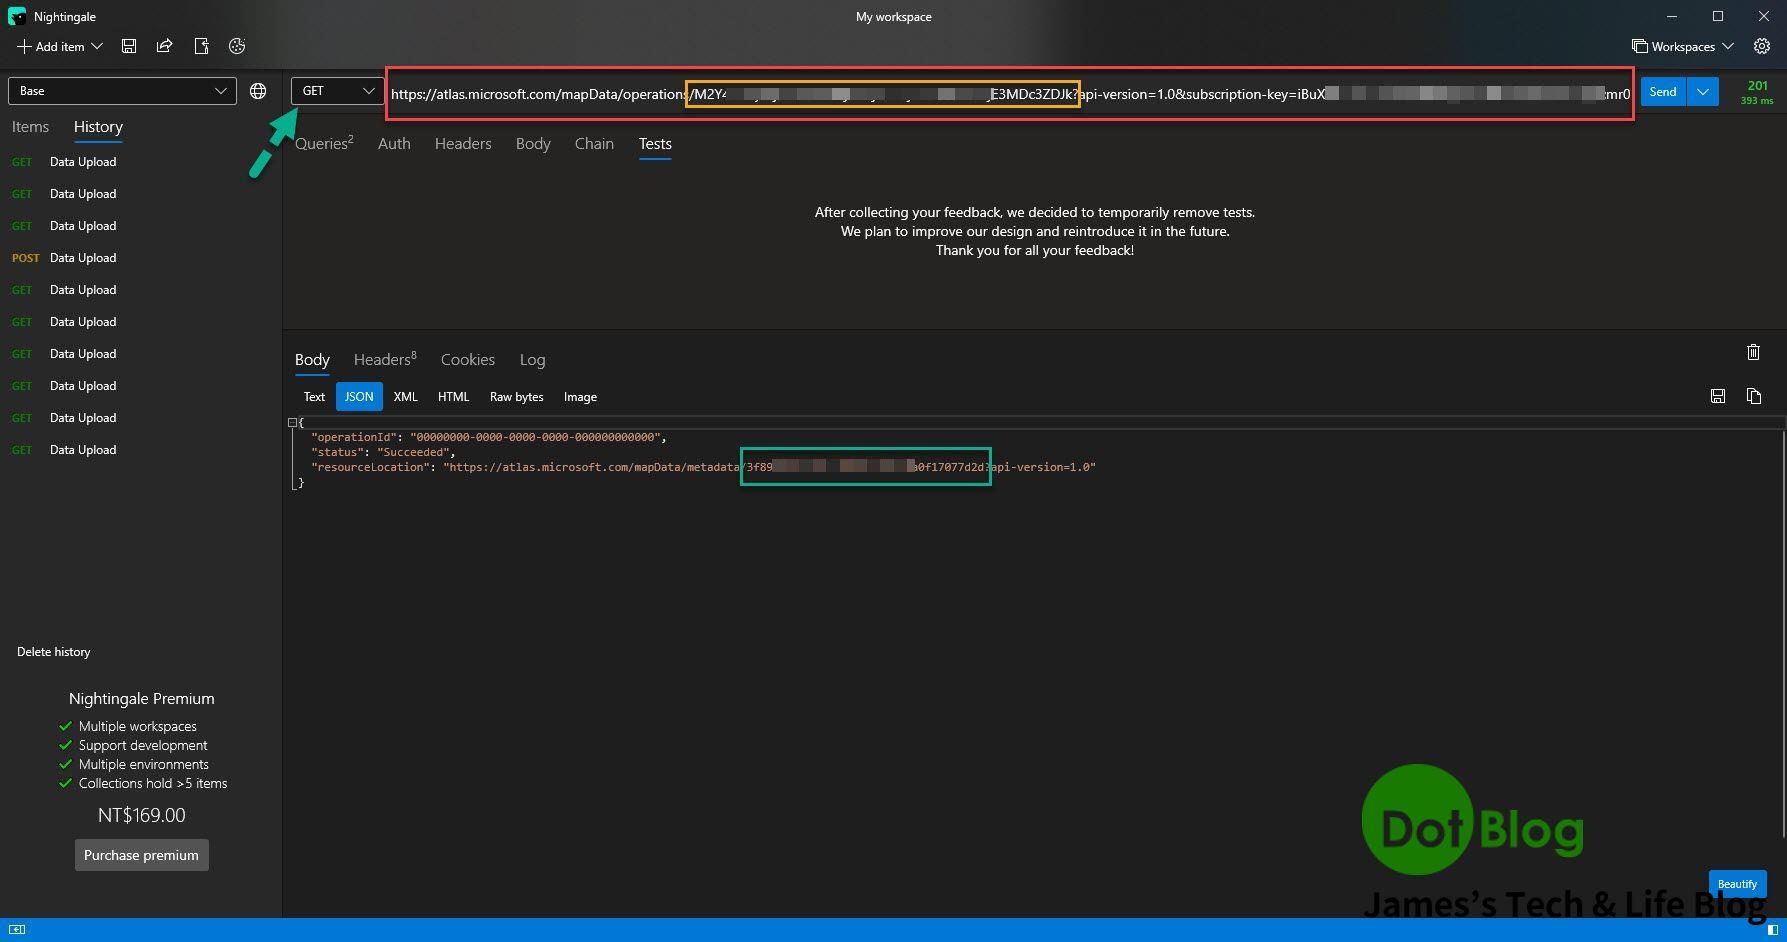
若回應 Success 則確認圖資上傳完成,並且在回應的 "Body" 當中會取得 "resourceLocation",其中的 metadata 後面的 "值" (上圖綠色框),會在後續步驟的 udid 中用到。
建立 - 的 WebAPI 操作都會使用 "Post" 的方式。
檢查 - 的 WebAPI 操作都會使用 "Get" 的方式。
下一個要使用的是 Convert Uploaded Drawing 的 WebAPI:
"https://atlas.microsoft.com/conversion/convert?subscription-key={Azure-Maps-Primary-Subscription-key}&api-version=1.0&udid={udid}&inputType=DWG"
(udid 請填入上圖當中所取得的綠色框值)
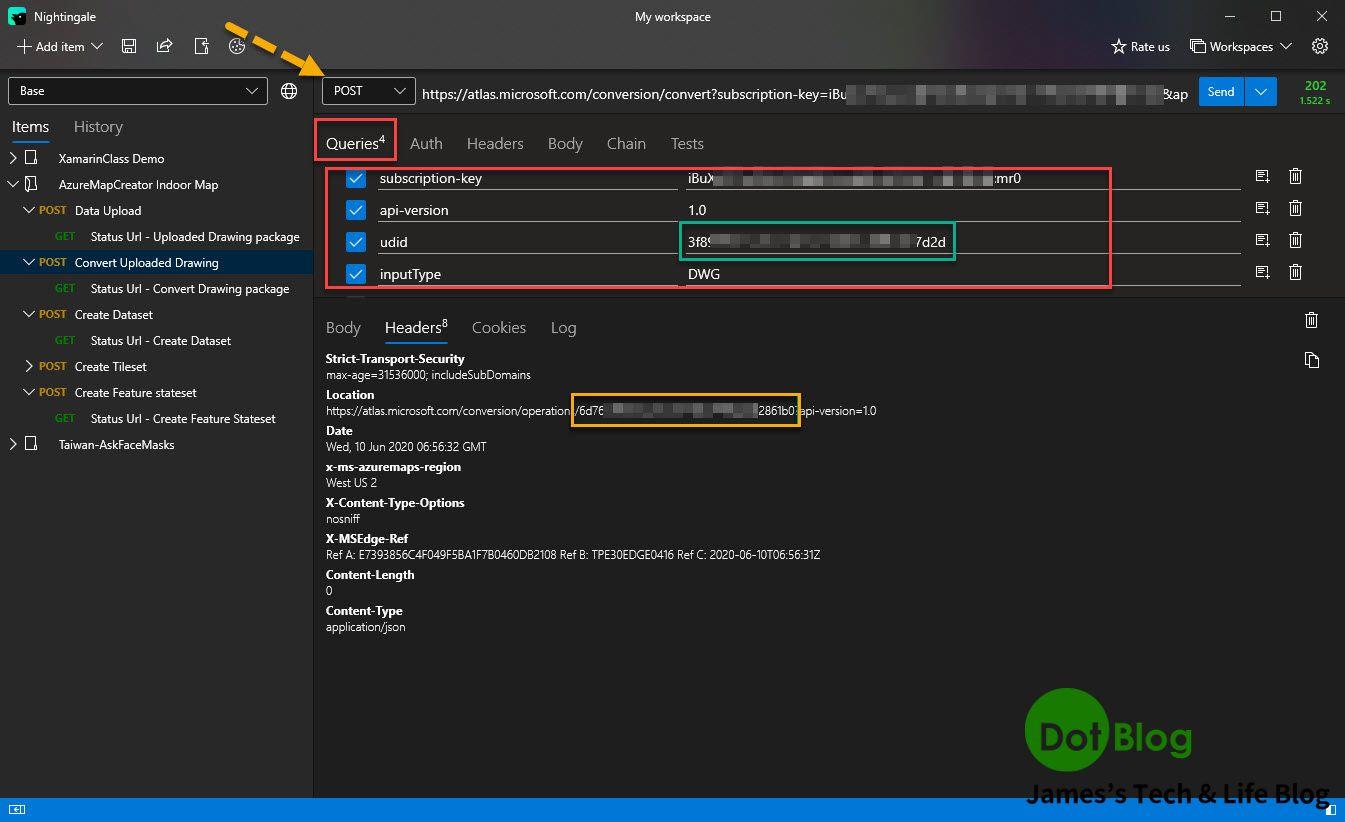
若回應 202 成功,就會在 Response 的 Headers ,其中會看到一個 "Location" 位址,而其中有一段 "值" (上圖黃色框) 會在轉換圖資的狀態檢查 operationsId 中用到。
接著上傳完成後可以呼叫轉換圖資的狀態檢查 WebAPI:
"https://atlas.microsoft.com/conversion/operations/{operationsId}?api-version=1.0&subscription-key={Azure-Maps-Primary-Subscription-key}"
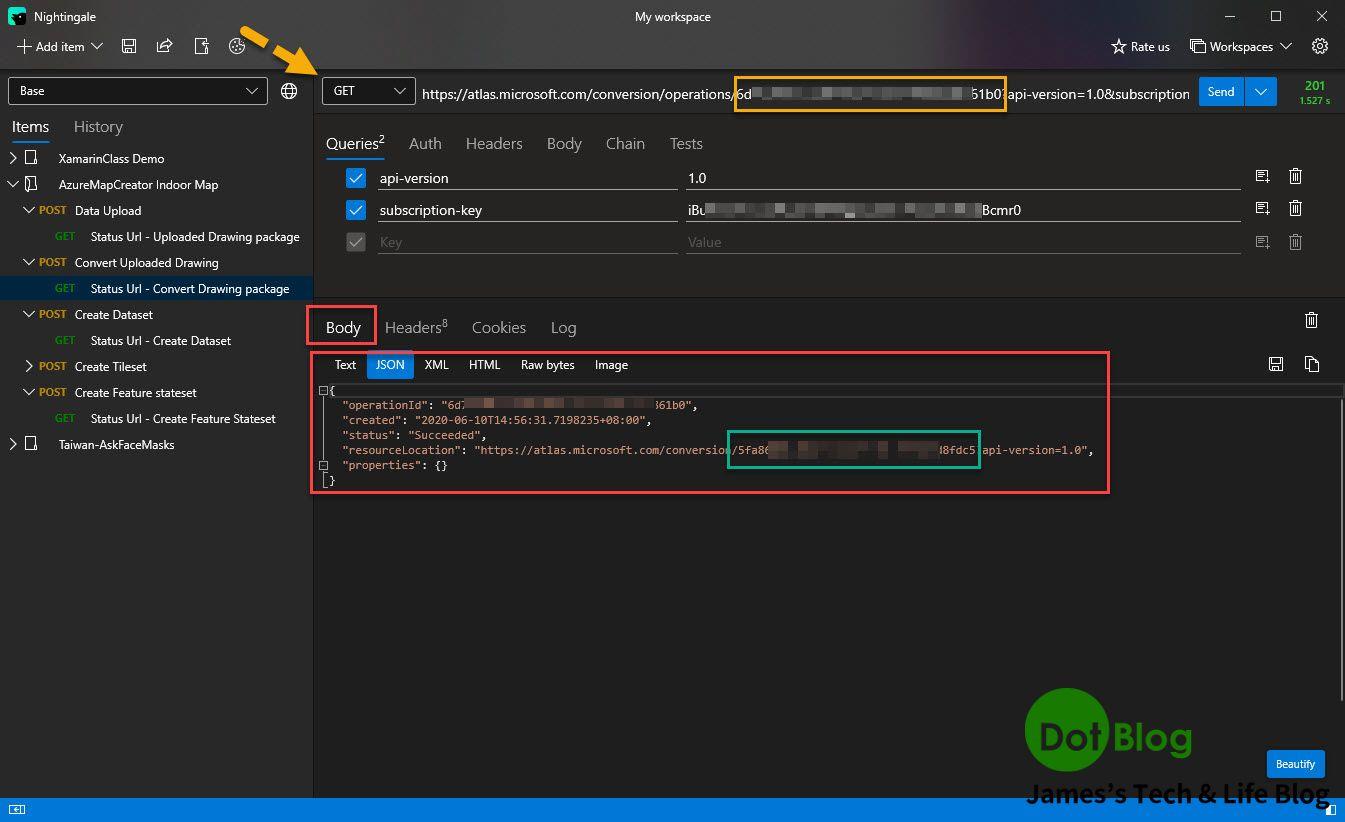
其得到 201 回應的 Response 的 Body,其中會看到一個 "resourceLocation" 位址,而其中有一段 "值" (上圖綠色框) 會在下一個步驟的 conversionID 中用到。
有興趣的朋友可以參考:
https://github.com/MicrosoftDocs/azure-docs/issues/56695
接著繼續使用 Dataset Create 的 WebAPI:
"https://atlas.microsoft.com/dataset/create?api-version=1.0&conversionID={conversionId}&type=facility&subscription-key={Azure-Maps-Primary-Subscription-key}"
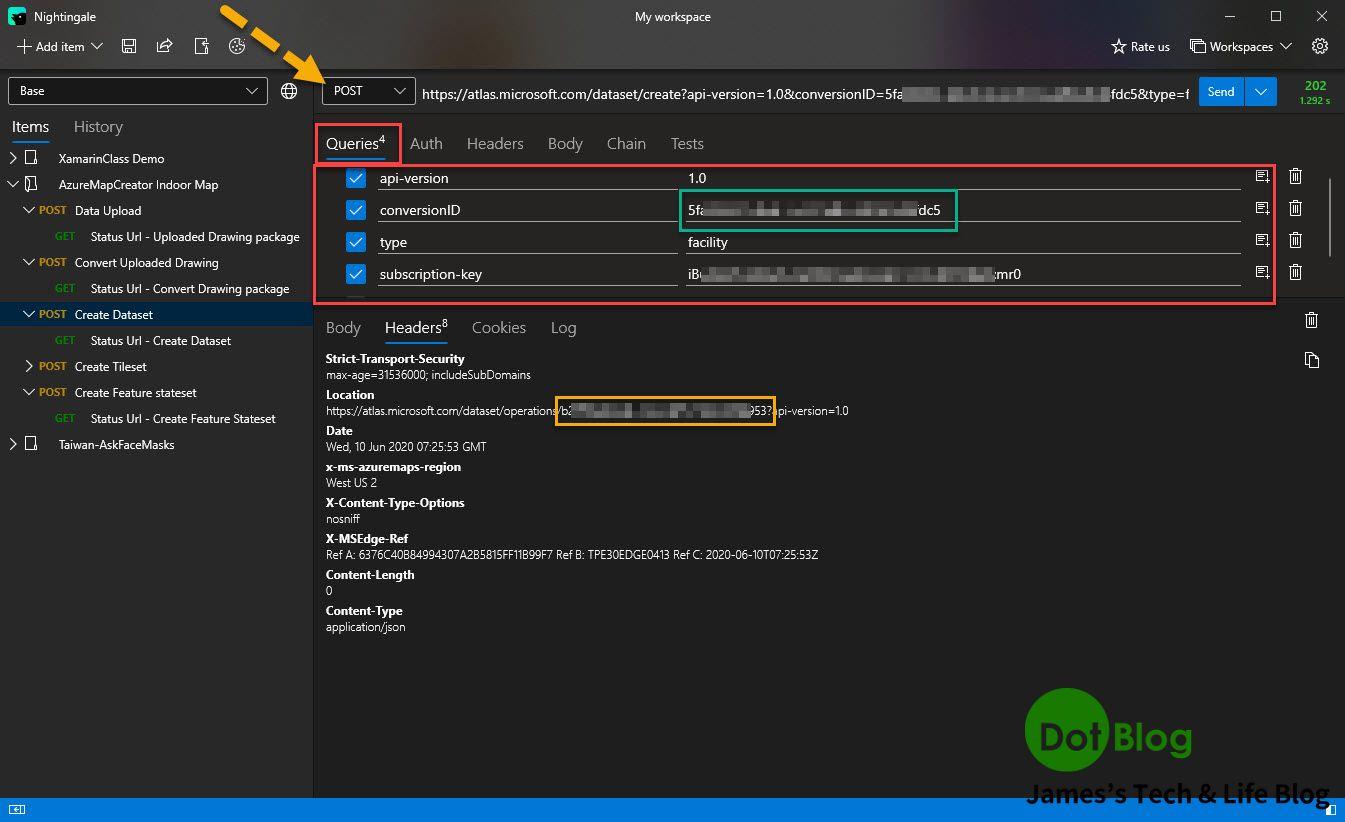
若回應 202 成功,就會在 Response 的 Headers ,其中會看到一個 "Location" 位址,而其中有一段 "值" (上圖黃色框) 會在資料集的狀態檢查 operationsId 中用到。
接著上傳完成後可以呼叫建立資料集的狀態檢查 WebAPI:
"https://atlas.microsoft.com/dataset/operations/{operationId}?api-version=1.0&subscription-key=<Azure-Maps-Primary-Subscription-key>"
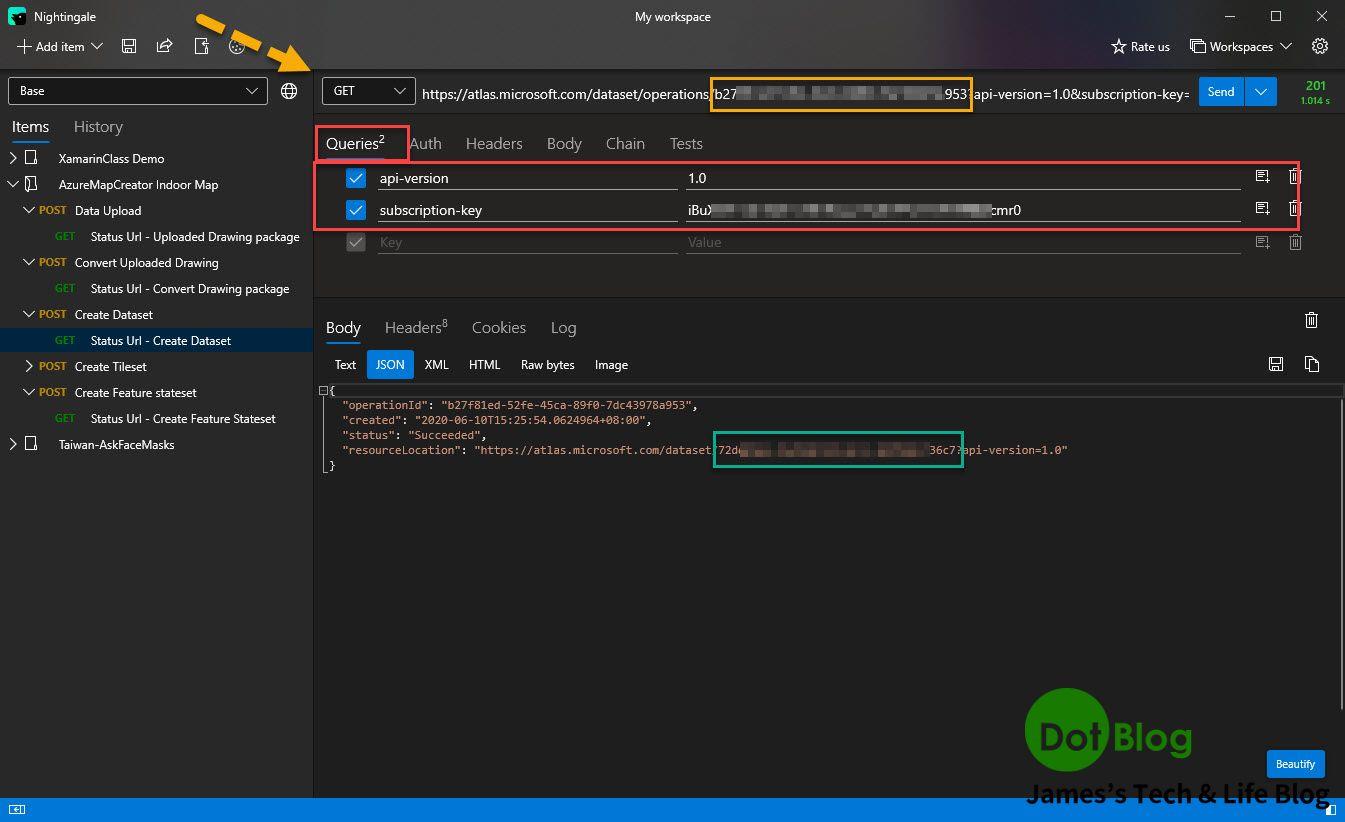
其得到 201 回應的 Response 的 Body,其中會看到一個 "resourceLocation" 位址,而其中有一段 "值" (上圖綠色框) 會在下一個步驟 Create tileset 的 datasetID 中用到。
接著繼續使用 Create tileset 的 WebAPI:
"https://atlas.microsoft.com/tileset/create/vector?api-version=1.0&datasetID={datasetId}&subscription-key={Azure-Maps-Primary-Subscription-key}"
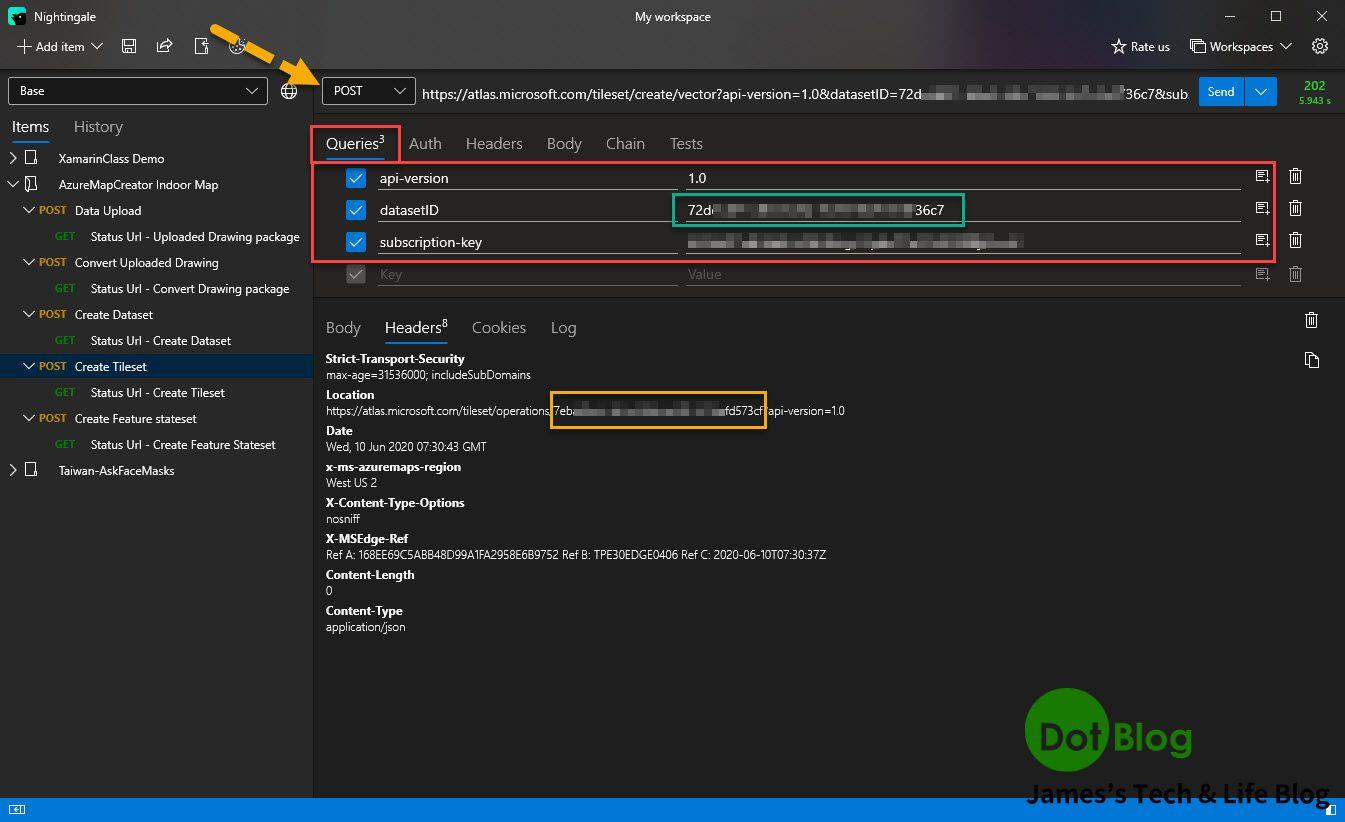
若回應 202 成功,就會在 Response 的 Headers ,其中會看到一個 "Location" 位址,而其中有一段 "值" (上圖黃色框) 會在下一個步驟的 operationsId 中用到。
接著上傳完成後可以呼叫建立磚版集的狀態檢查 WebAPI:
"https://atlas.microsoft.com/tileset/operations/{operationId}?api-version=1.0&subscription-key=<Azure-Maps-Primary-Subscription-key>"
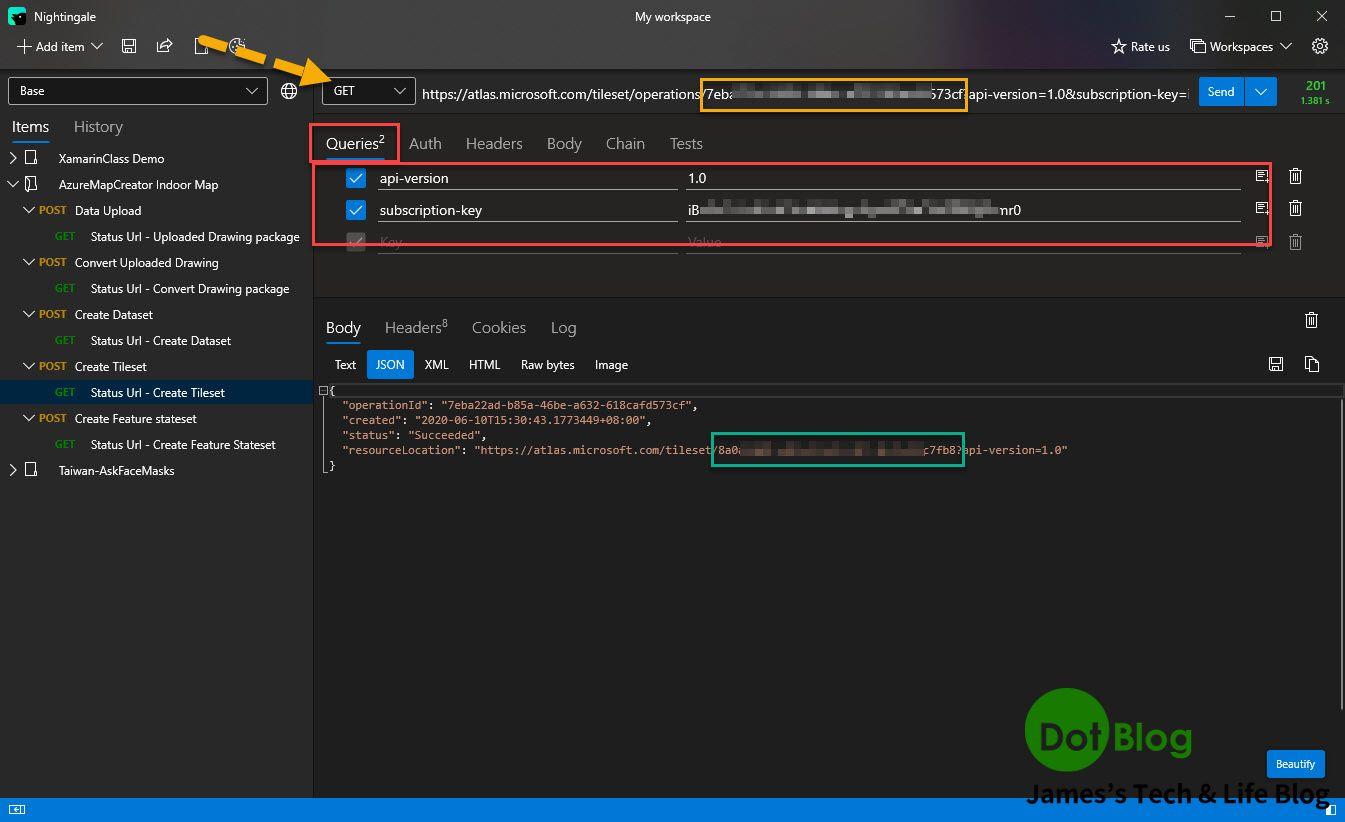
其得到 201 回應的 Response 的 Body,其中會看到一個 "resourceLocation" 位址,而其中有一段 "值" (上圖綠色框) 會在磚板集狀態檢查中的 datasetID 中用到。
中間因為沒有想要替此範例測試展示什麼特殊的功能使用,所以略過文件一些步驟,直接來到 建立 Feature State 的 WebAPI 的呼叫:
"https://atlas.microsoft.com/featureState/stateset?api-version=1.0&datasetId={datasetId}&subscription-key={Azure-Maps-Primary-Subscription-key}"
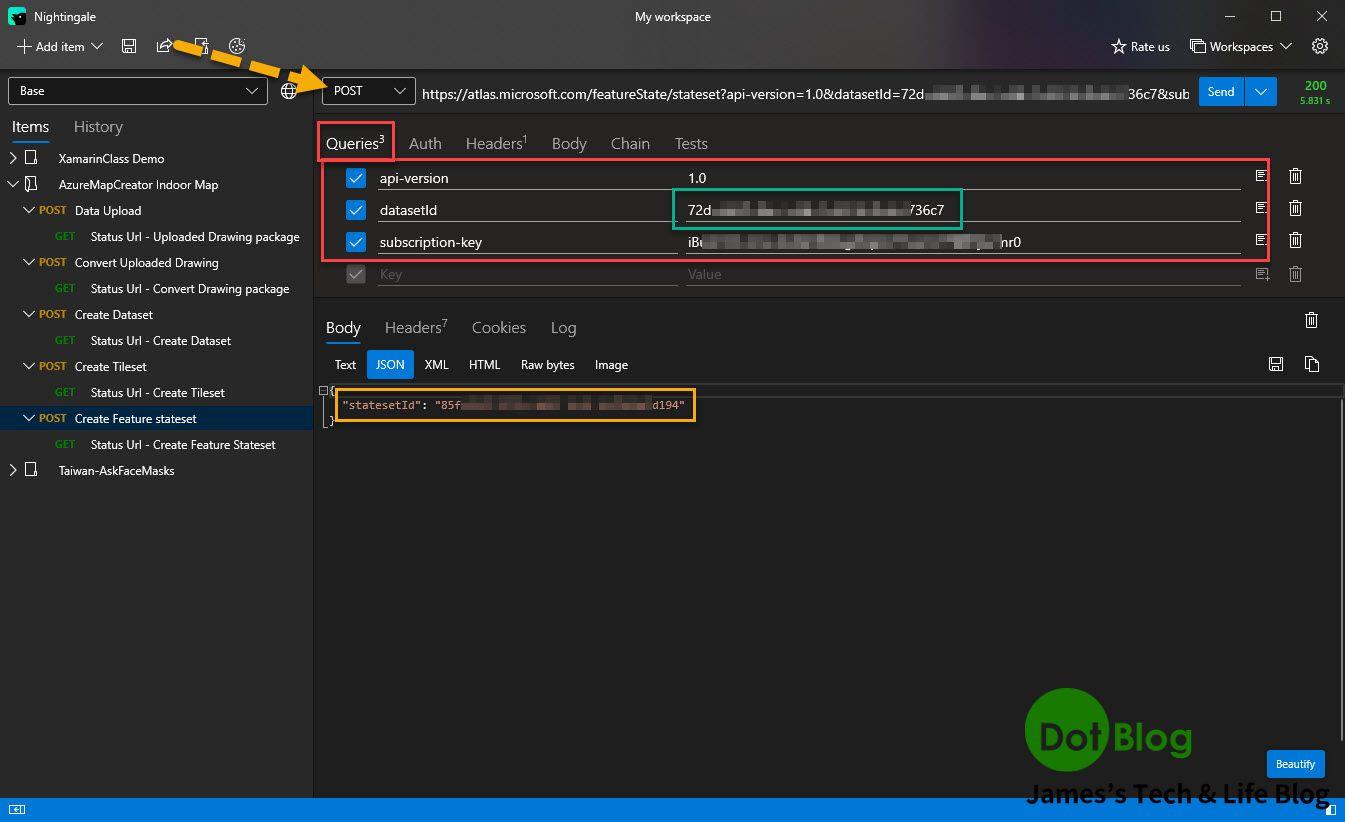
其得到 200 回應的 Response 的 Body,其中會看到一個 "statesetId" 其 "值" (上圖黃色框) 會後續中用到。
好了,大體上在 Azure Maps 的 Indoor Maps 建立相關資源的基本操作就這樣了,本文到目前為止已經取得 tilesetId、statesetId 這兩項資料值,後續就是寫 Web 前端畫面來取用在 Azure Maps - Indoor Maps 中所建立的服務資料了。
下回見~~~
I'm a Microsoft MVP - Developer Technologies (From 2015 ~).

I focus on the following topics: Xamarin Technology, Azure, Mobile DevOps, and Microsoft EM+S.
If you want to know more about them, welcome to my website:
https://jamestsai.tw
本部落格文章之圖片相關後製處理皆透過 Techsmith 公司 所贊助其授權使用之 "Snagit" 與 "Snagit Editor" 軟體製作。