因為去聽黃忠成老師的Building Desktop Apps With Electron
就把投影片的東西做一遍
1.安裝Electron
安裝Node JS (會一起裝npm)
開個electron資料夾
用npm裝electron
npm i electron -g
npm i electron --save-dev
electron-quick-start clone 下來
npm install
npm start
看到Hello World! 就是成功了
2.Web UI
Google Material Design 下載ZIP回來
加入SideNav 效果
新增index.html
 <!DOCTYPE html>
  <html>
    <head>
      <!--Import Google Icon Font-->
      <link href="http://fonts.googleapis.com/icon?family=Material+Icons" rel="stylesheet">
      <!--Import materialize.css-->
      <link type="text/css" rel="stylesheet" href="css/materialize.min.css"  media="screen,projection"/>

      <!--Let browser know website is optimized for mobile-->
      <meta name="viewport" content="width=device-width, initial-scale=1.0"/>
    </head>

    <body>
      <!--Import jQuery before materialize.js-->
      <script>window.$ = window.jQuery = require('jquery');</script>
      <script src="js/hammer.min.js"></script>
      <script src="js/materialize.min.js"></script>
        <ul id="slide-out" class="side-nav">
    <li><div class="userView">
      <div class="background">
        <img src="images/office.jpg">
      </div>
      <a href="#!user"><img class="circle" src="images/yuna.jpg"></a>
      <a href="#!name"><span class="white-text name">John Doe</span></a>
      <a href="#!email"><span class="white-text email">jdandturk@gmail.com</span></a>
    </div></li>
    <li><a href="#!"><i class="material-icons">cloud</i>First Link With Icon</a></li>
    <li><a href="#!">Second Link</a></li>
    <li><div class="divider"></div></li>
    <li><a class="subheader">Subheader</a></li>
    <li><a class="waves-effect" href="#!">Third Link With Waves</a></li>
  </ul>
  <a href="#" data-activates="slide-out" class="button-collapse"><i class="material-icons">menu</i></a>
    <script>
      // Initialize collapse button
      $(".button-collapse").sideNav();
    </script>
    </body>
  </html>
去electron-quick-start 複製 main.js, package.json, renderer.js
執行看看
因該沒有jQury 安裝他
npm i jquery
缺Hammer.js 抓js回來
應該就可以了
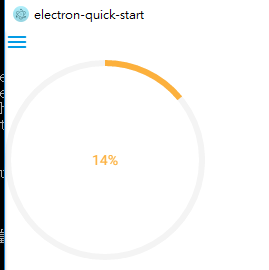
3.Node.js
用ProgressBar呈現CPU Loading
npm install progressbar.js
Html 加上
<div id="progress" style="width: 200px;height: 200px"></div>
js code (cpu 參考)
 <script>
     require('./renderer.js')

      // Initialize collapse button
      $(".button-collapse").sideNav();

 var Progressbar = require('progressbar.js')
var os = require("os");
//Create function to get CPU information
function cpuAverage() {

  //Initialise sum of idle and time of cores and fetch CPU info
  var totalIdle = 0, totalTick = 0;
  var cpus = os.cpus();

  //Loop through CPU cores
  for(var i = 0, len = cpus.length; i < len; i++) {

    //Select CPU core
    var cpu = cpus[i];

    //Total up the time in the cores tick
    for(type in cpu.times) {
      totalTick += cpu.times[type];
   }

    //Total up the idle time of the core
    totalIdle += cpu.times.idle;
  }

  //Return the average Idle and Tick times
  return {idle: totalIdle / cpus.length,  total: totalTick / cpus.length};
}


 var circle = new Progressbar.Circle('#progress',{
    color:'#FCB03C',
    strokeWidth:3,
    trailColor:'#f4f4f4'
 });
var startMeasure = cpuAverage();
setInterval(function() {

  //Grab second Measure
  var endMeasure = cpuAverage();

  //Calculate the difference in idle and total time between the measures
  var idleDifference = endMeasure.idle - startMeasure.idle;
  var totalDifference = endMeasure.total - startMeasure.total;

  //Calculate the average percentage CPU usage
  var percentageCPU = 100 - ~~(100 * idleDifference / totalDifference);
circle.set(percentageCPU/100);
circle.setText(percentageCPU+"%");
  //Output result to console
  console.log(percentageCPU + "% CPU Usage.");

}, 600);
    </script>
執行 應該會成功
未完待續......
如果內容有誤請多鞭策謝謝
