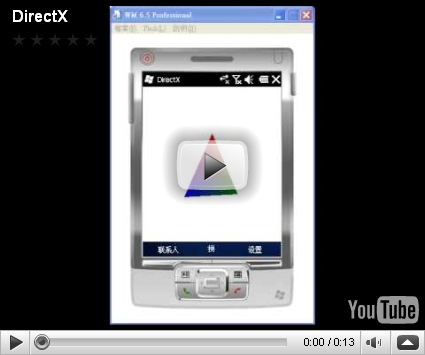
在 Windows Mobile 使用 DirectX 繪製3D圖形
前言
有網友寫信說,能不能介紹 Windows Mobile 上使用 DirectX 的部份,其實為什麼只介紹 OpenGL ES 沒有介紹 DirectX,原因是 DirectX 在網路上已經有太多介紹了,例如此網頁 Mobile DirectX with the Compact Framework,而且其實我對 DirectX 一點都不熟,不過本著學習與分享的精神,還是試著使用看看。
1. 簡介
想要在 Windows Mobile 畫3維圖形,就會想到 DirectX 與 OpenGL,而想在 Windows Mobile 使用 DirectX ,則必須使用 WindowsMobile.DirectX。
本文介紹如何使用 WindowsMobile.DirectX,以 C# 撰寫程式,而程式功能為畫一個旋轉的三角形,執行結果請參考以下影片。
2. 方法
2.1 將 DirectX 加入參考與引用
並於程式中 using
using Microsoft.WindowsMobile.DirectX;
using Microsoft.WindowsMobile.DirectX.Direct3D;
2.2 程式流程
在本程式中,繪製旋轉的三角形,其流程如下所示
(1) 宣告 Device 以及呼叫 DirectX Device 相關參考的函式
        private Device device;  // 宣告全域 Device
        private VertexBuffer vertices;  // 宣告全域 VertexBuffer

        public Form1()
        {
            InitializeComponent();

            this.ClientSize = new System.Drawing.Size(200, 150);  // 設定表單初始尺寸
            this.Text = "DirectX";
            InitializeGraphics();  // 初始化 DirectX Device 相關參數
        }
(2) 初始化 DirectX Device 相關參數,先藉由 PresentParameters : 描述 DirectX 展示的參數,並且實例化 Device,將 PresentParameters 帶入,並且建立 VertexBuffer
        /// <summary>
        /// 初始化 DirectX Device 相關參數
        /// </summary>
        protected void InitializeGraphics()
        {
            PresentParameters pres = new PresentParameters();  // 實例化 PresentParameters,設定顯示的相關參數
            pres.Windowed = true;  // 設定在視窗模式下執行
            pres.SwapEffect = SwapEffect.Discard;  // 設定緩衝區交換方式為 Discard
            device = new Device(0, DeviceType.Default, this, CreateFlags.None, pres);  // 實例化 Device
            vertices = CreateVertexBuffer(device); // 建立 VertexBuffer
        }
(3) 建立 Vertex Buffer 的部份,相關參數宣告請參考註解部份
        /// 建立 Vertex Buffer
        /// </summary>
        /// <param name="device"></param>
        /// <returns></returns>
        protected VertexBuffer CreateVertexBuffer(Device device)
        {
            // 初始化 VertexBuffer
            //public VertexBuffer(
            //    Type typeVertexType,
            //    int numVerts,
            //    Device device,
            //    Usage usage,
            //    VertexFormats vertexFormat,
            //    Pool pool
            //)
            VertexBuffer buf = new VertexBuffer(
              typeof(CustomVertex.PositionNormalColored),  // 包含位置,色彩和標準資料的自訂格式結構
              6,  // Vertex 數量為 6
              device,  // Device
              0,  // Usage 設為 0 表示 no usage value
              CustomVertex.PositionNormalColored.Format,  // 表示 VertexBuffer 的格式
              Pool.SystemMemory  // 定義資源緩衝區的記憶體類別為 Pool.SystemMemory 系統記憶體
              );
            PopulateVertexBuffer(buf);  // 填入欲顯示的資料到 VerTex Buffer
            return buf;
        }
(4) 進行繪製,主要是在表單 OnPaint 重繪事件中,呼叫 Render()
Render的流程首先清除背景緩攻與設定背景色,接著透過 Device.BeginScene() 設定景象開始,並且設定轉移矩陣 ( SetupMatrices ) 與光源 ( SetupLight )
透過 Device.SetStreamSource 將緩衝區繫結到資料流中,並且進行繪製,透過 Device.EndScene() 讓景象結束,並且呈現下個緩衝區內容檢視
        /// <summary>
        ///  描繪 DirectX
        /// </summary>
        protected void Render()
        {
            device.Clear(ClearFlags.Target, System.Drawing.Color.White, 1.0f, 0);  // 清除背景緩衝為成白色
            device.BeginScene();  // 景象開始
            SetupMatrices();
            SetupLights();
            device.SetStreamSource(0, vertices, 0);  // 將頂點緩衝區繫結至裝置資料流
            device.DrawPrimitives(PrimitiveType.TriangleList, 0, 2);
            device.EndScene();  // 景象結束
            device.Present();  // 呈現下個緩衝區內容檢視
        }

        /// <summary>
        /// 表單 OnPaint 重繪事件
        /// </summary>
        protected override void OnPaint(PaintEventArgs e)
        {
            Render();  // 描繪 DirectX
            Invalidate();   // 讓介面失效,並且重繪
        }
2.3 完整程式碼
using System;
using System.Linq;
using System.Collections.Generic;
using System.ComponentModel;
using System.Data;
using System.Drawing;
using System.Text;
using System.Windows.Forms;

using Microsoft.WindowsMobile.DirectX;
using Microsoft.WindowsMobile.DirectX.Direct3D;

namespace SmartDeviceDirectX
{
    public partial class Form1 : Form
    {
        private Device device;  // 宣告全域 Device
        private VertexBuffer vertices;  // 宣告全域 VertexBuffer

        public Form1()
        {
            InitializeComponent();

            this.ClientSize = new System.Drawing.Size(200, 150);  // 設定表單初始尺寸
            this.Text = "DirectX";
            InitializeGraphics();  // 初始化 DirectX Device 相關參數
        }

        /// <summary>
        /// 初始化 DirectX Device 相關參數
        /// </summary>
        protected void InitializeGraphics()
        {
            PresentParameters pres = new PresentParameters();  // 實例化 PresentParameters,設定顯示的相關參數
            pres.Windowed = true;  // 設定在視窗模式下執行
            pres.SwapEffect = SwapEffect.Discard;  // 設定緩衝區交換方式為 Discard
            device = new Device(0, DeviceType.Default, this, CreateFlags.None, pres);  // 實例化 Device
            vertices = CreateVertexBuffer(device); // 建立 VertexBuffer
        }

        /// <summary>
        /// 填入欲顯示的資料到 VerTex Buffer
        /// </summary>
        /// <param name="vertices"></param>
        protected void PopulateVertexBuffer(VertexBuffer vertices)
        {
            CustomVertex.PositionNormalColored[] verts =
              (CustomVertex.PositionNormalColored[])vertices.Lock(0, 0);

            int i = 0;
            verts[i++] = new CustomVertex.PositionNormalColored(
              0, 1, 0,
              0, 0, 1,
              Color.Red.ToArgb());
            verts[i++] = new CustomVertex.PositionNormalColored(
              -0.5F, 0, 0,
              0, 0, 1,
              Color.Green.ToArgb());
            verts[i++] = new CustomVertex.PositionNormalColored(
              0.5F, 0, 0,
              0, 0, 1,
              Color.Blue.ToArgb());
            verts[i++] = new CustomVertex.PositionNormalColored(
              0, 1, 0,
              0, 0, -1,
              Color.Red.ToArgb());
            verts[i++] = new CustomVertex.PositionNormalColored(
              0.5F, 0, 0,
              0, 0, -1,
              Color.Blue.ToArgb());
            verts[i++] = new CustomVertex.PositionNormalColored(
              -0.5F, 0, 0,
              0, 0, -1,
              Color.Green.ToArgb());

            vertices.Unlock();  // 解除鎖定頂點資料
        }

        /// <summary>
        /// 建立 Vertex Buffer
        /// </summary>
        /// <param name="device"></param>
        /// <returns></returns>
        protected VertexBuffer CreateVertexBuffer(Device device)
        {
            // 初始化 VertexBuffer
            //public VertexBuffer(
            //    Type typeVertexType,
            //    int numVerts,
            //    Device device,
            //    Usage usage,
            //    VertexFormats vertexFormat,
            //    Pool pool
            //)
            VertexBuffer buf = new VertexBuffer(
              typeof(CustomVertex.PositionNormalColored),  // 包含位置,色彩和標準資料的自訂格式結構
              6,  // Vertex 數量為 6
              device,  // Device
              0,  // Usage 設為 0 表示 no usage value
              CustomVertex.PositionNormalColored.Format,  // 表示 VertexBuffer 的格式
              Pool.SystemMemory  // 定義資源緩衝區的記憶體類別為 Pool.SystemMemory 系統記憶體
              );
            PopulateVertexBuffer(buf);  // 填入欲顯示的資料到 VerTex Buffer
            return buf;
        }

        /// <summary>
        /// 設定轉移矩陣
        /// </summary>
        protected void SetupMatrices()
        {
            float angle = Environment.TickCount / 500.0F;  // 計算旋轉角度,角度 = 系統啟動後經過的毫秒數/500
            device.Transform.World = Matrix.RotationY(angle);  // 設定第一個全域矩陣為延著Y軸方向旋轉 angle 角度的旋轉矩陣
            device.Transform.View = Matrix.LookAtLH(new Vector3(0, 0.5F, -3),new Vector3(0, 0.5F, 0), new Vector3(0, 1, 0));  // 設定轉換矩陣
            device.Transform.Projection = Matrix.PerspectiveFovLH((float)Math.PI / 4.0F, 1.0F, 1.0F, 10.0F);  // 設定投影矩陣
        }

        /// <summary>
        /// 設定光源
        /// </summary>
        protected void SetupLights()
        {
            device.Lights[0].Diffuse = Color.White;  // 設定燈光所發出的曠散色彩為白色
            device.Lights[0].Type = LightType.Directional;  // 設定光源的類型為 LightType.Directional
            device.Lights[0].Direction = new Vector3(-1, -1, 3);  // 設定空間中指向的方向
            device.Lights[0].Update();  // 更新目前的光源設定
            device.Lights[0].Enabled = true;  // 啟用光源設定
            device.RenderState.Ambient = Color.FromArgb(0x40, 0x40, 0x40);  // 設定環境燈光色彩
        }

        /// <summary>
        ///  描繪 DirectX
        /// </summary>
        protected void Render()
        {
            device.Clear(ClearFlags.Target, System.Drawing.Color.White, 1.0f, 0);  // 清除背景緩衝為成白色
            device.BeginScene();  // 景象開始
            SetupMatrices();
            SetupLights();
            device.SetStreamSource(0, vertices, 0);  // 將頂點緩衝區繫結至裝置資料流
            device.DrawPrimitives(PrimitiveType.TriangleList, 0, 2);
            device.EndScene();  // 景象結束
            device.Present();  // 呈現下個緩衝區內容檢視
        }

        /// <summary>
        /// 表單 OnPaint 重繪事件
        /// </summary>
        protected override void OnPaint(PaintEventArgs e)
        {
            Render();  // 描繪 DirectX
            Invalidate();   // 讓介面失效,並且重繪
        }

        /// <summary>
        /// 表單 OnPaintBackground 背景重繪事件
        /// </summary>
        /// <param name="e"></param>
        protected override void OnPaintBackground(PaintEventArgs e)
        {

        }
    }
}
執行結果請參考文章開頭的影片
4. 參考


