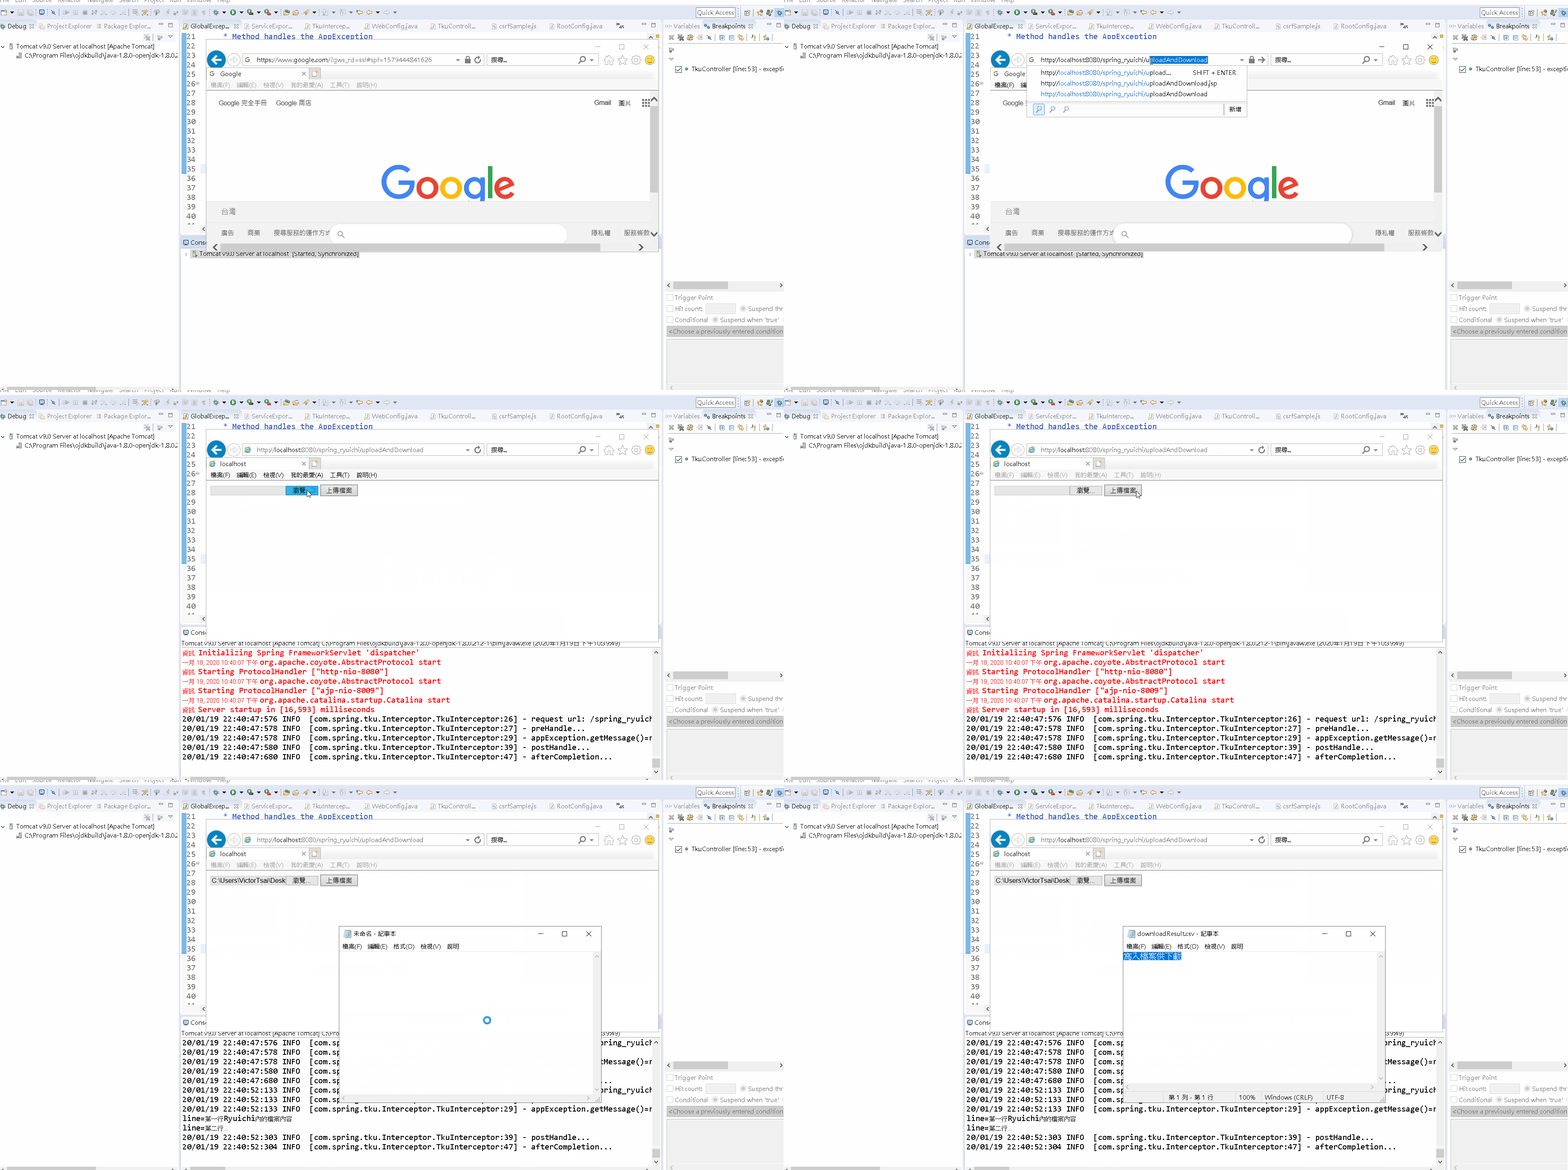
Spring MVC with Ajax upload and download file。
Spring + Ajax 實作檔案上傳其實下 google 關鍵字就有很多例子。
但大部分的例子在上傳檔案後,畫面都會全屏更新,這對很多工程師來說並不是他想要的結果。
本人也是經過 google 過許多的 case 後,最後才整合出 Spring + Ajax 不會全屏更新卻又可以達到上傳檔案的方法。
在這裡連下載檔案的功能一併實作給大家,希望有 google 到這篇的人, 可以解決你的困擾。
首先於 JSP 上寫一個 Form。
<form id="myForm">
	<input type="file" name="fileUpload" id="fileUpload" />
	<button type="submit">上傳檔案</button>
</form>
接著用 Jquery 的語法寫該 Form 的 submit 函式,並於函式 submit 觸發時,將其停止,改用 Ajax 進行 Spring Controller的呼叫。
同時將 FormData 當作 Data 內容一併傳送過去。
processData 參數要設定為 false,因為 jquery 預設會把你傳送出去的資料轉為 String (你送出的不是String),會造成錯誤。
$(function() {
	$("#myForm").submit(function(e) {
		e.preventDefault(); // 停止觸發submit
		console.log("upload");
		var formData = new FormData($("#myForm")[0]); // 使用FormData包裝form表單來傳輸資料
		$.ajax({
			type : "POST",
			url : "/spring_ryuichi/uploadAndDownloader",
			data : formData,
			cache : false, // 不需要cache
			processData : false, // jQuery預設會把data轉為query String, 所以要停用
			contentType : false, // jQuery預設contentType為'application/x-www-form-urlencoded; charset=UTF-8', 且不用自己設定為'multipart/form-data'
			//dataType: 'text',
			success : function(data) {
				ajaxFileDownload(data.file, data.filename)
			},
			error : function(data) {
				alert(data.exception);
			}
		});
	});
});
接著你必須在 Spring Controller 端寫 Controller 接口去接 request。
注意 @RequestParam("fileUpload") 這個參數要和 From 上面的 <input type="file" name="fileUpload" id="fileUpload" /> 一樣,不然你會接不到檔案。
接到 multipart 參數後,用 Java 正常讀取檔案的方式即可讀取~
@RequestMapping(value = "/uploadAndDownloader", method = RequestMethod.POST, consumes = {"multipart/form-data"})
@ResponseBody
public Map<String,Object> uploadfilePoint(@RequestParam("fileUpload") MultipartFile multipart) throws AppException {

	//準備一個Map供回傳Ajax讀取結果使用
	Map<String,Object> result = new HashMap<String,Object>();
	try {
		//取得上傳檔案串流
		BufferedReader br;
		String line;
		InputStream is = multipart.getInputStream();
		br = new BufferedReader(new InputStreamReader(is));
		//讀取檔案並印出
		while ((line = br.readLine()) != null) {
			System.out.println("line="+line);
		}
		//建立要回傳的檔案
		File csvFile = File.createTempFile("downloadResult", ".csv");
		FileOutputStream fos = new FileOutputStream(csvFile);
		BufferedWriter bw = new BufferedWriter(new OutputStreamWriter(fos));
		//寫入檔案內容
		bw.write("寫入檔案供下載");
		bw.close();
		FileInputStream inputFile = new FileInputStream(csvFile);
		byte[] buffer = new byte[(int)csvFile.length()];
		inputFile.read(buffer);
		inputFile.close();
		//檔案編碼
		result.put("file", Base64Utils.encodeToString(buffer));
		result.put("filename", "downloadResult.csv");
	} catch(Exception e) {
		e.printStackTrace();
	}
	return result;
}
下載部分一併寫在上圖的 code 內,用 File 建立一個 tempFile,並用 BufferReader 寫入檔案,然後用 FileInputStream 讀入 byte Array。
準備一個Map<String, Object>,用 Spring 的 Base64Utils 方法轉換 byte Array 後塞入 Map。
同時也塞一個檔案名稱在 Map 裡,最後回傳Map。
接下來回到 Javascript 端,Ajax 呼叫 Controller 處理成功後,將結果丟入 ajaxFileDownload 函式處理。
function ajaxFileDownload(data, fileName) {
	try {
		var bstr = atob(data), n = bstr.length, u8arr = new Uint8Array(
				n);
		while (n--) {
			u8arr[n] = bstr.charCodeAt(n);
		}
		var blob = new Blob([ u8arr ], {
			type : "'text/csv"
		});
		if (window.navigator && window.navigator.msSaveOrOpenBlob) { // for IE
			window.navigator.msSaveOrOpenBlob(blob, fileName);
		}
		// for Non-IE (chrome, firefox etc.)
		else {
			var a = document.createElement('a');
			document.body.appendChild(a);
			a.style = 'display: none';
			var url = window.URL.createObjectURL(blob);
			a.href = url;
			a.download = fileName;
			a.click();
			a.remove();
			window.URL.revokeObjectURL(url);
		}
	} catch (e) {
		alert(e)
	}
}
函式內將回傳的 Map 裡 byte Array 轉換後的結果轉成 Blob 物件,非IE的部分用創造一個 link 的方式去觸發,達到下載檔案的目的(IE與非IE的寫法不同,因此這邊會有判斷)。
