實現@Input, @output, ngFor和ngIf 四個功能
情境說明:
在app.component.ts 內定義要提供其他Component共用的 物件(TodoItem)陣列 :todoItmes,
把這個物件傳遞到 component :todo-items 讓他呈現在畫面上,
在component :todo-items 畫面上操作刪除的時候,
要binding 回 app.component.ts內提供的Function 將app.component.ts內定義的物件陣列內的值給移除
最後,透過add-form.component.ts 畫面上的新增對話框可以新增TodoItem至 app.component.ts內的物件陣列
實際新增的動作一樣是由 app.component.ts 提供。
實作:
在app.component.ts內定義要共用的TodoItem 物件陣列 :todoItmes,
todoItems: TodoItem[] = [
    {
      id: 1,
      value: 'Todo Item NO.1',
      done: false
    },
    {
      id: 2,
      value: 'Todo Item NO.2',
      done: true
    },
    {
      id: 3,
      value: 'Todo Item NO.3',
      done: false
    }
  ];
將AppComponent內定義好的物件陣列傳給todo-Items.component
開啟app.component.html,們將items視為一個屬性,並且把todoItems傳進去。
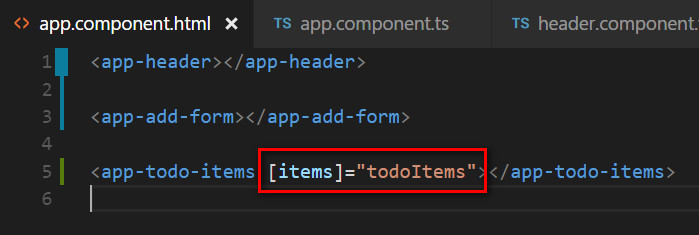
-- 使用@Input接收傳入Component的資料
接下來我們打開src/app/todo-items/todo-items.component.ts,
import { Component, OnInit, Input } from '@angular/core';
import { TodoItem } from '../shared/todo-item';

@Component({
  selector: 'app-todo-items',
  templateUrl: './todo-items.component.html',
  styleUrls: ['./todo-items.component.css']
})
export class TodoItemsComponent implements OnInit {

  constructor() { }

  //使用@Input接收傳入 todo-Items這個 Component的陣列資料
  @Input() items: TodoItem[];

  //如果要將items 更改別名,可用這個寫法
  //@Input("items") NewItemsName:TodoItem[];

  ngOnInit() {
  }

}
使用ngFor在todo-items.component.html內來列舉剛剛收到的資料
使用ngIf來顯示/隱藏資料
使用[(ngModel)] 來綁定item.done(雙向連動),畫面上點選這個checkbox的時候,定義在app.component.ts內的物件陣列會連動改變資料
<ul>
<li *ngFor="let item of items">
<label for="chk_{{item.id}}">
<input type="checkbox" name="" id="chk_{{item.id}}" [(ngModel)]="item.done" [checked]="item.done">{{item.value}}
</label>
<a href="#"> Delete</a>
<span *ngIf="item.done">(已完成)</span>
</li>
</ul>
子元件要透過 event binding 告訴父元件事件被觸發了
首先我們先在app.component.ts(父元件)中寫好要加入TodoItem的函數
addTodoItem(text) {
    this.todoItems.push({
      id: (new Date()).getTime(),
      value: text,
      done: false
    });
  };
打開add-form.component.ts(子元件),要使用@Output之前需要先import 兩個參考 Output, EventEmitter
使用 @Output() 的時候 要先import Output
使用EventEmitter 的時候,要先import EventEmitter (會有好幾個,一定要從@angular/core 匯入)
//要使用Output 之前要記得import Output, EventEmitter
import { Component, OnInit, Output, EventEmitter } from '@angular/core';

@Component({
  selector: 'app-add-form',
  templateUrl: './add-form.component.html',
  styleUrls: ['./add-form.component.css']
})
export class AddFormComponent implements OnInit {

  placeHolderText = "請輸入待辦事項!";
  todoText = '';

  constructor() { }

  //先定義addTodoItem這個component的property是一個要輸出(output)的東西
  @Output() AddTodoItem = new EventEmitter();

  //Button:btnAdd的click事件
  addTodo($event) {
    //實際觸發Output的事件,是定義再btnAdd的click事件內
    this.AddTodoItem.emit(this.todoText);
  }

  ngOnInit() {
  }
}
藉由AddTodoItem.emit(this.todoText)來把事件發射出去,並且參數內容為this.todoText(畫面上輸入的內容),
接著到app.component.html 內修改 <app-add-form></app-add-form>
<app-add-form (AddTodoItem)="addTodoItem($event)"></app-add-form>
加入這行 (AddTodoItem)="addTodoItem($event)"
左邊的AddTodoItem 是 event binding 綁定addTodoItem事件到 add-form.component.ts(子元件) 裡面一個輸出(@Output())的物件
右邊的addTodoItem($event) 是app.component.ts(父元件) 內剛剛定義好要加入TodoItem的函數
傳遞到 app.component.ts的函數addTodoItem,將資料新增。
這樣,就可以自行新增資料
===
接著我想實作刪除TodoItem
先在app.component.ts(父元件) 中寫好要加入要刪除TodoItem的函數
delTodoItem(paraObject) {
    this.todoItems = this.todoItems.filter(function (ele) {
      return (ele !== paraObject);
      //return ((ele.id != paraObject.id) && (ele.value != paraObject.value));
    });
  };
接著到todo-items.component.ts (子元件) 內定義@Output() 參數
@Output() DeleteTodoItem = new EventEmitter();
修改子元件的template: todo-items.component.html ,新增Delete 的Click 事件
<ul>
<li *ngFor="let item of items">
<label for="chk_{{item.id}}">
<input type="checkbox" name="" id="chk_{{item.id}}" [(ngModel)]="item.done" [checked]="item.done">{{item.value}}
</label>
<a href="#" (click)="delTodoItem(item)"> Delete</a>
<span *ngIf="item.done">(已完成)</span>
</li>
</ul>
再回到todo-items.component.ts 內定義click function:delTodoItem
 delTodoItem(item: TodoItem) {
    this.DeleteTodoItem.emit(item);
  }
最後將Output參數綁定到app-todo-item
<app-todo-items [items]="todoItems" (DeleteTodoItem)="delTodoItem($event)"></app-todo-items>
這樣就可以把todo-Item 刪除了
結論:
簡單的說 app.component.ts 、app.component.html 會去控制我新增的三個component
這個範例會用到的todoItems這個陣列,實體是放在app.component.ts內,
透過property binding 將陣列傳給child component 去顯示,
如果child component要新增或是移除陣列內的物件,可透過event binding 來搭配app.component.ts內的function控制這個陣列的資料
補充:
關於@Input()
加上中括號的話代表綁定的是一個變數,如果沒有加的話代表綁定的是字串!
舉例來說:
<app-todo-items [items]="todoItems" iText="DemoInput"></app-todo-items>
todoItems 是一個變數,items 這個@Input() 接收到的是這個變數的資料(有可能是陣列,看todoItems 這個變數怎麼定義)
iText這個@Input() 接到的資料是字串 DemoInput